A Forager's Home

Grow. Find. Eat. Make.

  • Blog
  • About
  • DIY
  • Recipes
  • Foraging
IMG_3696.JPG

MakeShift Workshop: Himmeli

May 22, 2017 by Kelsey Fast in Make

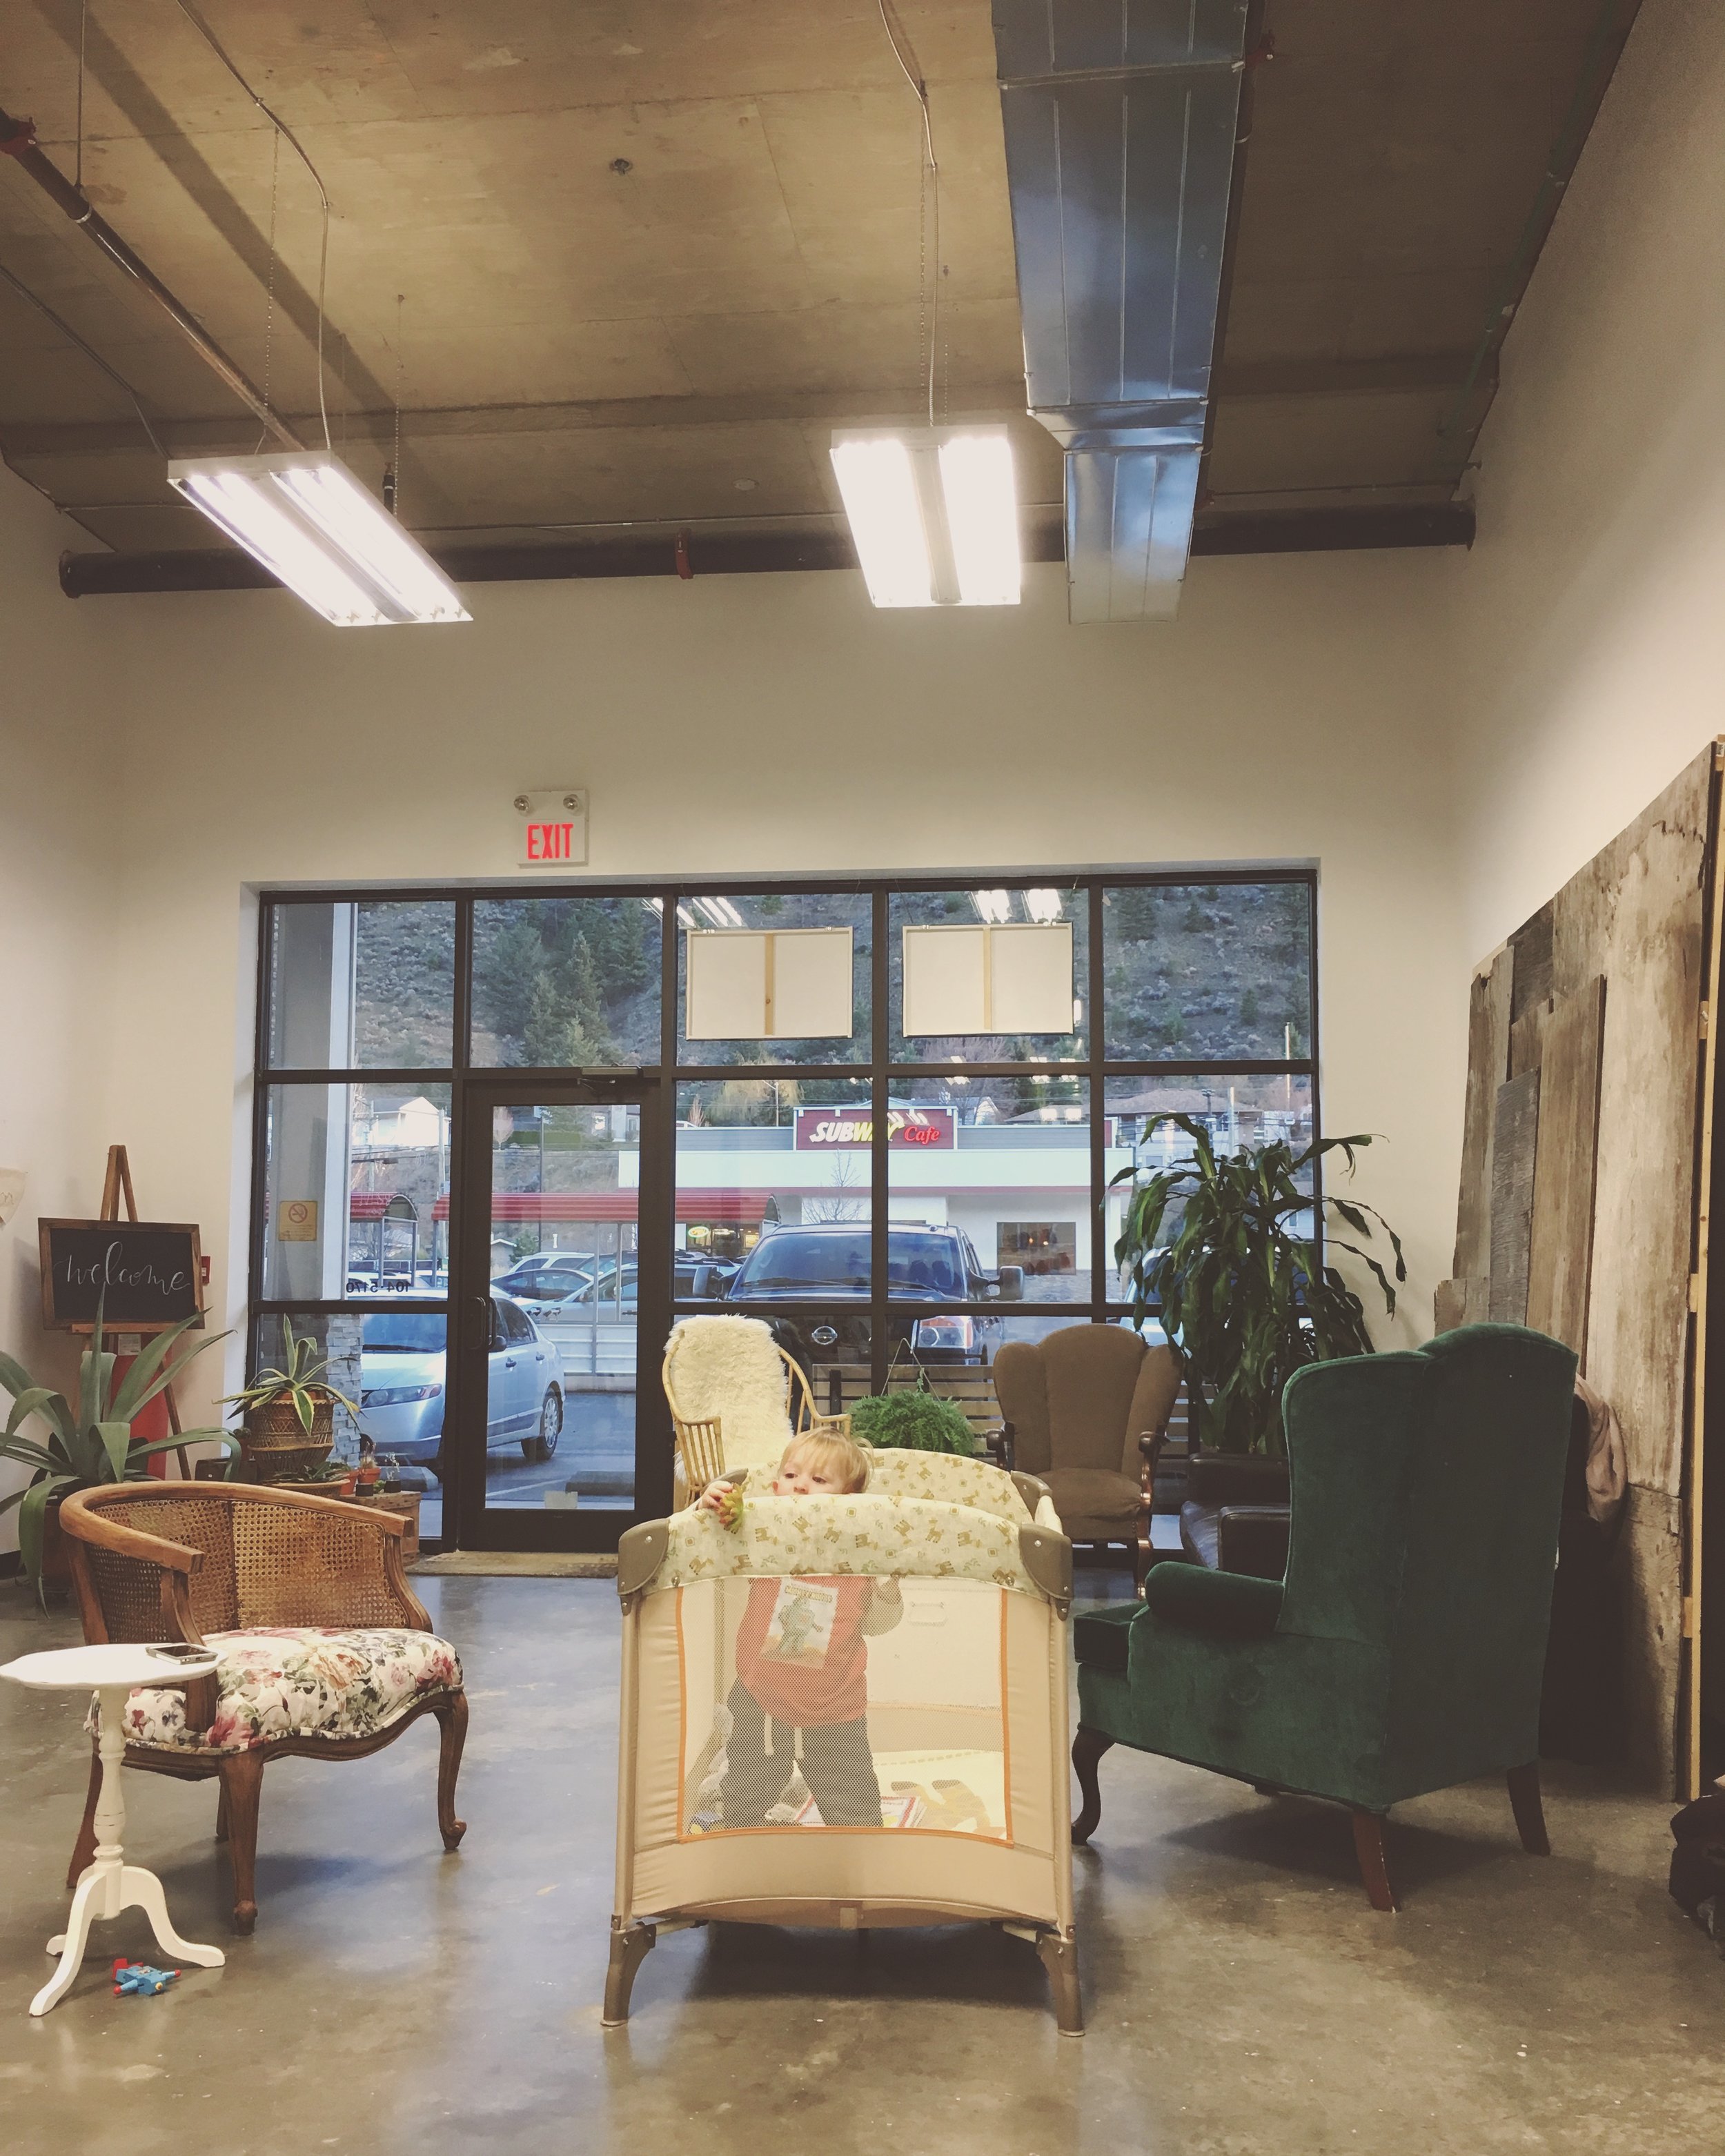
Something rather special has moved into my neighbourhood, and I really want to tell you all about it. For the past several months MakeShift (Brianne Sheppard and Calli Duncan) has been running these incredible DIY workshops.  Topics range from weaving to terrariums.  They have created a beautiful space in the Dallas neighbourhood of Kamloops where they run their workshops and events which is also available for private rentals.

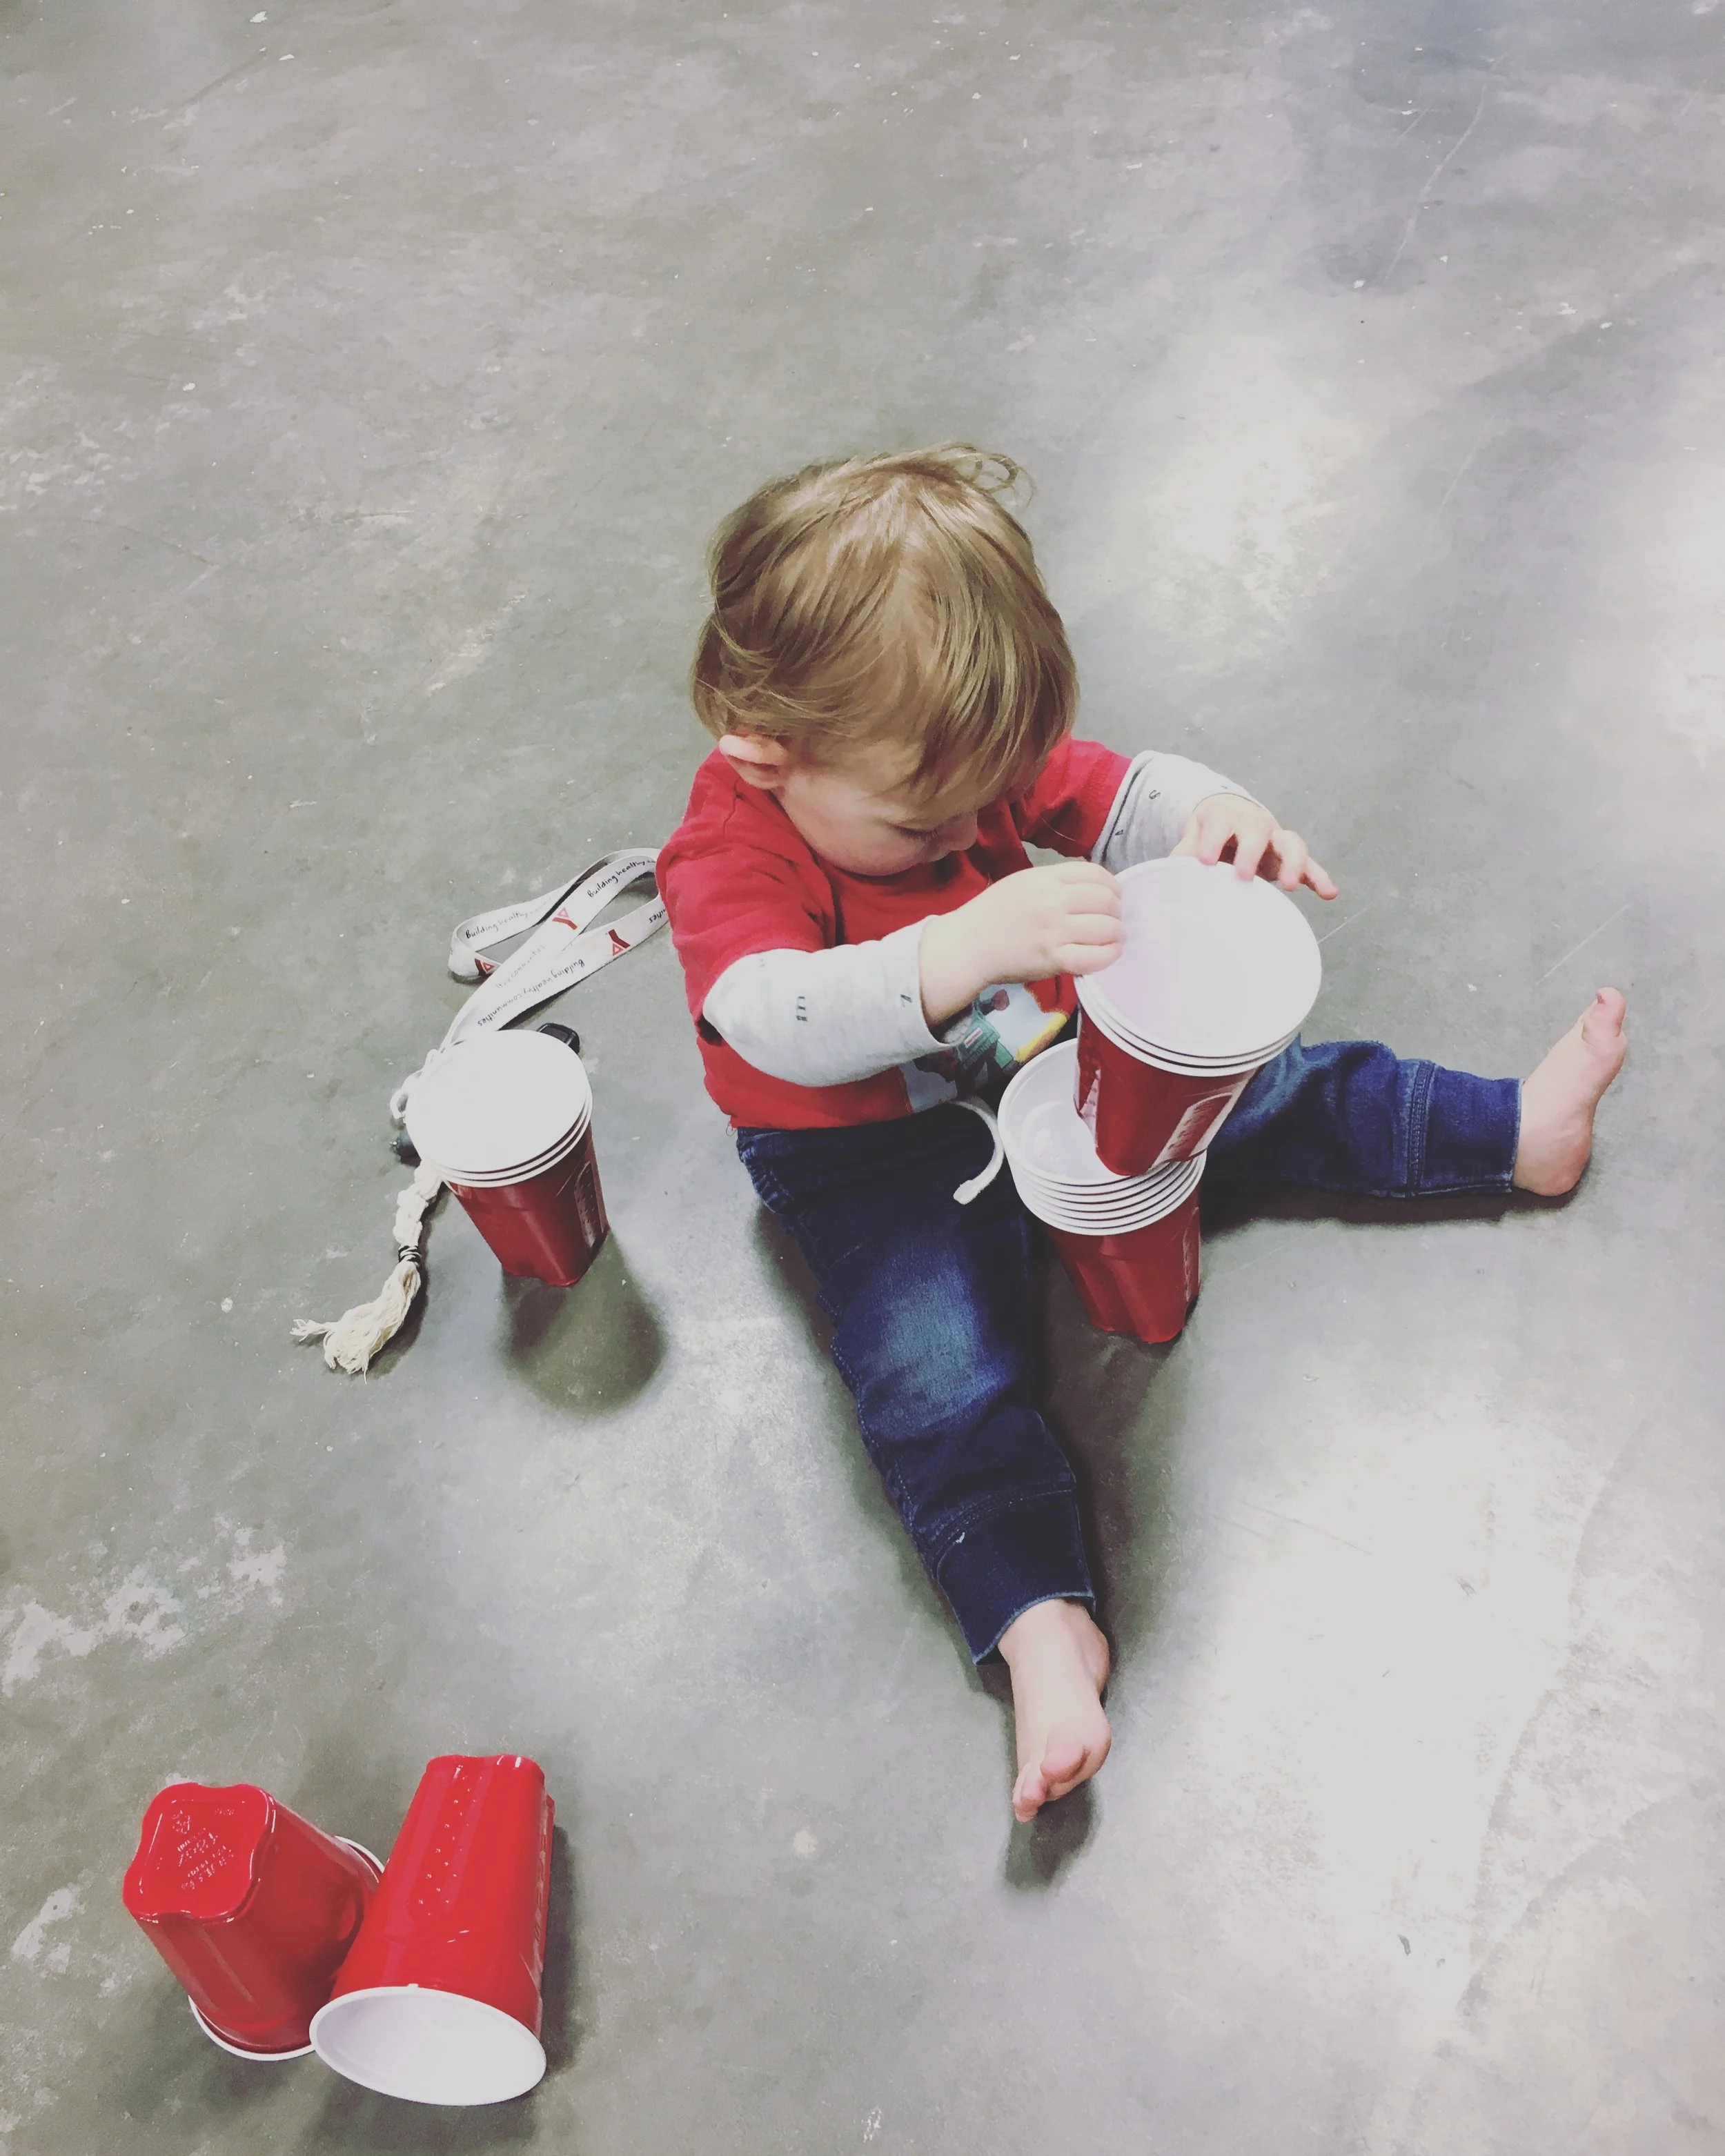
When they offered their himmeli workshop I was so excited because it finally worked out in my schedule to attend.  Closer to the date however I realized I wasn't going to have childcare that evening, but I needn't have worried.  Brianne and Calli were totally happy to have me bring Little Forager and a play pen, and even helped entertain him when he started getting upset about not being part of the crafting action!  There he is below trying to see what we are all making, and also playing with some cups and someone's keys.

IMG_4115.JPG
IMG_4114.JPG

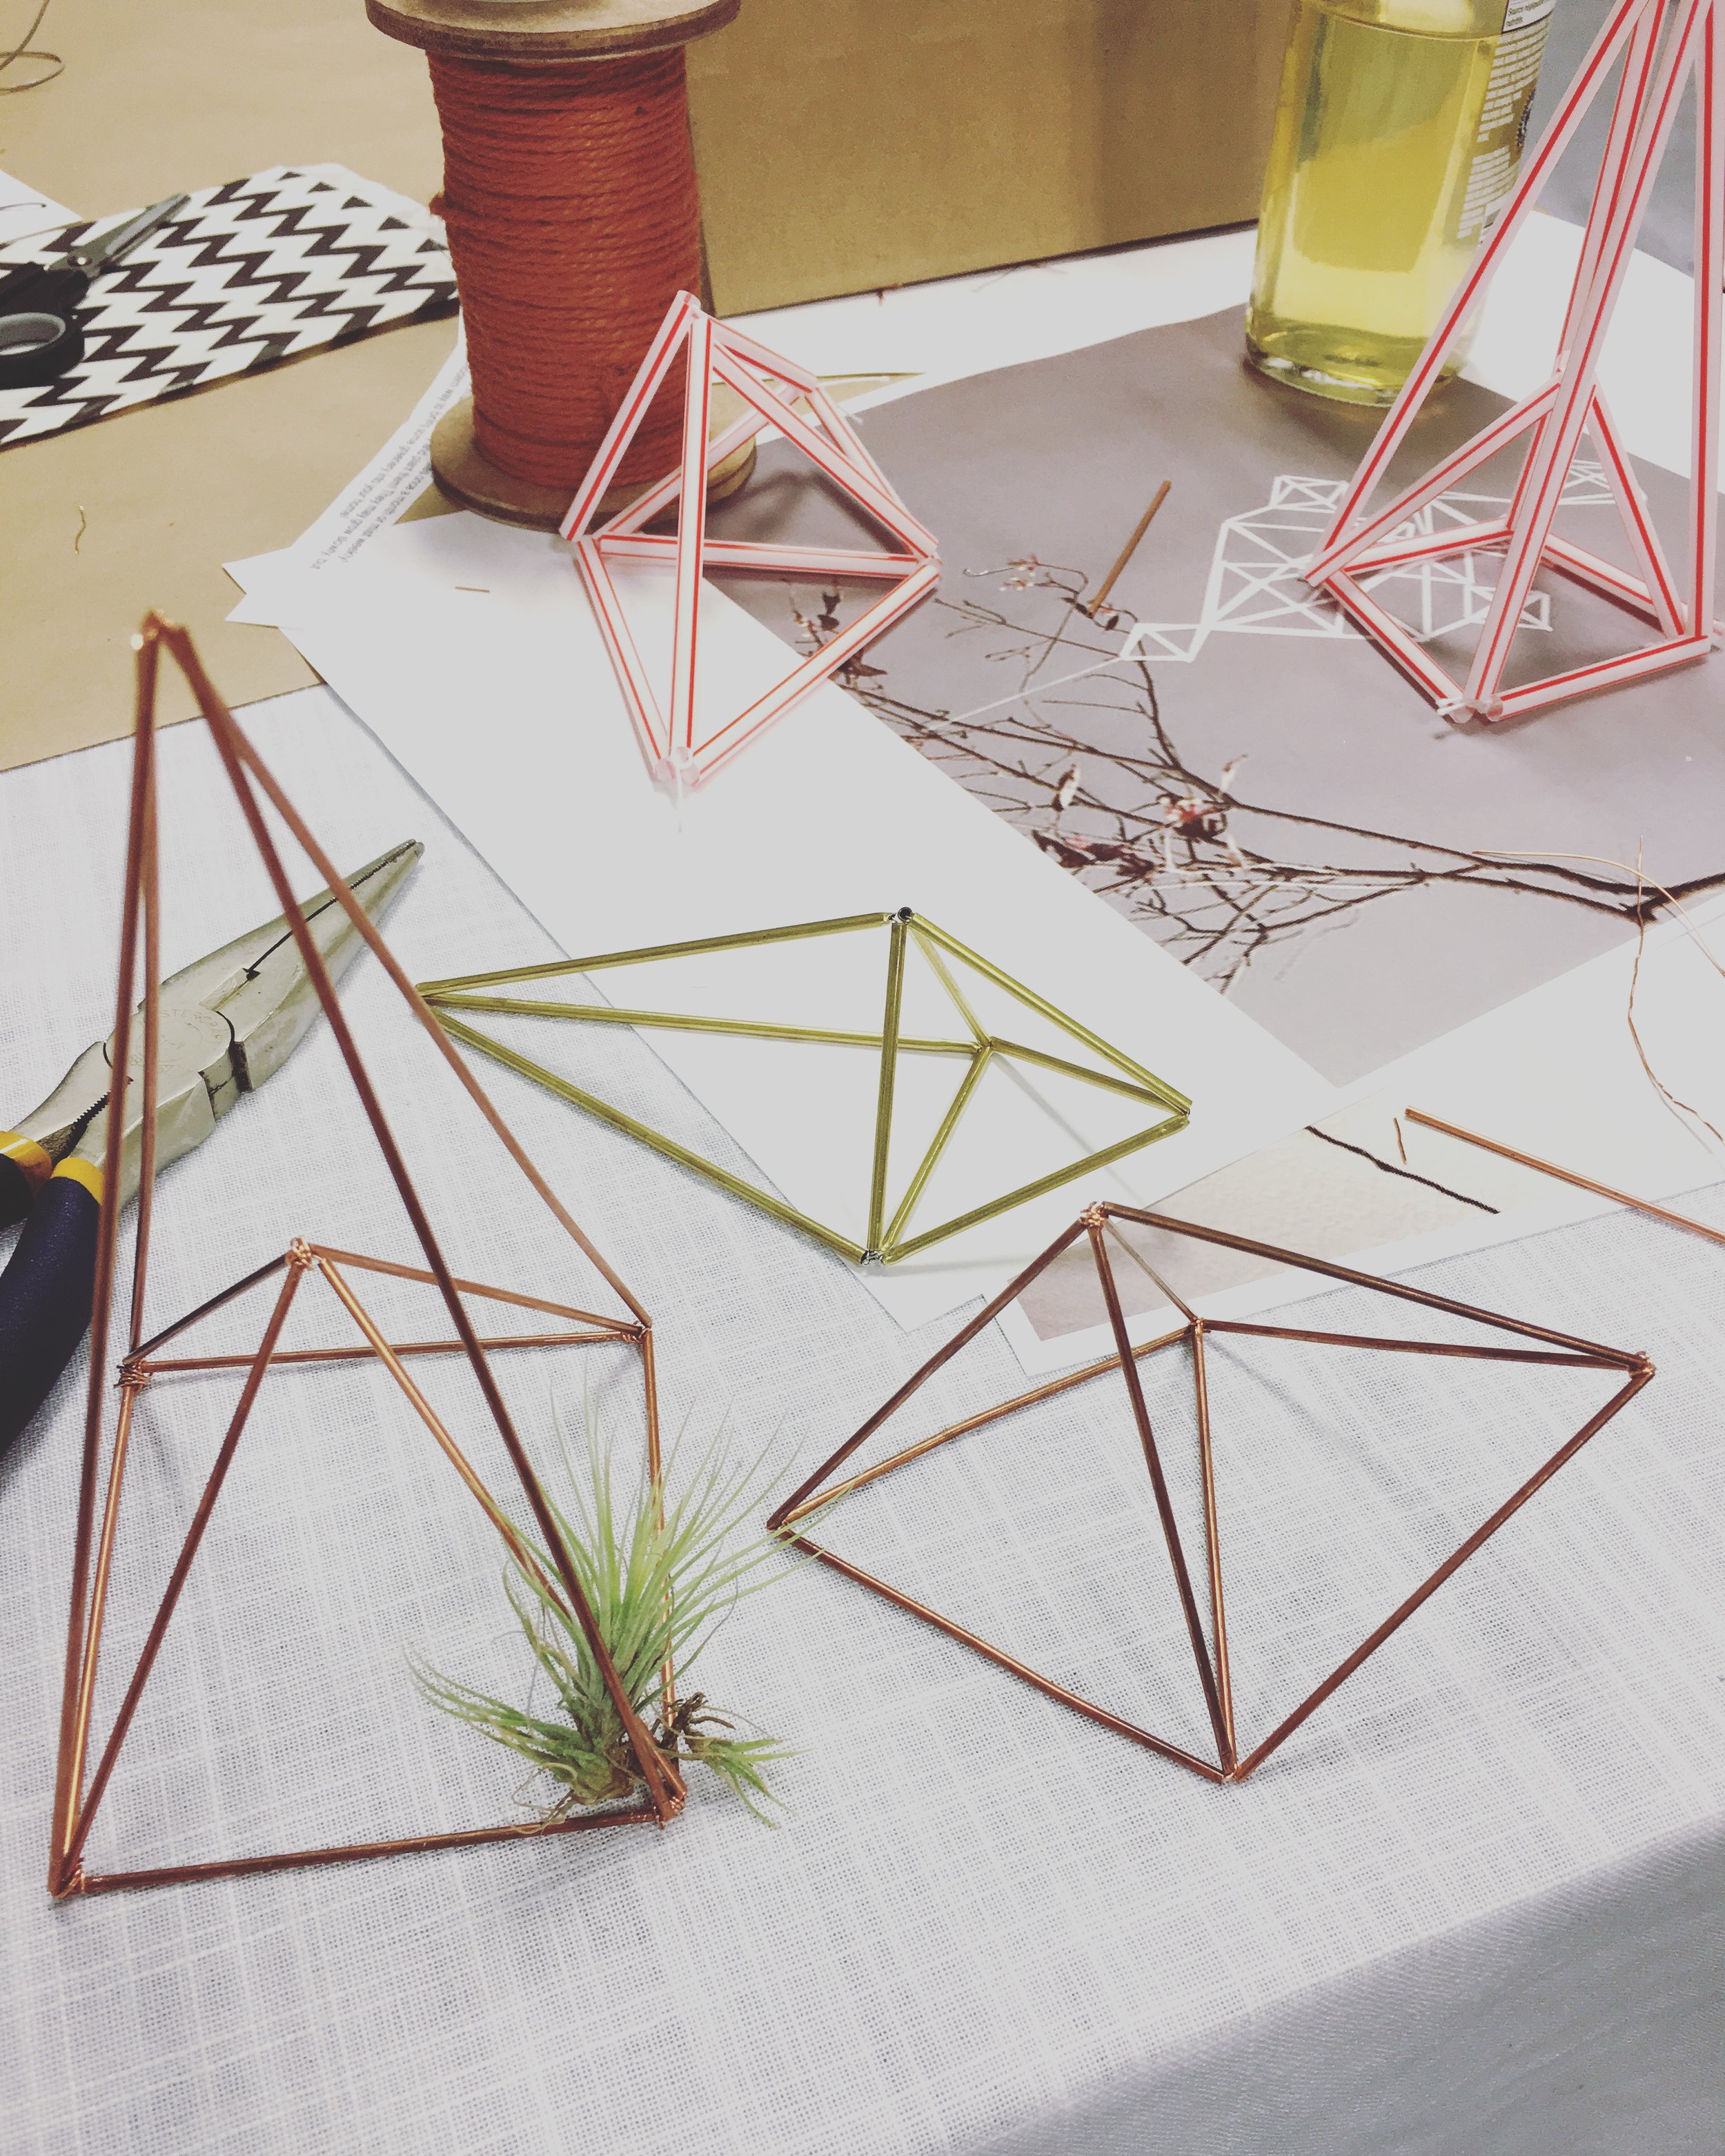
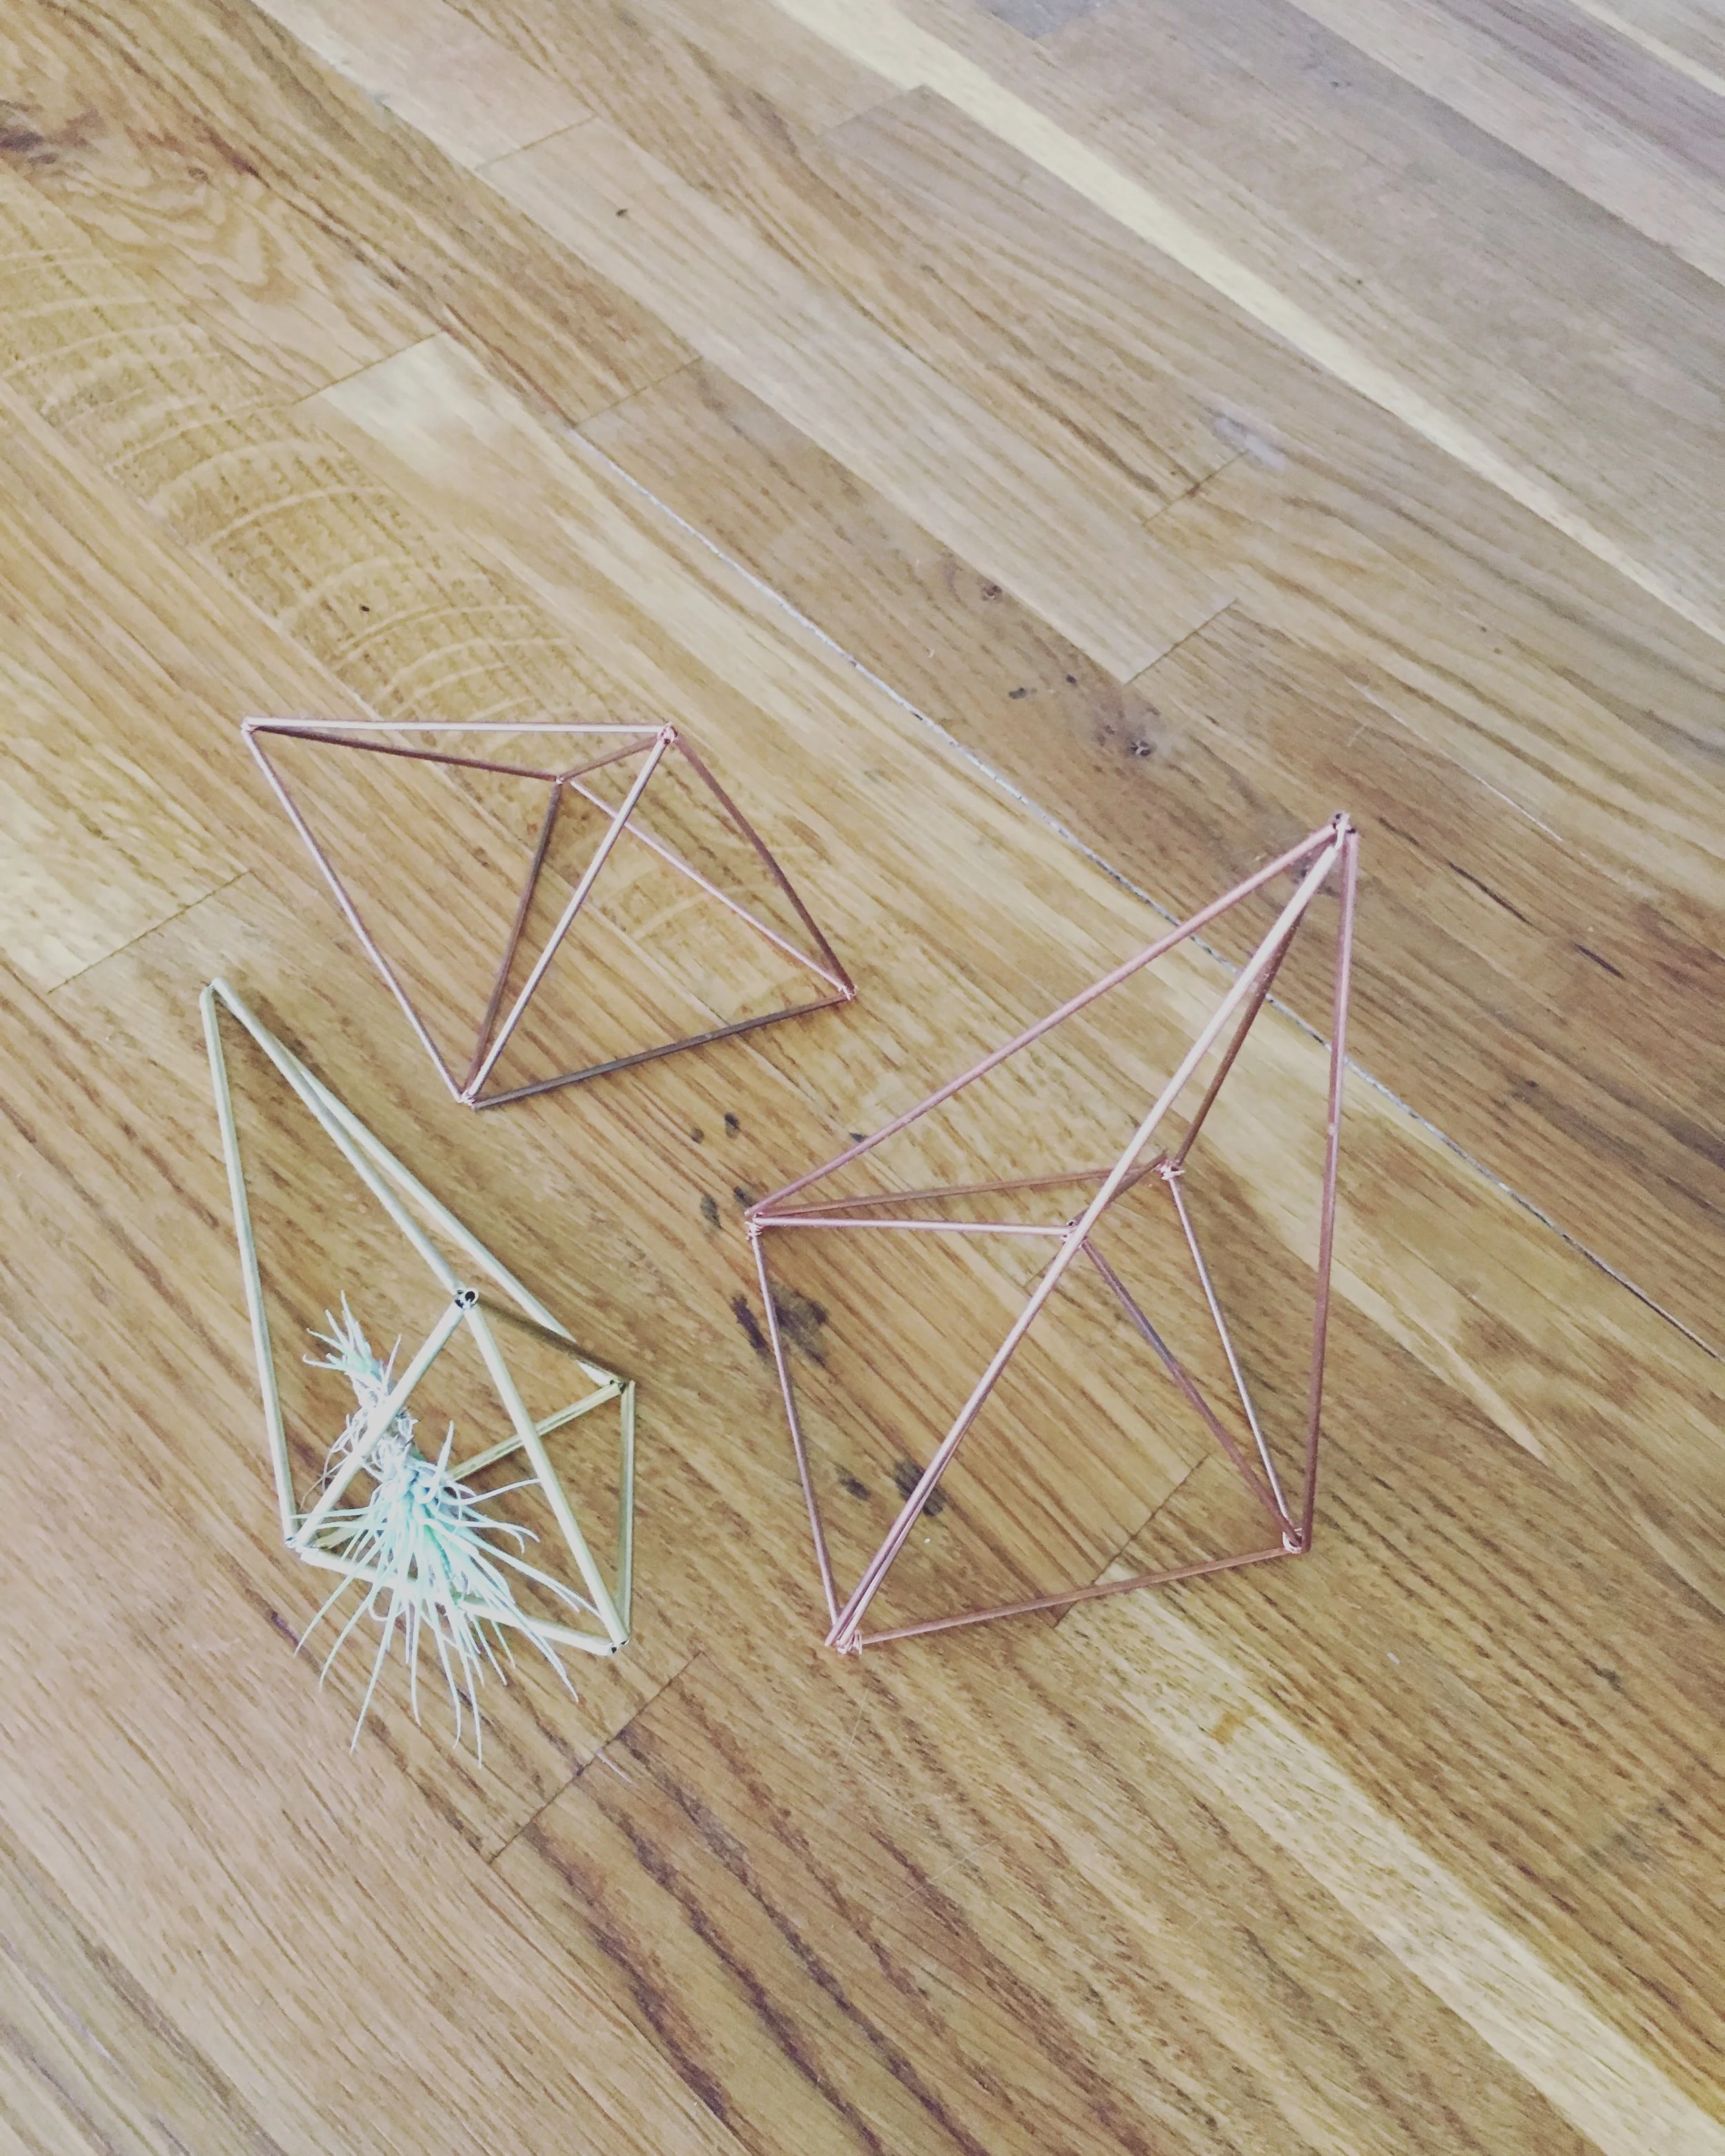
Himmeli are traditional Finnish ornaments that are usually associated with Christmas.  They were originally made of straw from the previous year's harvest.  Legend has it that the larger and more ornate the himmeli the better the following year's harvest would be.  Our himmeli were made from more modern material - in this case thin copper and brass pipe with wire to hold it all together.  Another more modern feature was the air plant that sits perfectly in the geometric ornaments.  These himmeli look beautiful hanging or just sitting pretty on a shelf or table.

IMG_4116.JPG

If you are local I highly recommend making it out to a workshop if you can!  Check out their website and sign up for their mailing list to be the first to find out about upcoming workshops and events!  Tickets tend to go quickly, so sign up early if you see something you want to be a part of!


This review was not sponsored by MakeShift.

May 22, 2017 /Kelsey Fast
DIY, local, Kamloops BC, MakeShift, make it mondays
Make
1 Comment

Chocolate Zucchini Cake

April 02, 2017 by Kelsey Fast in Eat, Make

I like to think that I am a pretty good baker, but for me so far it has been all about following recipes.  I only know the very basics about the science behind how it all works.  I am pretty comfortable with cooking on the fly, but baking is much more of a balancing act.  While I love to play around with my baking, I usually start with a recipe and go from there.  I am pretty comfortable with any failures, since I know my understanding of the foundations of it all is quite limited.  Every failure is just a step to understanding more how it works.

This recipe began in an odd way.  One day I was rather desperate to eat nachos (this is how my life is sometimes), but I was disappointed to discover I had no sour cream or any other dip type condiment, and no way of getting to the store.  I made the nachos anyway, and made a weird sort of soured whipped cream with Sriracha.  While it wasn't disgusting, it won't be making its way into the family recipe collection.  I also misjudged the amount I would need and ended up with about a cup and a half of the soured cream (pre-sriracha) left over.  I don't like wasting food, and for some reason my brain connected this to a chocolate zucchini cake.  I took out some of last summer's zucchini to defrost, and started trying to figure out how to make it all into a cake.  I looked at quite a few "cake templates" people had put up online using different ratios between the ingredients, and what I came up with ended up being quite delicious!  I wouldn't recommend trying to recreate my weird soured cream experiment - just use regular sour cream instead!


Print Friendly and PDF

Chocolate Zucchini Cake

Ingredients

  • 2 cups Shredded Zuchhini
  • 1 1/2 cup Sour Cream
  • 3 Eggs
  • 1 tsp Vanilla
  • 2 cups Sugar
  • 2 Cups Flour
  • 1/3 cup Cocoa
  • 1/4 tsp Salt
  • 2 tsp Baking Powder
  • Chocolate Chips (optional)

Takes 1 hour, Yield: Two eight inch cakes..

Instructions

  1. Preheat your oven to 350˚F.
  2. Beat eggs, sour cream, vanilla, and sugar together.
  3. Whisk the remaining dry ingredients together in a separate bowl. When combined add to the wet ingredients and gently mix until there are no remaining pockets of dry ingredients.
  4. Gently stir in the zucchini.
  5. Pour into two eight inch round cake pans.
  6. If you are not stacking the layers and icing the cake, sprinkle some chocolate chips on the top of each.
  7. Bake for approximately 30-45 minutes, or until an inserted toothpick comes out clean.
April 02, 2017 /Kelsey Fast
food, baking, recipe, cake, zucchini
Eat, Make
Comment
IMG_3307.JPG

Food in Jars Mastery Challenge: Shrubs

March 27, 2017 by Kelsey Fast in Eat, Make

At first you might be wondering what a small garden bush has to do with food preservation, but actually the term 'shrub' also means a type of drinking vinegar.  Let me cut you off before you dismiss this concoction as disgusting, and let you know that they are actually, in fact, delicious.  I was super skeptical at first as well.  I like the idea of being one of those ultra-healthy daily dose of unfiltered cider vinegar people, but the truth is I don't love the taste of it straight.  I know all about the amazing benefits of the probiotic in my gut, and have even made several litres of my own cider vinegars, but I only ever use them in recipes as a supporting role.  You may recall last summer I made a vinegar pie from the Fannie Farmer Baking Book, and that ended up being pretty tasty.  This drinking vinegar business is another surprising success story just like that one.

IMG_3303.JPG

Here's the setup.  You need to roughly chop about a pound of fruit, add one cup of sugar (honey and other natural sweeteners are acceptable substitutes), and one cup of vinegar.  Some have said to think of this as a 1:1:1 ratio.  I find this problematic since that would mean you use one pound of each, or one cup of each, but in fact there should be more fruit than the rest.  You can also play around with the amounts and adjust them to taste.  The type of vinegar you use is completely your choice, but I wouldn't recommend using plain white vinegar.  For both types of shrub I have made so far I used the apple cider vinegar I made from apple scraps last year.  I do plan on trying other fruit vinegars, and also potentially balsamic vinegars, or wine vinegars and see how that turns out.

Mix everything in a bowl and pour it in some sort of container.  I have zillions of mason jars, so I used mason jars.

After this let them sit on your counter for a couple days.  I found two days to be the right number.  Make sure you cover them, but use cheesecloth, or a napkin, or paper towel or something.

IMG_3305.JPG

Here are my jars in their festive leftover Christmas napkins.  After they hang out like that for a couple days strain out the solids, and store the finished shrub in the fridge.  I am told some people leave them to age for a week or so, but I tasted mine almost right away and it was really good!

IMG_3306.JPG

The flavours you can choose to make these shrubs are only limited by your imagination.  I did one more simple: pear, honey, and cider vinegar; and one more experimental: blueberry, hops, sugar, and cider vinegar.  I love the piney sort of undertones that both blueberries and hops have and I wondered if they would blend well together as a result. 

Yes.

Yes they do.

The other thing I really find that I love about shrubs is that you get the taste of the fresh fruit, but in syrup form.  I have a SodaStream, and I make a lot of my own syrups to go with the fizzy water, but the idea that I could make a syrup and taste fresh fruit rather than cooked was so exciting!  I can't wait to try this with other combinations!  I'm imagining a watermelon shrub and it is making my mouth water.  I can't wait!

So go make yourself some shrubs and enjoy them diluted (about a quarter cup in a 16 oz cup filled the rest of the way with soda water was a perfect concentration for me, but experiment and see what you like) in soda water, cocktails, and whatever else you can think of!

March 27, 2017 /Kelsey Fast
Food in Jars Mastery Challenge, drinking vinegar, preserve, drink, recipe
Eat, Make
Comment

Food In Jars Mastery Challenge - Salt Preserved Dill

February 25, 2017 by Kelsey Fast in Eat, Make

When I heard that Marisa at Food in Jars was running this challenge I was so excited, but for some reason the first month slipped by and I didn't end up making any marmalade!  This is not altogether bad since marmalade moves very slowly in our house as Mr. Forager can't stand the stuff.  Not to mention that I still have some in the pantry from last winter!

This month there were so many options that were exciting to me that I didn't have time to try them all, but I wanted to make sure I tried out salt preserved herbs so that I have a good handle on it when my gigantic herb garden starts producing in a few months!  I will still be trying a few of the others I think since I love the idea of salt cured egg yolks, salt preserved soup base, gravlax, and many other things (salt preserved grapefruit!).  I will also need to replenish the kimchi in my fridge soon.  Salt is such a useful tool!  It is amazing the kind of things we can create just by adding salt to something.

I began by stripping a bunch of dill I got from the local store (alas, being February, local fresh herbs are hard to come by!), but I soon got tired of it and wondered if I could just whiz it all through my Vitamix blender.  I figured this way I could make use of the stems as well and have less waste.  After that I added the zest of one lemon and 1/2 cup of coarse salt.  I think if you were chopping by hand you might want to use fine salt, but I figured sine I was using my blender this might be a better way.

IMG_3132.JPG

I am happy to say that it mostly worked, but - as you can see below - the mixture overall is quite wet!  I am hoping it will dry out nicely and then I can crumble it back into a salt-like consistency.  Some of the very strong dill scent has given way to more of a general "green" aroma since blending, but I am sure it will come back to normal as it dries.  I can't wait to have this on hand since I don't have any dill related seasoning in my pantry at the moment and every time I make potatoes I seriously feel the absence.

February 25, 2017 /Kelsey Fast
Food in Jars Mastery Challenge, recipe, pantry staples, food
Eat, Make
2 Comments

Render Your Own Lard

February 23, 2017 by Kelsey Fast in Eat, Make

While the idea of whole animal eating sounds really nice, the reality can occasionally be a bit gruesome.  If you've been reading my blog for a while now you can imagine I was very excited when we learned that our friends' farm was going to be offering sides of pork since I am passionate about supporting local growers.  If they are our friends it is the icing on the cake! 

I love that all the money I spent on this meat is going directly to support my friends and their farm.  I know them, and that they are people of quality, and that they really care for their animals.  I know they source extra treats for them like the surplus milk and cream from the local dairy, and the slightly old produce the local grocery store would have wasted.  I've seen their farm and probably saw this very pig. 

As I was planning my order with the butcher I mentioned that I would really like to have as much of the trim as possible - things like soup bones, and all the extra fat.  In fact, when my friend dropped off my order she asked if I would want to take the head!  My frugal self and my squeamish self had a little battle, but in the end I took it.  That's a lot of meat to waste!  Currently it is waiting for me in my freezer to become an attempt at head cheese.  Regardless of how that adventure goes, I knew for sure I was going to try to render some lard.

IMG_2984.JPG

I started out by rendering in a large pot on the stove, but the cubes I painstakingly cut (note to self - get fat ground next time if possible!) started to stick to the bottom, and I ended up transferring it all to a crockpot on low.  The other thing I didn't realize is that if you don't slowly ladle off the fat as you go it takes forever to render.  Once I realized that things moved along much more quickly, and "cracklins" - the leftover bits of skin and tissue that have slowly deep fried through the process - started to form.  I saved my cracklins to mix into a batch of baked beans.

It is important that you don't ladle your fat directly into glass storage containers, since it will be too hot and your glass will shatter.  I strained mine into a plastic bowl first and then poured it into mason jars.  Working in batches like this also helped since I would know if I had burned it before mixing it in with the rest of the finished lard.  Thankfully it didn't happen, but it gave me peace of mind to know that if I ruined some I wouldn't necessarily ruin it all!

IMG_3016.JPG

When the lard is liquid it is a light golden colour, but as it hardens it turns white.  To get really beautiful, pure white lard you want to render only the leaf lard which is the fat surrounding the kidneys.  Since I knew the butcher was really busy I didn't bother to specify that I wanted it separated.  I also didn't think I needed to be super particular about my first attempt in case it was a complete flop!

IMG_3017.JPG

After the lard had cooled a bit more I put it in the fridge and it hardened up nicely into this nice creamy colour.  It doesn't smell particularly pork like, but it isn't completely odourless.  This is probably since I didn't discriminate about the types of fat I used.  I may not use this in a pie crust in case the piggy taste remained, but I definitely would give it a try with biscuits or something else more savoury.

Have any of you tried rendering fats?  It was certainly time consuming, but I feel like it was worth it! I am also pleased to know this technique won't be lost because most of my generation isn't interested in learning traditional cooking!  Writing this post was my way of passing it along.  If any of you try it let me know how it went!

February 23, 2017 /Kelsey Fast
recipe, pantry staples, food, lard, local farms
Eat, Make
Comment
  • Newer
  • Older

Terms and Conditions | Privacy Policy | Shipping and Returns

Powered by Squarespace