A Forager's Home

Grow. Find. Eat. Make.

  • Blog
  • About
  • DIY
  • Recipes
  • Foraging

Food In Jars Mastery Challenge - Salt Preserved Dill

February 25, 2017 by Kelsey Fast in Eat, Make

When I heard that Marisa at Food in Jars was running this challenge I was so excited, but for some reason the first month slipped by and I didn't end up making any marmalade!  This is not altogether bad since marmalade moves very slowly in our house as Mr. Forager can't stand the stuff.  Not to mention that I still have some in the pantry from last winter!

This month there were so many options that were exciting to me that I didn't have time to try them all, but I wanted to make sure I tried out salt preserved herbs so that I have a good handle on it when my gigantic herb garden starts producing in a few months!  I will still be trying a few of the others I think since I love the idea of salt cured egg yolks, salt preserved soup base, gravlax, and many other things (salt preserved grapefruit!).  I will also need to replenish the kimchi in my fridge soon.  Salt is such a useful tool!  It is amazing the kind of things we can create just by adding salt to something.

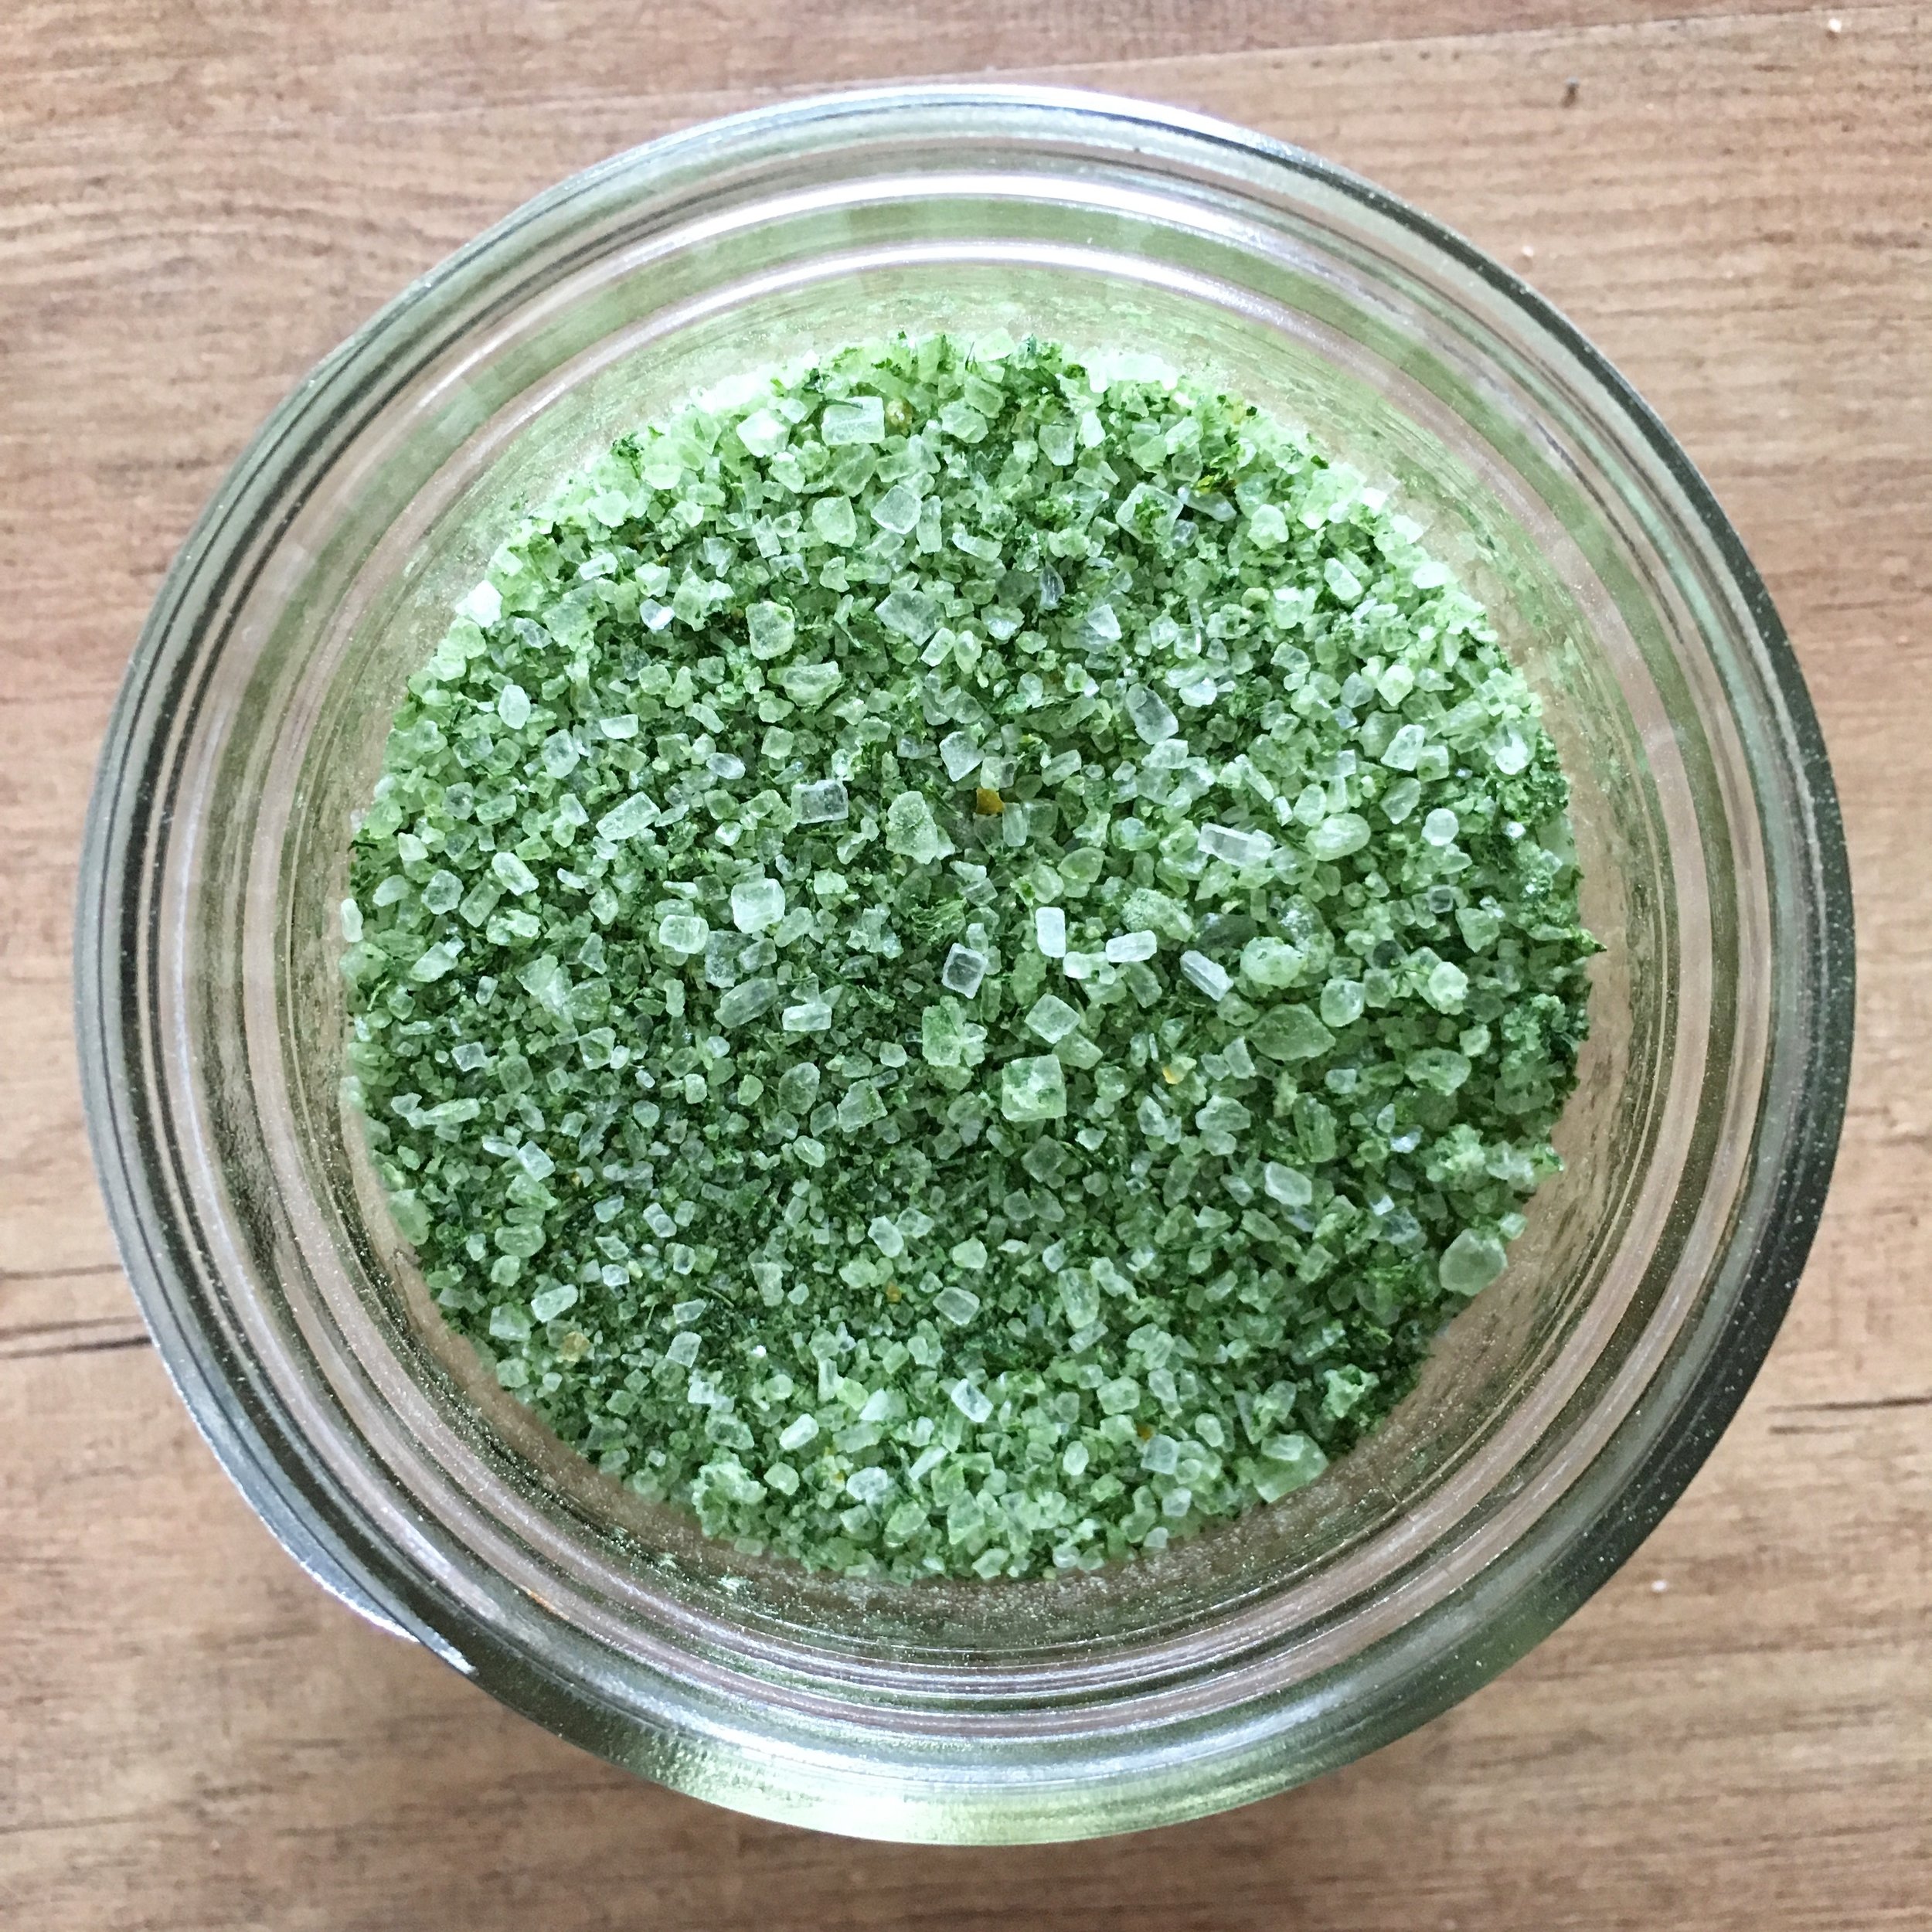
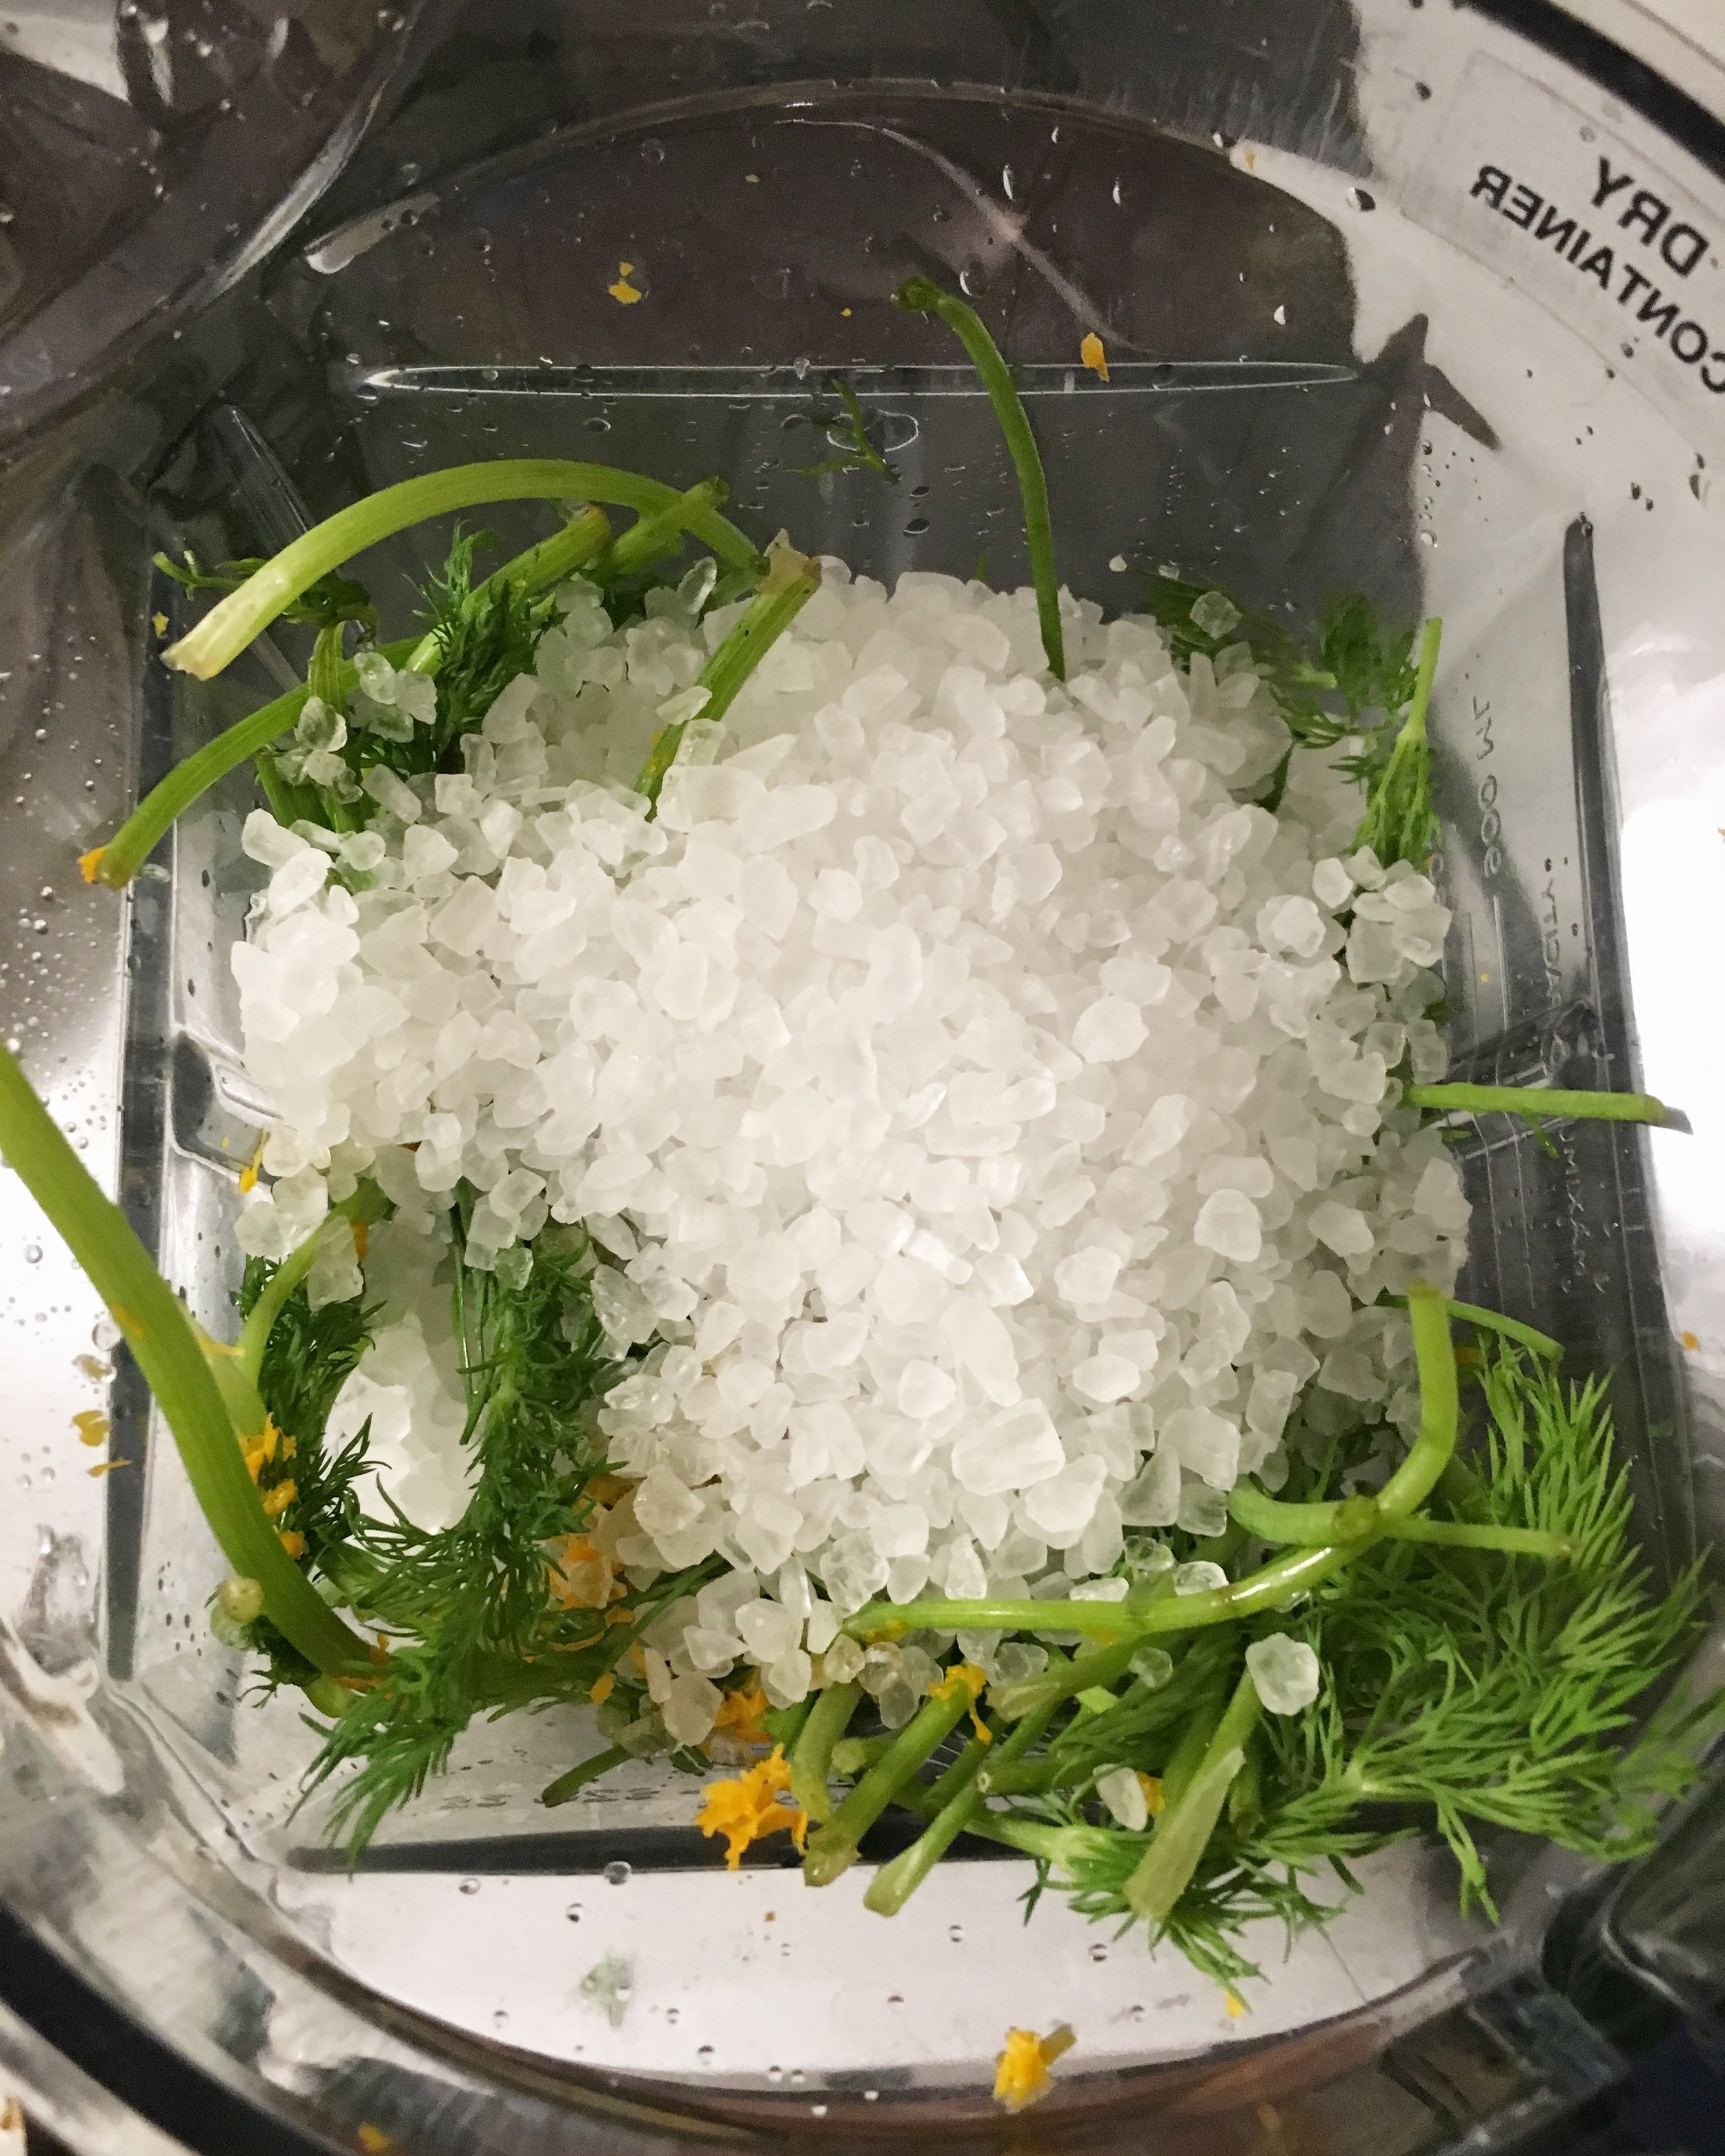
I began by stripping a bunch of dill I got from the local store (alas, being February, local fresh herbs are hard to come by!), but I soon got tired of it and wondered if I could just whiz it all through my Vitamix blender.  I figured this way I could make use of the stems as well and have less waste.  After that I added the zest of one lemon and 1/2 cup of coarse salt.  I think if you were chopping by hand you might want to use fine salt, but I figured sine I was using my blender this might be a better way.

IMG_3132.JPG

I am happy to say that it mostly worked, but - as you can see below - the mixture overall is quite wet!  I am hoping it will dry out nicely and then I can crumble it back into a salt-like consistency.  Some of the very strong dill scent has given way to more of a general "green" aroma since blending, but I am sure it will come back to normal as it dries.  I can't wait to have this on hand since I don't have any dill related seasoning in my pantry at the moment and every time I make potatoes I seriously feel the absence.

February 25, 2017 /Kelsey Fast
Food in Jars Mastery Challenge, recipe, pantry staples, food
Eat, Make
2 Comments

Render Your Own Lard

February 23, 2017 by Kelsey Fast in Eat, Make

While the idea of whole animal eating sounds really nice, the reality can occasionally be a bit gruesome.  If you've been reading my blog for a while now you can imagine I was very excited when we learned that our friends' farm was going to be offering sides of pork since I am passionate about supporting local growers.  If they are our friends it is the icing on the cake! 

I love that all the money I spent on this meat is going directly to support my friends and their farm.  I know them, and that they are people of quality, and that they really care for their animals.  I know they source extra treats for them like the surplus milk and cream from the local dairy, and the slightly old produce the local grocery store would have wasted.  I've seen their farm and probably saw this very pig. 

As I was planning my order with the butcher I mentioned that I would really like to have as much of the trim as possible - things like soup bones, and all the extra fat.  In fact, when my friend dropped off my order she asked if I would want to take the head!  My frugal self and my squeamish self had a little battle, but in the end I took it.  That's a lot of meat to waste!  Currently it is waiting for me in my freezer to become an attempt at head cheese.  Regardless of how that adventure goes, I knew for sure I was going to try to render some lard.

IMG_2984.JPG

I started out by rendering in a large pot on the stove, but the cubes I painstakingly cut (note to self - get fat ground next time if possible!) started to stick to the bottom, and I ended up transferring it all to a crockpot on low.  The other thing I didn't realize is that if you don't slowly ladle off the fat as you go it takes forever to render.  Once I realized that things moved along much more quickly, and "cracklins" - the leftover bits of skin and tissue that have slowly deep fried through the process - started to form.  I saved my cracklins to mix into a batch of baked beans.

It is important that you don't ladle your fat directly into glass storage containers, since it will be too hot and your glass will shatter.  I strained mine into a plastic bowl first and then poured it into mason jars.  Working in batches like this also helped since I would know if I had burned it before mixing it in with the rest of the finished lard.  Thankfully it didn't happen, but it gave me peace of mind to know that if I ruined some I wouldn't necessarily ruin it all!

IMG_3016.JPG

When the lard is liquid it is a light golden colour, but as it hardens it turns white.  To get really beautiful, pure white lard you want to render only the leaf lard which is the fat surrounding the kidneys.  Since I knew the butcher was really busy I didn't bother to specify that I wanted it separated.  I also didn't think I needed to be super particular about my first attempt in case it was a complete flop!

IMG_3017.JPG

After the lard had cooled a bit more I put it in the fridge and it hardened up nicely into this nice creamy colour.  It doesn't smell particularly pork like, but it isn't completely odourless.  This is probably since I didn't discriminate about the types of fat I used.  I may not use this in a pie crust in case the piggy taste remained, but I definitely would give it a try with biscuits or something else more savoury.

Have any of you tried rendering fats?  It was certainly time consuming, but I feel like it was worth it! I am also pleased to know this technique won't be lost because most of my generation isn't interested in learning traditional cooking!  Writing this post was my way of passing it along.  If any of you try it let me know how it went!

February 23, 2017 /Kelsey Fast
recipe, pantry staples, food, lard, local farms
Eat, Make
Comment

Terms and Conditions | Privacy Policy | Shipping and Returns

Powered by Squarespace