A Forager's Home

Grow. Find. Eat. Make.

  • Blog
  • About
  • DIY
  • Recipes
  • Foraging
IMG_4136.JPG

Tea From the Garden - With Instructions for Oolong and Bancha Hojicha

July 02, 2017 by Kelsey Fast in Eat

I have always been interested in the idea of growing everything I might want to use.  My goal is to someday have a few acres, and try to produce at least all our fruits and vegetables.  It's a lofty goal, but I like having something to aim for.  Part of the reason this is going to be so challenging, is that we love our tea and coffee over here.  Also citrus.  But hey - The Olive Farm on Saltspring Island just produced the first Canadian grown olive oil last year, so I choose to believe that anything is possible!  When I visited one of the local nurseries and discovered they had tea plants for sale I was so excited.  I picked out one labeled 'Korean Tea' and headed home to research what I needed to do to these leaves to transform them into tea.

IMG_3825.JPG

All tea is made from the same plant (camellia sinensis), and depending on the process used on the leaves you end up with either black, white, oolong, or green tea.  Herbal teas, rooibos, and yerba mate (although delicious infusions) are not technically considered teas since they come from other plants. 

It felt like I was googling for days to find out what I was supposed to do.  Centuries ago the English sent Robert Fortune to go to China and uncover the secrets of how tea was processed since they were tired of depending on trade to obtain their national addiction.  Somehow he successfully pretended to be Chinese and gathered several samples to send back home and tea cultivation started in India which was then still part of the British Empire.  It felt only slightly easier than what Fortune went through to discover how I might produce a small amount of tea as a hobbyist with one tea plant and no specialized equipment.

IMG_4098.JPG

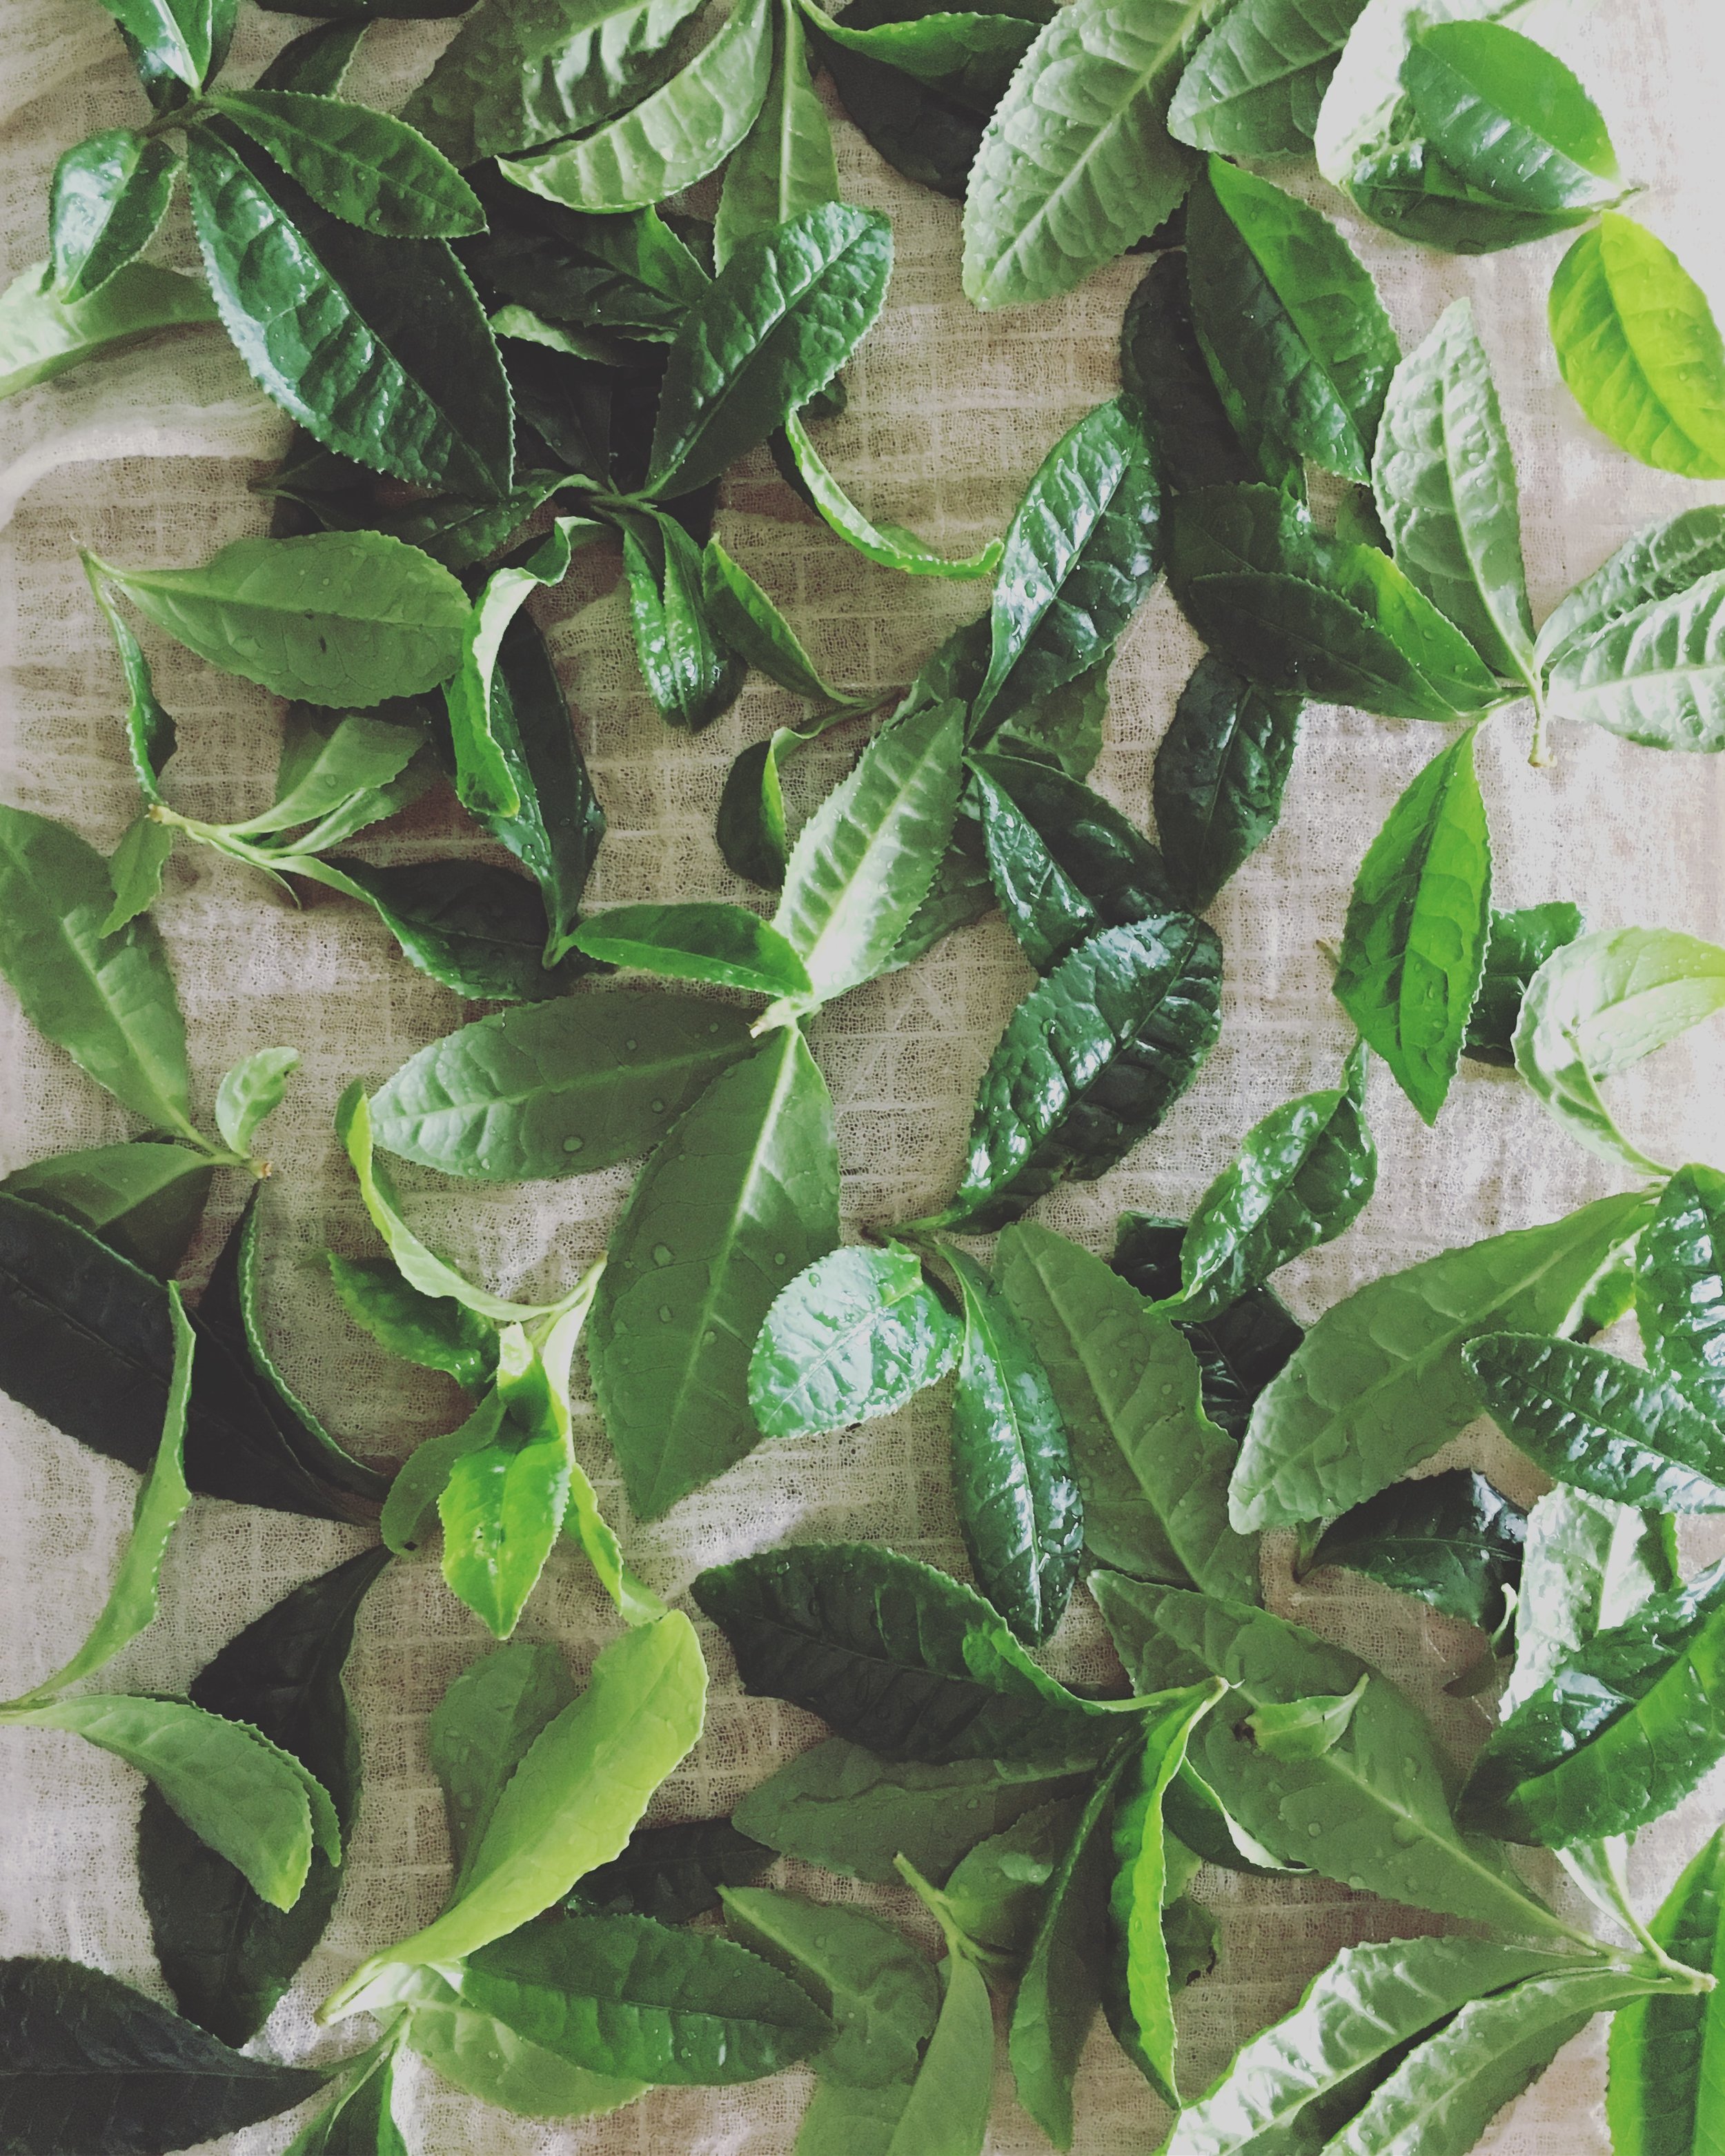
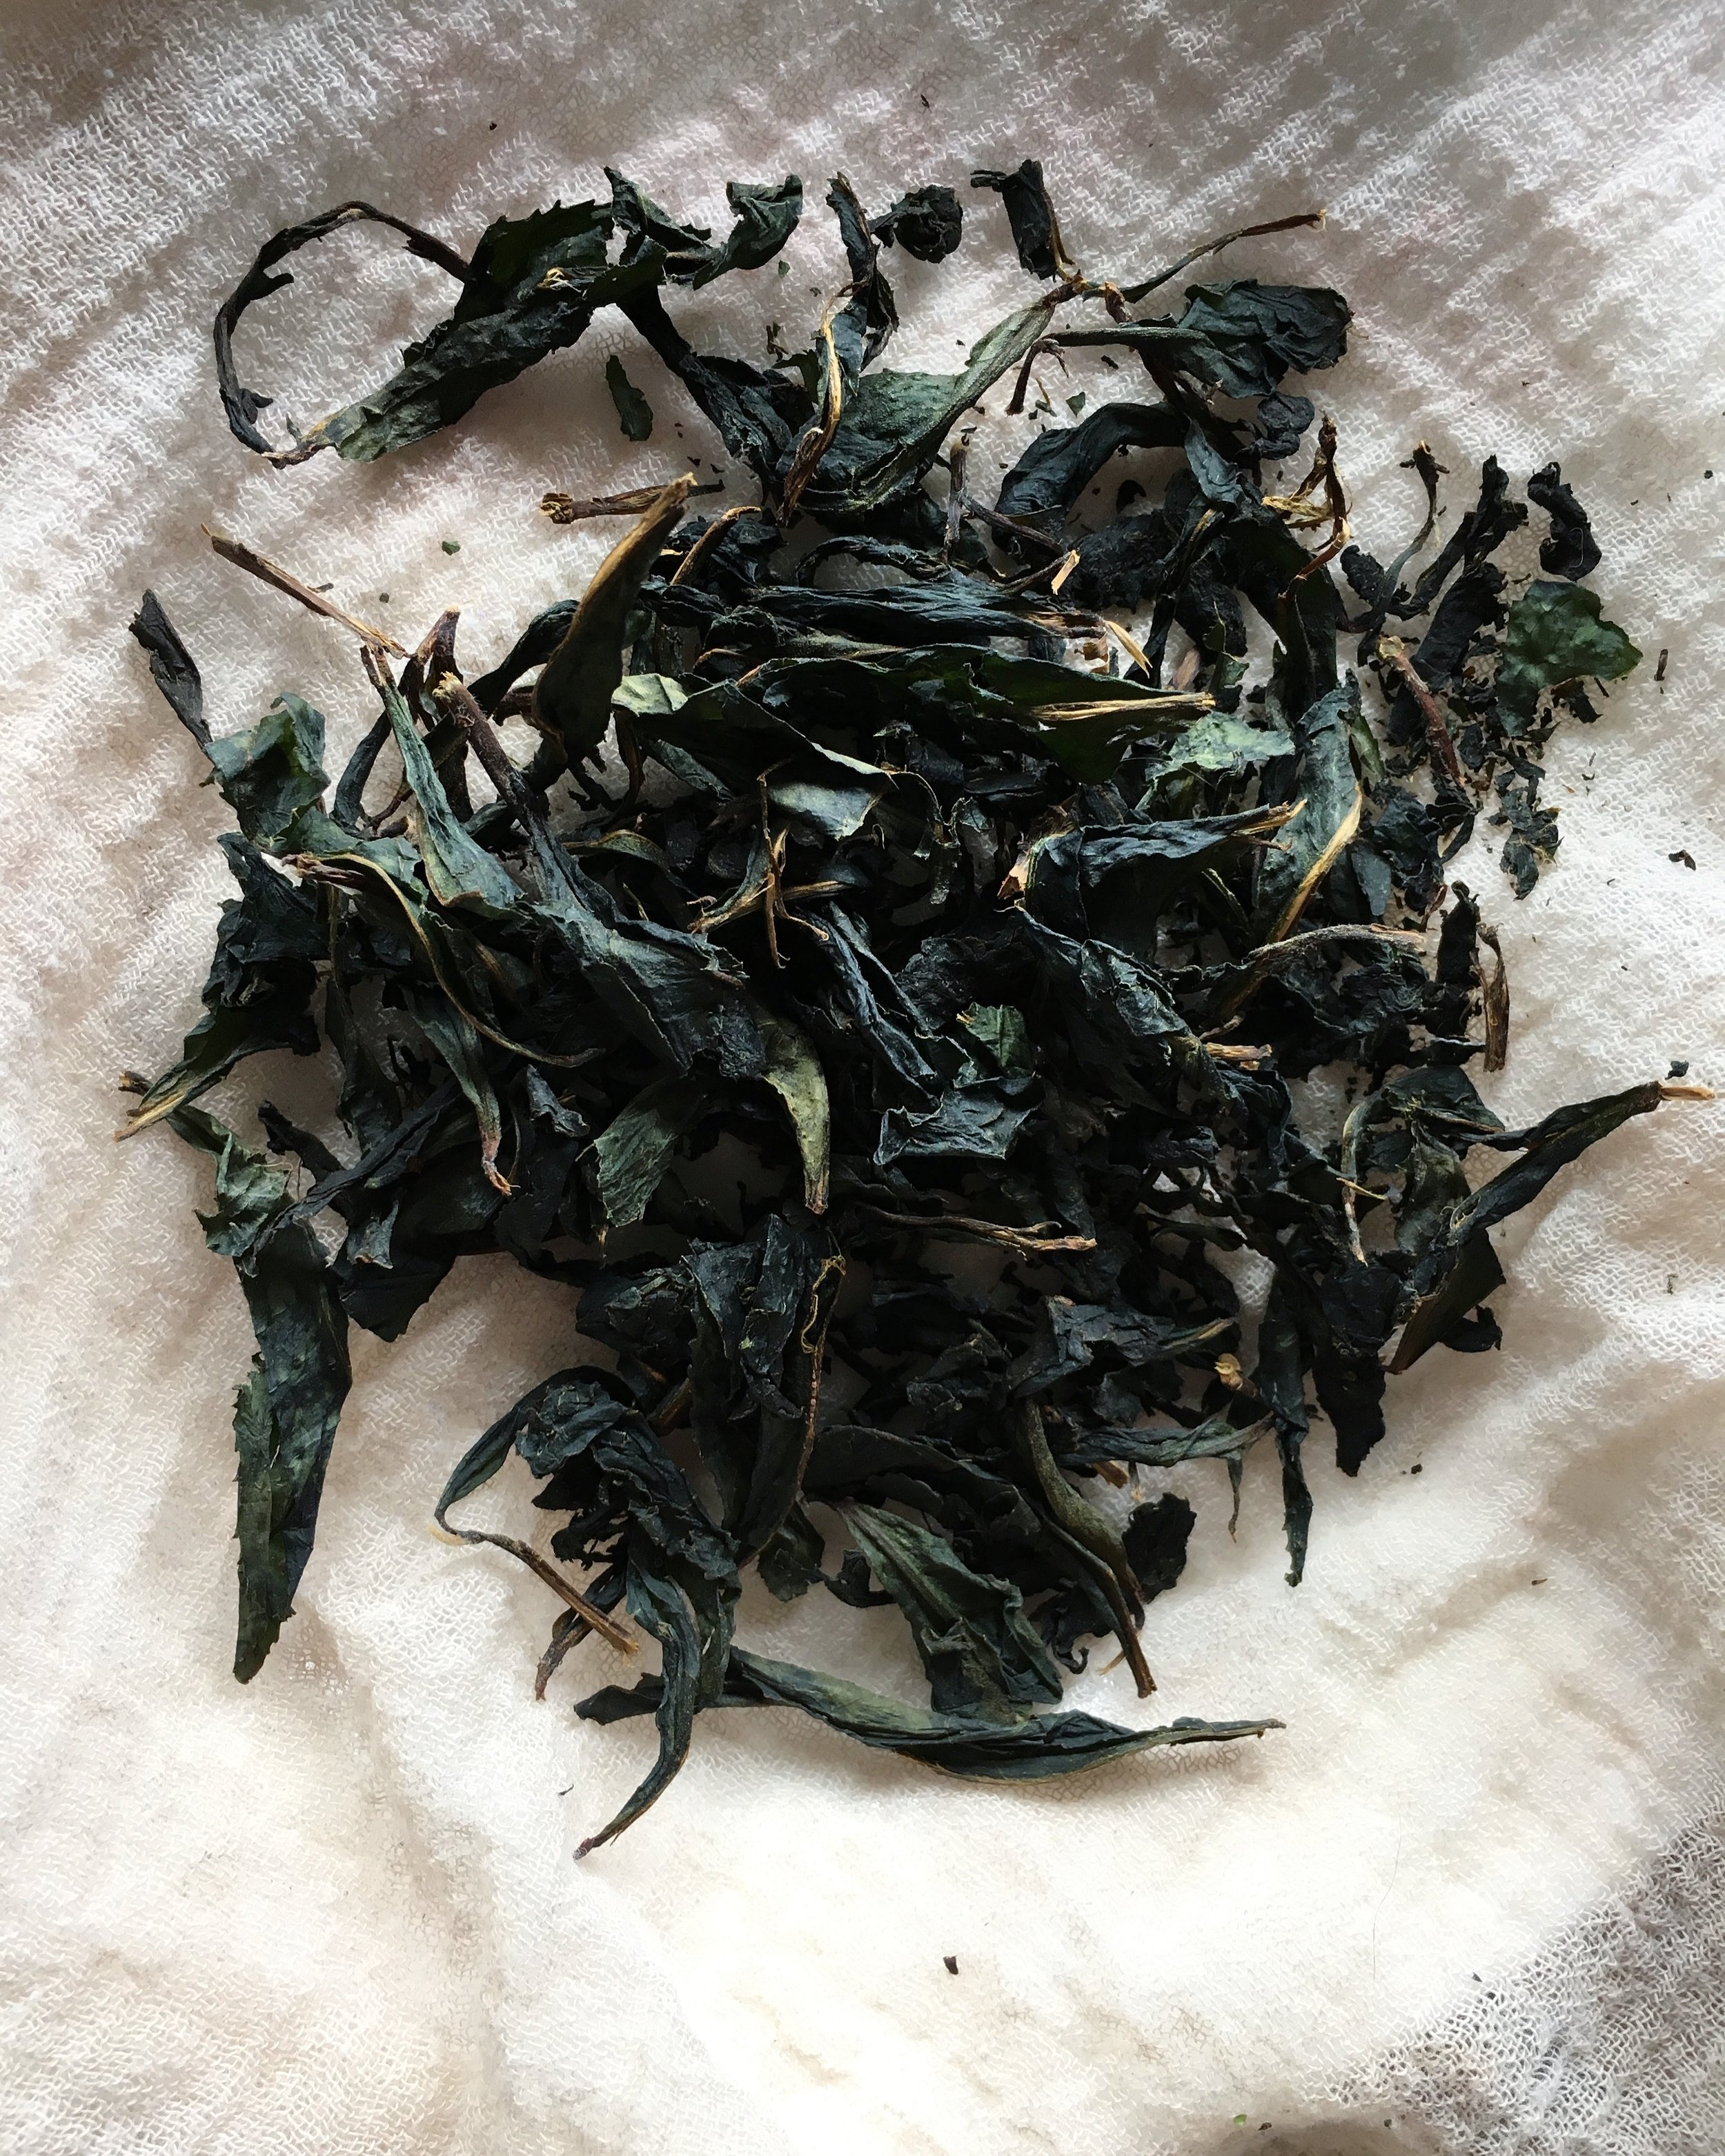
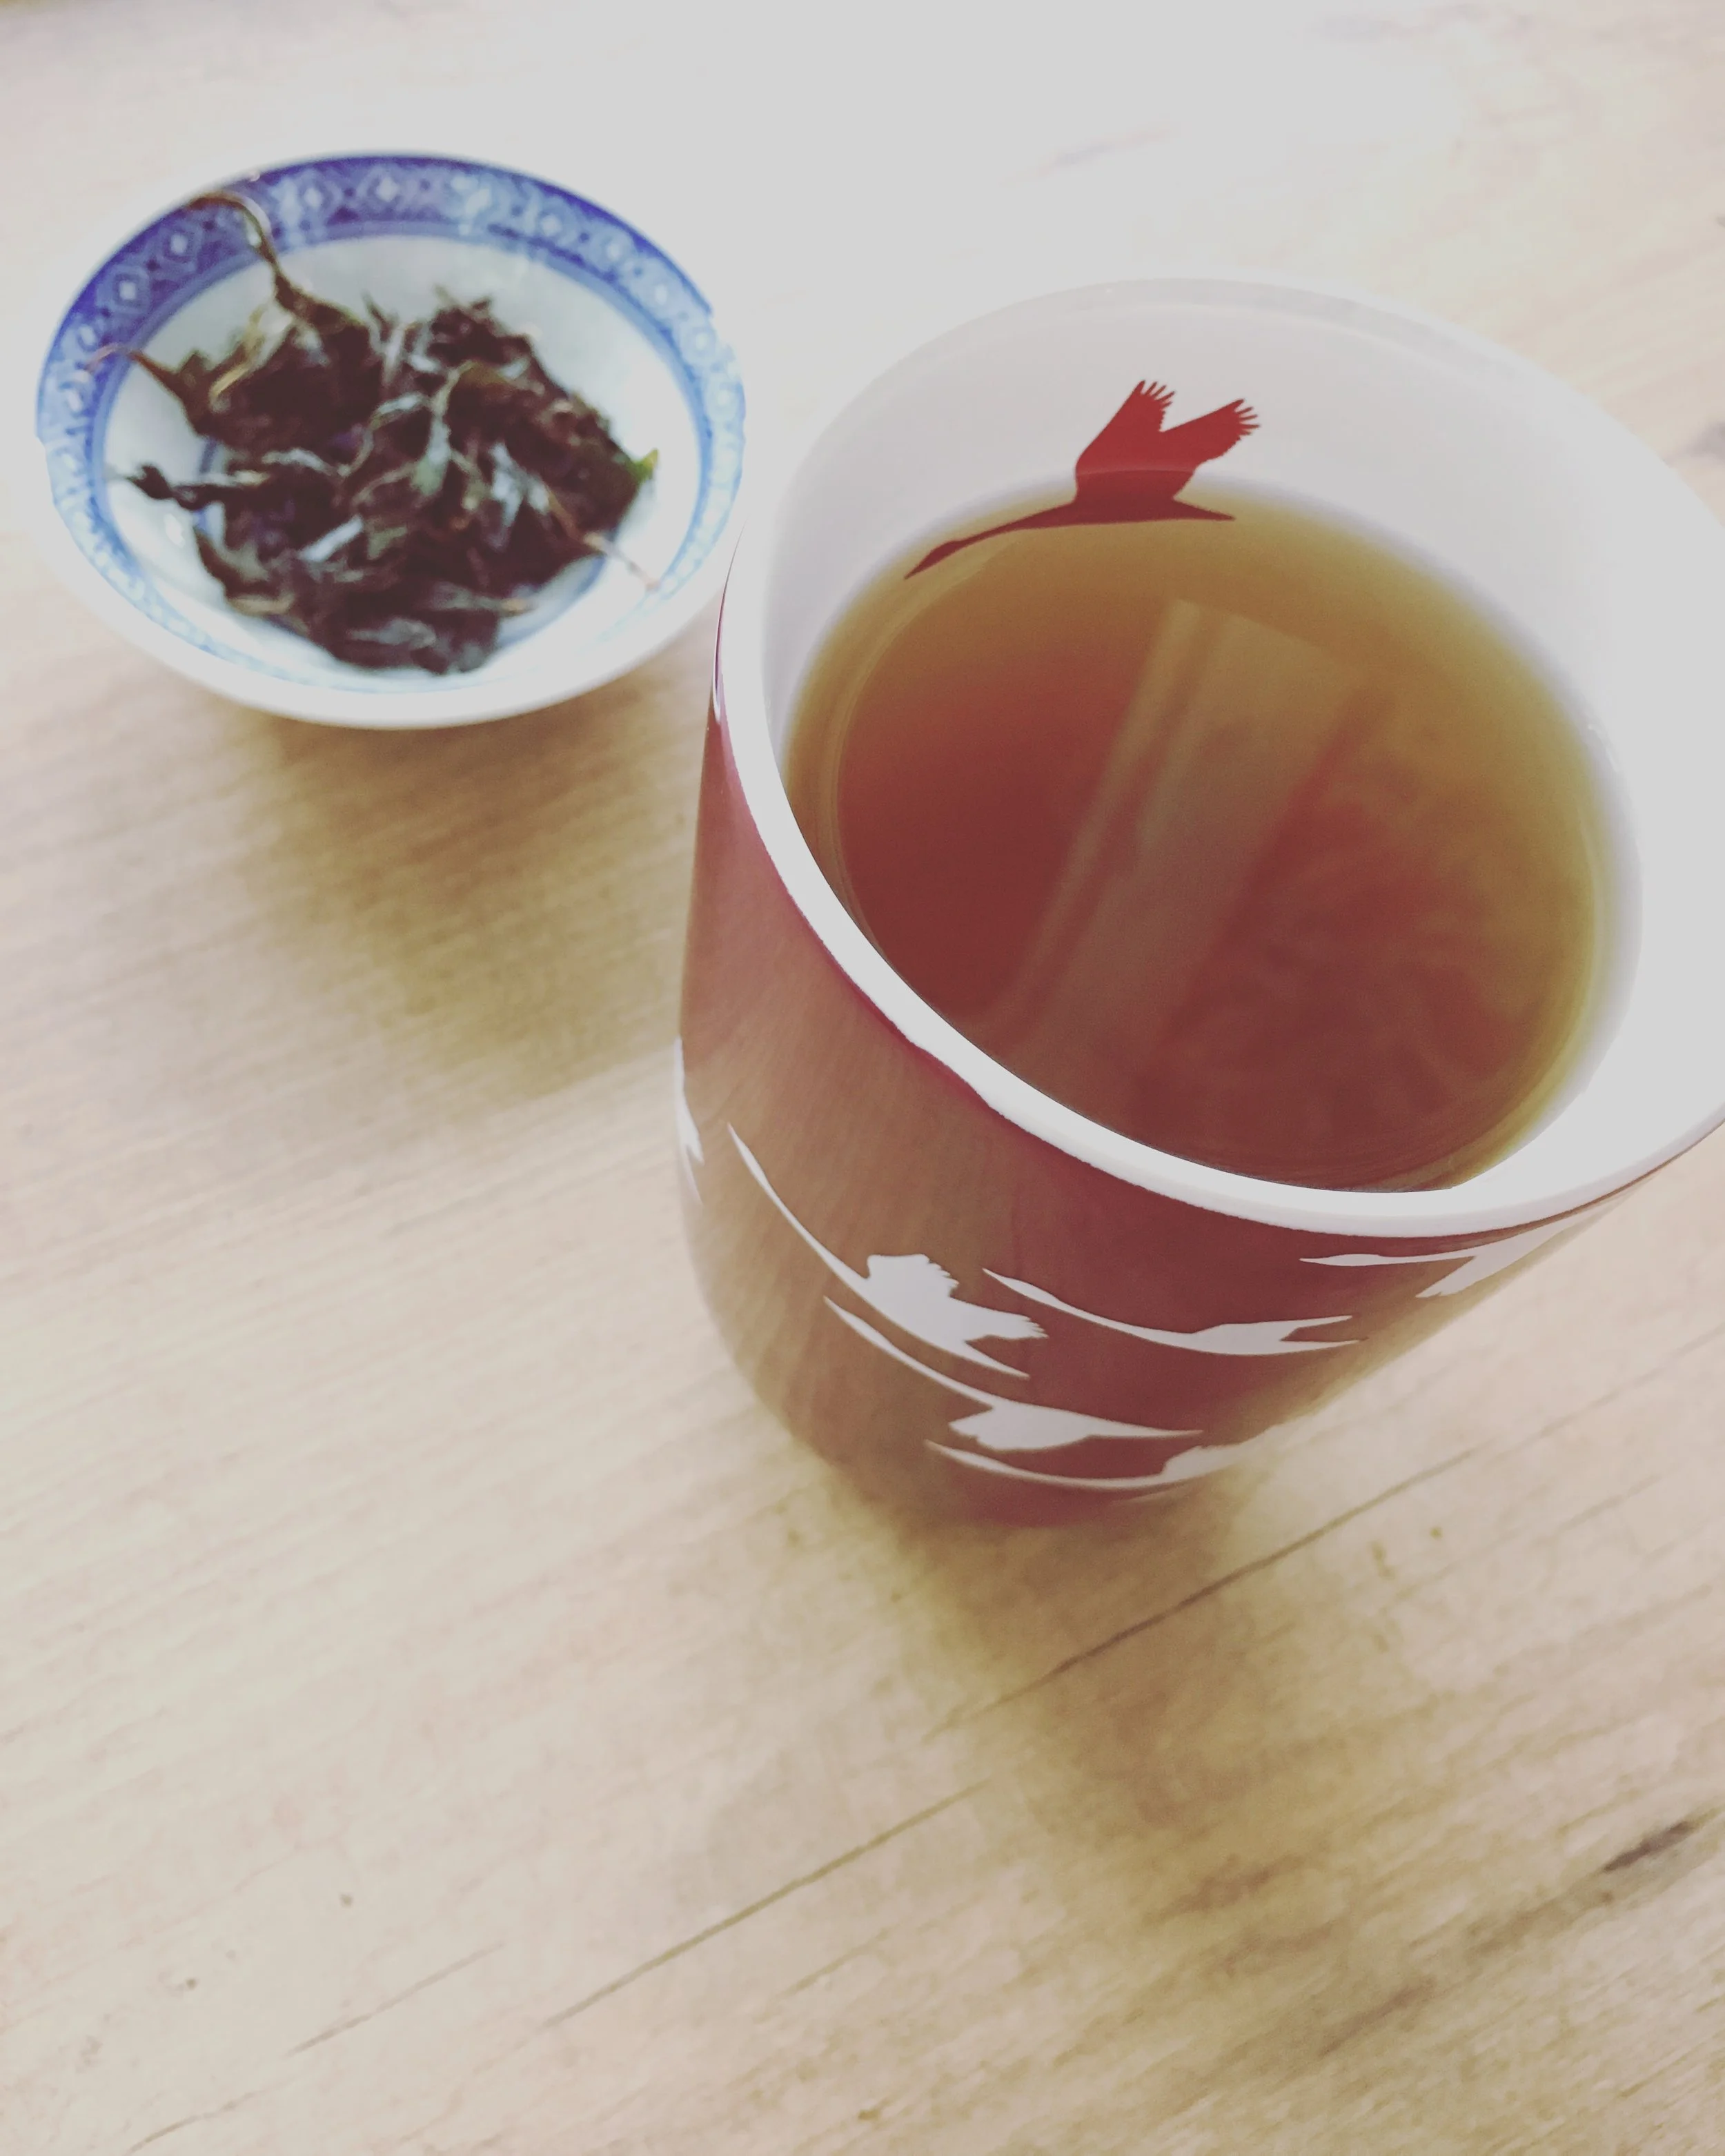
My plan was to make black tea, since I still had several types of green and white teas in my cupboard, and it seemed like the longest process, so if I could do that, I could figure out the other types.  The first step was to pick the new growth, and let them wilt.  After that, begin kneading, mashing, and rolling (my heavy marble rolling pin was useful here), the leaves until they start to turn red and oxidize.   At this point it is time to let the leaves sit and ferment until they turn black.  Things turned out a bit differently than I planned, because my house is really dry, and the leaves dried out before they finished all their fermenting.  Halfway between green tea, and fully fermented black tea is oolong, and that is what I ended up with.

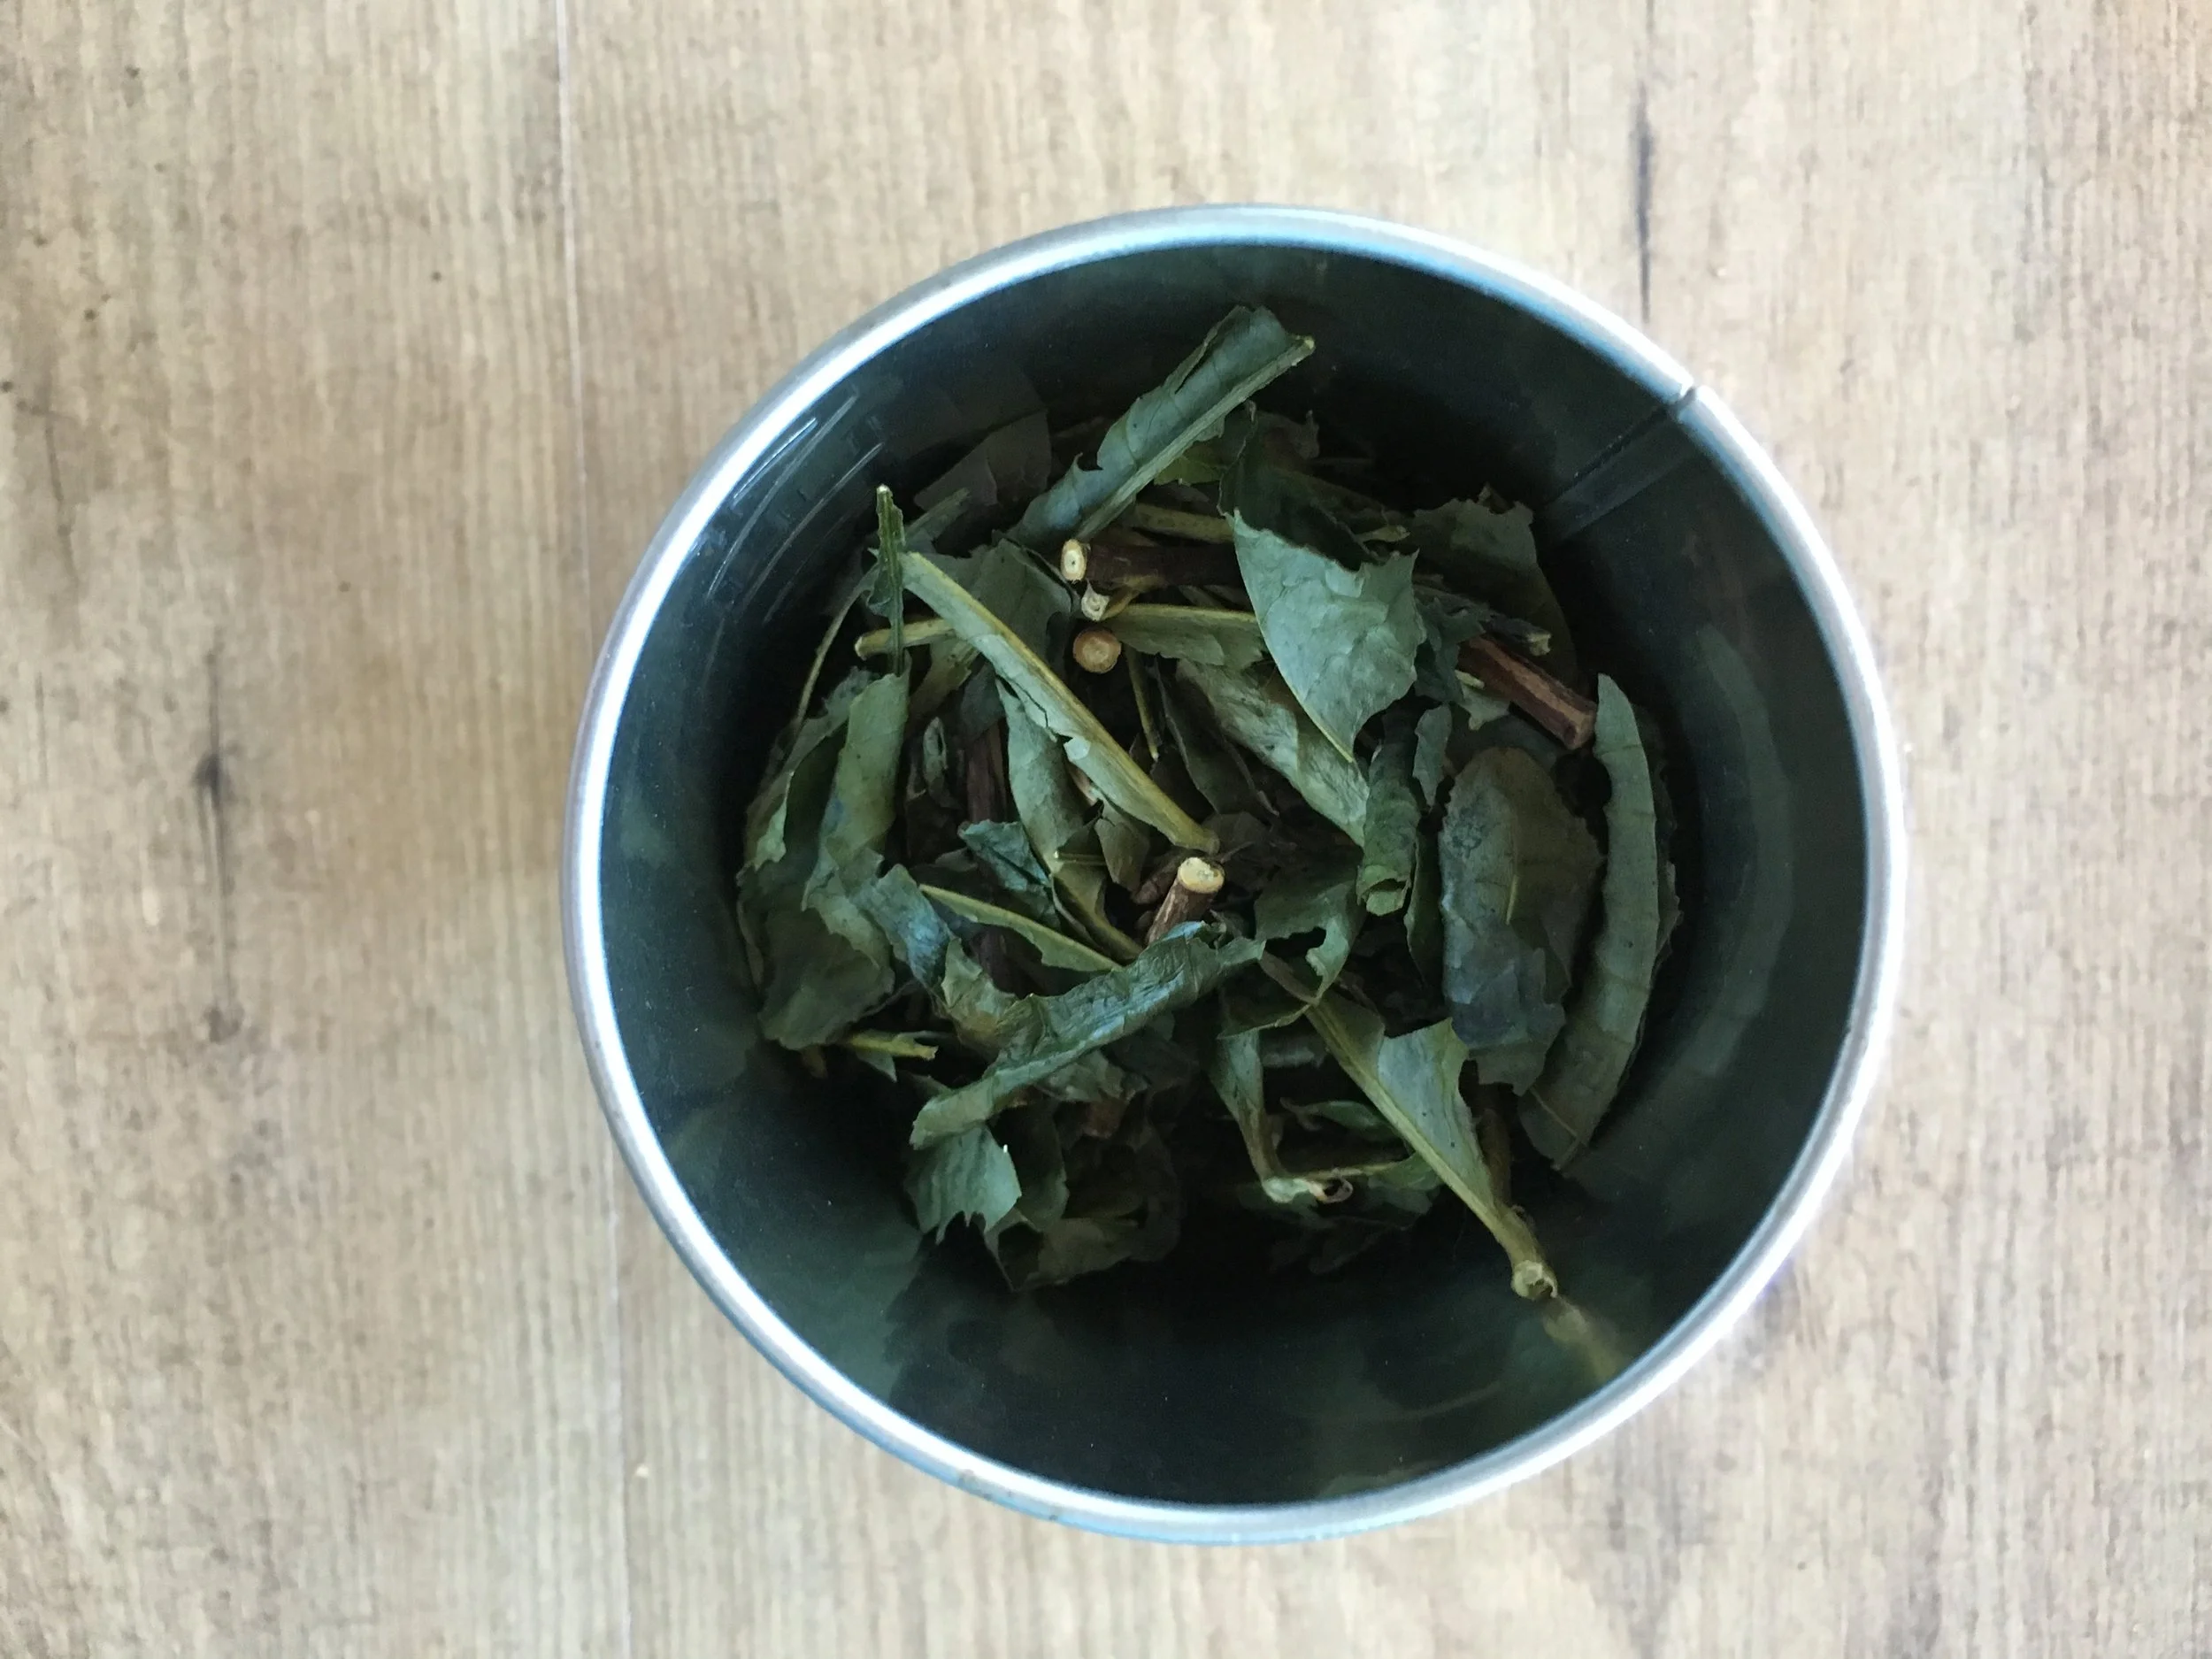
While most of the teas we are familiar with are made from the fresh, new growth on the tea plant in the spring, there are a few other types made from the older parts of the plant.  They all seem to have evolved as peasant tea - the poor people taking the leftovers of the plants after harvest and making something out of them.  Bancha is the Japanese name for one such tea.  This is essentially the same process as green tea, just made with the older leaves and stems.  From there it seems genmaicha (bancha, or sometimes sencha, with added puffed rice), and hojicha evolved.  Since I had some genmaicha in my pantry, I wanted to give hojicha a try. I also  thought my coffee loving husband might like the roasted flavour of this tea.  

I started by pruning my tea plant into a more manageable shape.  I had picked the largest one in the nursery, and after realizing better how tea is produced I figured it was a bit unruly.  I steamed the trimmings for about 90 seconds, and then stripped the leaves from their stems, and cut the stems into more manageable lengths.  After letting everything dry I threw it all into my cast iron skillet and stirred it all around until it started looking dark and toasty, and I could see the tiniest bit of smoke coming up from the leaves.

IMG_4902.JPG

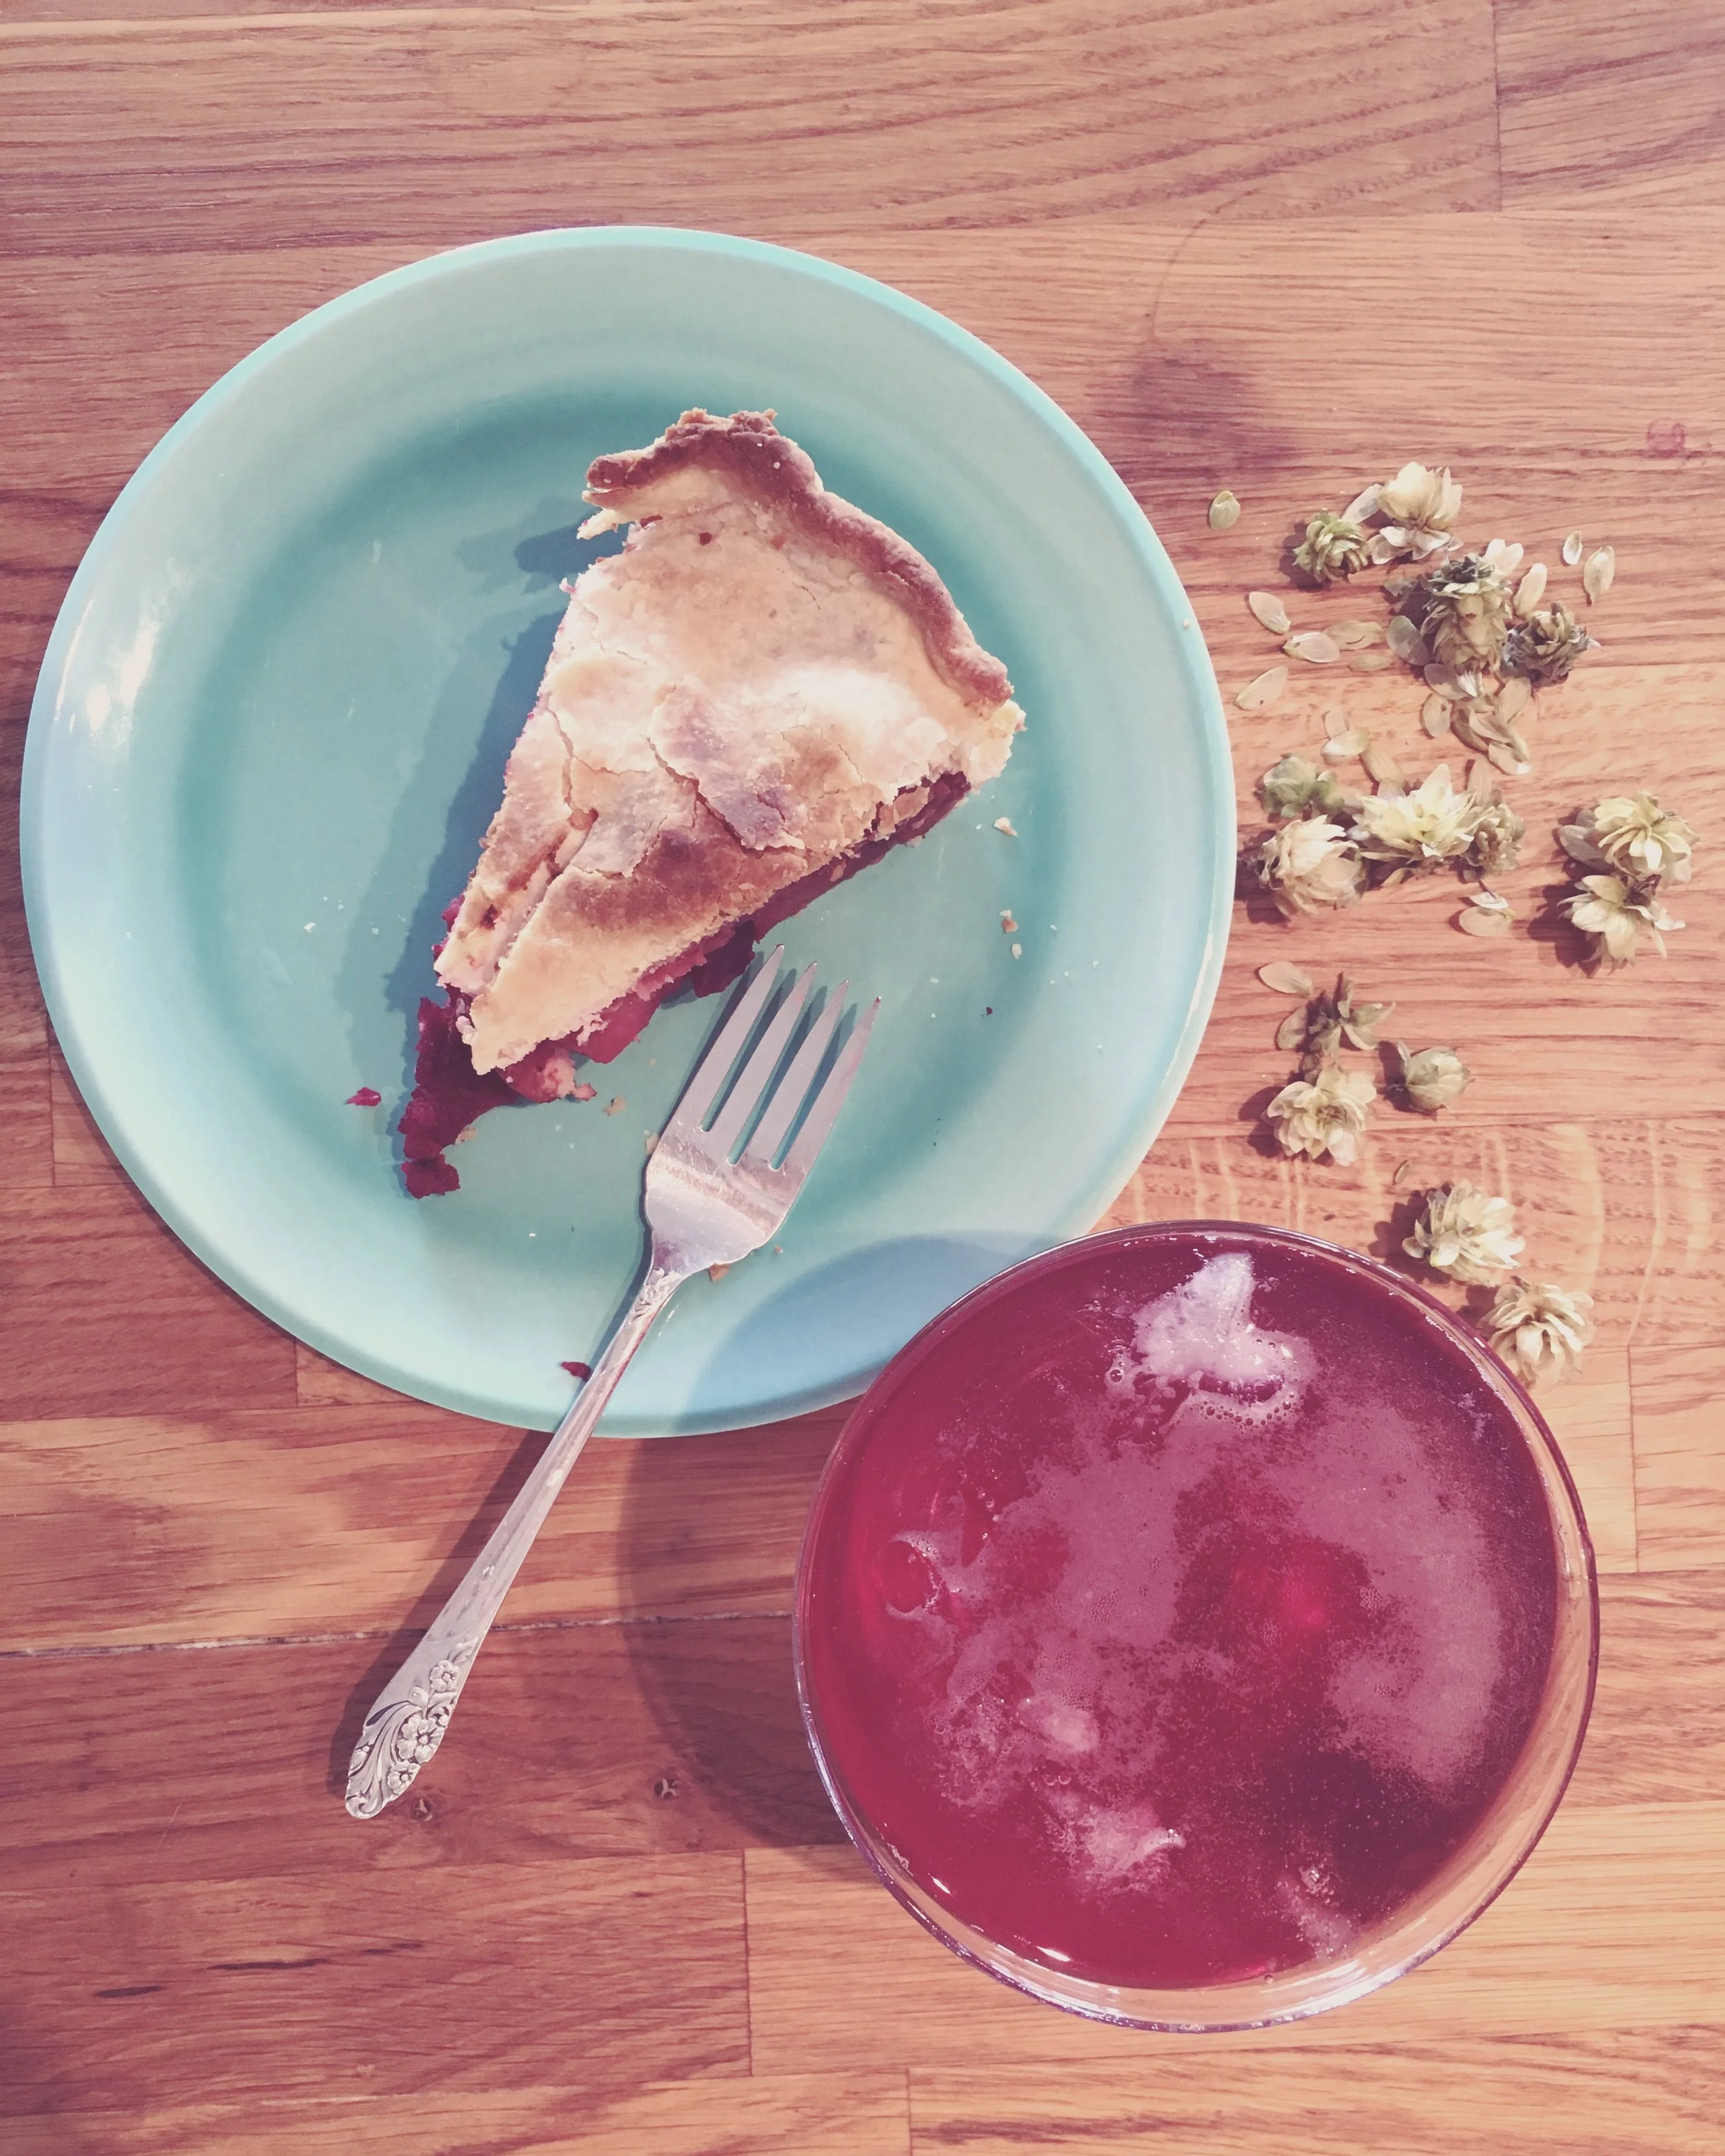
I am looking forward to next spring when I will get to harvest again and make more.  I also heard that  I should expect to see flowers sometime in the autumn, and that they can be dried for tea as well, so I am excited to see that!

July 02, 2017 /Kelsey Fast
tea, recipe, garden, harvest, drink, food
Eat
Comment
IMG_3307.JPG

Food in Jars Mastery Challenge: Shrubs

March 27, 2017 by Kelsey Fast in Eat, Make

At first you might be wondering what a small garden bush has to do with food preservation, but actually the term 'shrub' also means a type of drinking vinegar.  Let me cut you off before you dismiss this concoction as disgusting, and let you know that they are actually, in fact, delicious.  I was super skeptical at first as well.  I like the idea of being one of those ultra-healthy daily dose of unfiltered cider vinegar people, but the truth is I don't love the taste of it straight.  I know all about the amazing benefits of the probiotic in my gut, and have even made several litres of my own cider vinegars, but I only ever use them in recipes as a supporting role.  You may recall last summer I made a vinegar pie from the Fannie Farmer Baking Book, and that ended up being pretty tasty.  This drinking vinegar business is another surprising success story just like that one.

IMG_3303.JPG

Here's the setup.  You need to roughly chop about a pound of fruit, add one cup of sugar (honey and other natural sweeteners are acceptable substitutes), and one cup of vinegar.  Some have said to think of this as a 1:1:1 ratio.  I find this problematic since that would mean you use one pound of each, or one cup of each, but in fact there should be more fruit than the rest.  You can also play around with the amounts and adjust them to taste.  The type of vinegar you use is completely your choice, but I wouldn't recommend using plain white vinegar.  For both types of shrub I have made so far I used the apple cider vinegar I made from apple scraps last year.  I do plan on trying other fruit vinegars, and also potentially balsamic vinegars, or wine vinegars and see how that turns out.

Mix everything in a bowl and pour it in some sort of container.  I have zillions of mason jars, so I used mason jars.

After this let them sit on your counter for a couple days.  I found two days to be the right number.  Make sure you cover them, but use cheesecloth, or a napkin, or paper towel or something.

IMG_3305.JPG

Here are my jars in their festive leftover Christmas napkins.  After they hang out like that for a couple days strain out the solids, and store the finished shrub in the fridge.  I am told some people leave them to age for a week or so, but I tasted mine almost right away and it was really good!

IMG_3306.JPG

The flavours you can choose to make these shrubs are only limited by your imagination.  I did one more simple: pear, honey, and cider vinegar; and one more experimental: blueberry, hops, sugar, and cider vinegar.  I love the piney sort of undertones that both blueberries and hops have and I wondered if they would blend well together as a result. 

Yes.

Yes they do.

The other thing I really find that I love about shrubs is that you get the taste of the fresh fruit, but in syrup form.  I have a SodaStream, and I make a lot of my own syrups to go with the fizzy water, but the idea that I could make a syrup and taste fresh fruit rather than cooked was so exciting!  I can't wait to try this with other combinations!  I'm imagining a watermelon shrub and it is making my mouth water.  I can't wait!

So go make yourself some shrubs and enjoy them diluted (about a quarter cup in a 16 oz cup filled the rest of the way with soda water was a perfect concentration for me, but experiment and see what you like) in soda water, cocktails, and whatever else you can think of!

March 27, 2017 /Kelsey Fast
Food in Jars Mastery Challenge, drinking vinegar, preserve, drink, recipe
Eat, Make
Comment
applecider.jpg

Apple Cider Days

September 12, 2014 by Kelsey Fast in Eat

It's still officially summer and the sunshine is still pretty warm, but where we are the air has some of that telltale fall crispness.  In our chilly basement suite we are swaddled up in comfy sweaters and we've already ditched our iced coffee for homemade pumpkin spice flavoured ones.  In our minds it's officialy fall. 

During the colder months we like to have a pot of something warm and spiced on our counter almost 24/7.  I find that it serves two purposes - one is that you have a nearly constant supply of something warm and delicious to drink, and the other is that it fills your home with a beautiful warm aroma.  My basic recipe varies quite a bit from day to day, but some green cardamom pods were the source of my inspiration lately.  Here's the recipe.

Cardamom Apple Cider

  • 4 Litres of Apple Juice
  • 5 or 6 Whole Cloves
  • 2 Cinnamon Sticks
  • 7 or 8 Green Cardamom Pods
  • 4 or 5 Allspice Berries
  1. Fill - exactly how much depends on how many people you are serving - your slow cooker (or a pot on the stove) with apple juice. I usually use a four litre jug (one gallon for my American friends).  We like to find organic and local juice if possible, but anything from the store will do if you're in a pinch.
  2. Add spices and turn the cooker up to high for a while.  Once heated and steaming turn it to low.  Allow the spices to mingle with the juice for at least 30 minutes before drinking.  The longer you leave it the stronger the taste of the spices.
September 12, 2014 /Kelsey Fast
recipe, autumn, kitchen, drink
Eat
Comment

Terms and Conditions | Privacy Policy | Shipping and Returns

Powered by Squarespace