A Forager's Home

Grow. Find. Eat. Make.

  • Blog
  • About
  • DIY
  • Recipes
  • Foraging
IMG_7697.jpeg

Carrot Top Cake

July 19, 2020 by Kelsey Fast in Eat

I hope you’re not getting tired of baking recipes! I promise I’ll come up with something else soon, but in the meantime I wanted to share this cake I made to celebrate my 10 year wedding anniversary with Mr. Forager. I started with a carrot cake recipe that’s been in our family for quite a while and tweaked it so it would work with carrot tops instead. I’m always interested in recipes that help use up the parts of our food that would ordinarily be composted. Carrot tops are actually really delicious. I’ve used them as a pesto ingredient, or thrown them in when I’m making soup stock before, but this would be my first time using them in baking. I’ve seen oil cake recipes using nettles and even lettuce, so I figured this would probably work and I am happy to say it really did!

{Jump to the recipe.}

IMG_7711.jpeg

This recipe is similar to most other veggie cakes, but you’ll need a food processor or high powered blender to get the carrot tops to a fine puree. I add the carrot tops in with the oil for the recipe and puree that all together and then you don’t need to add any other liquids to the mix. The batter comes together really easily, and you can either bake it into layers and add icing, or just pour it into loaf pans if that’s going to be something you enjoy more. I think it would also be delicious as a simple loaf cake with a lemon drizzle on top.

IMG_7684.jpeg

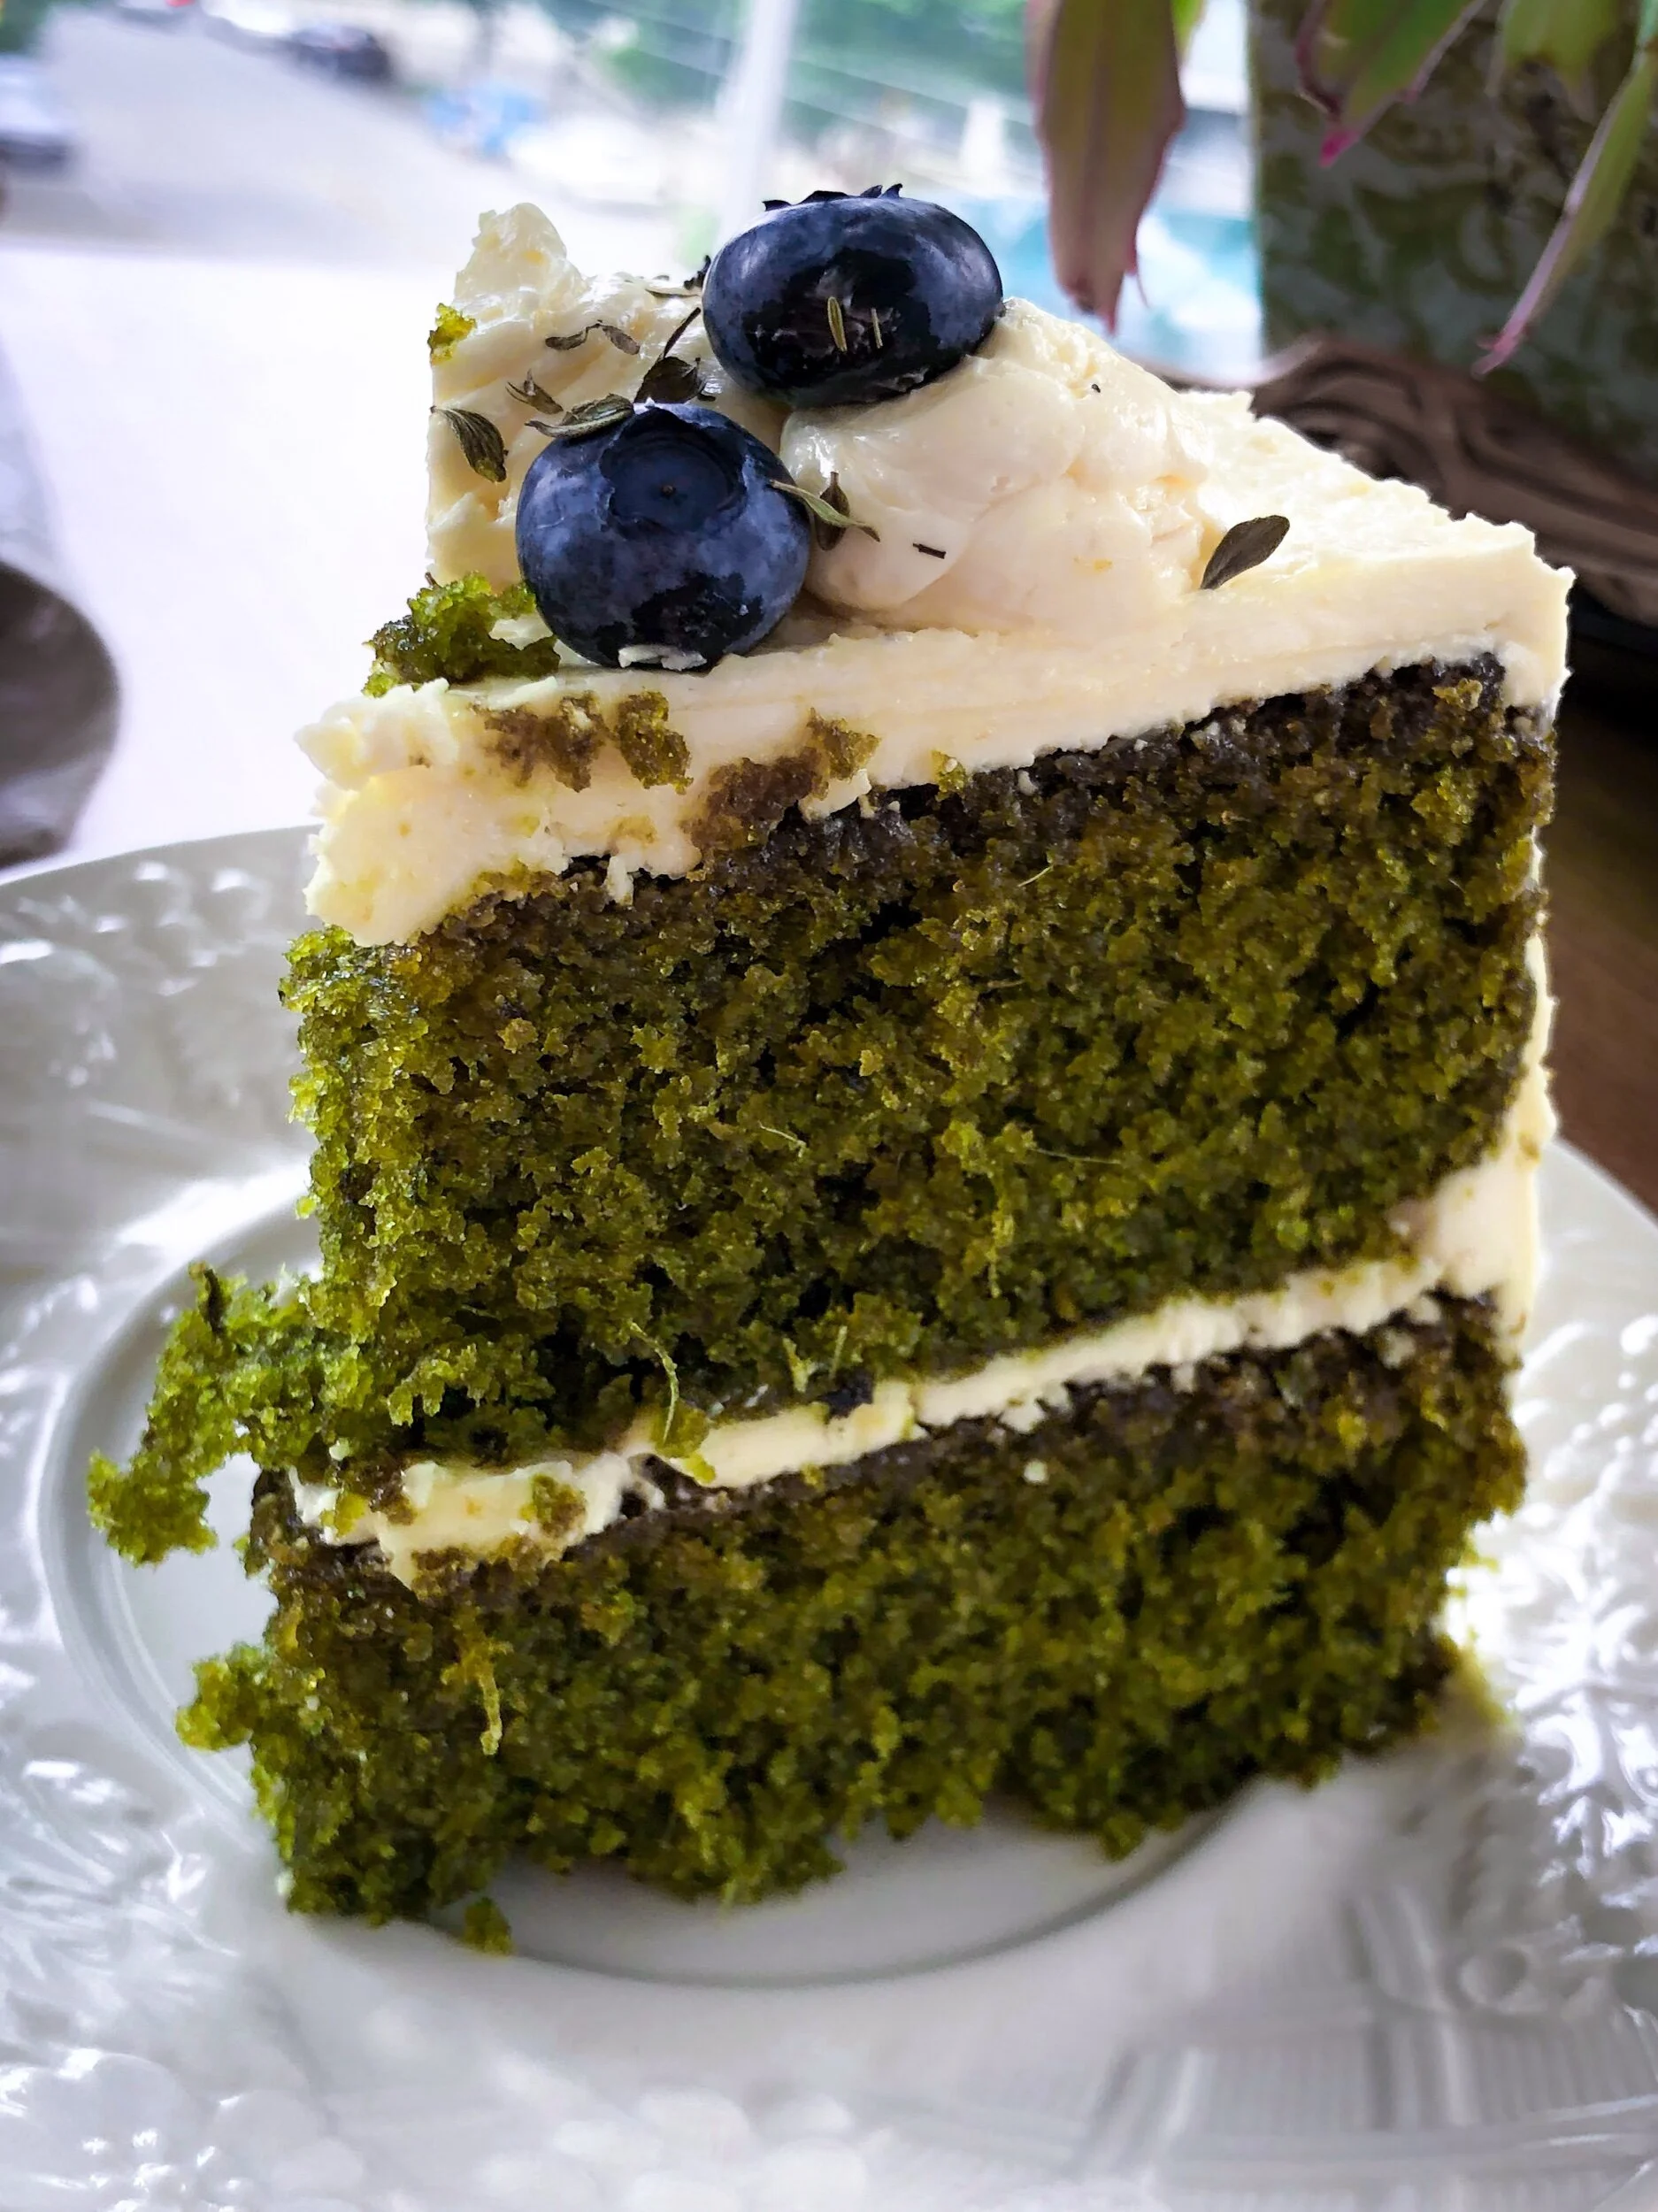
The icing I used for the cake in these photos is an italian meringue buttercream flavoured with lemon. It’s delicious, but a little bit on the complicated side. I made it for a cake we were decorating at work and got to take some of the extra home. I think if I was doing this for an everyday sort of snack cake I would do something more simple, but for a special occasion I think this is a fantastic icing. I’m not going to be posting the recipe for it here because there are many others already online, and the recipe I used wasn’t my own.

I’m also including a recipe for a simple syrup to brush on the cake layers to keep them moist, but if you’re not wanting to bake the cake in layers you could easily use those flavours and some icing sugar to convert it into a drizzle to dress up a layer cake. I might try that next time!

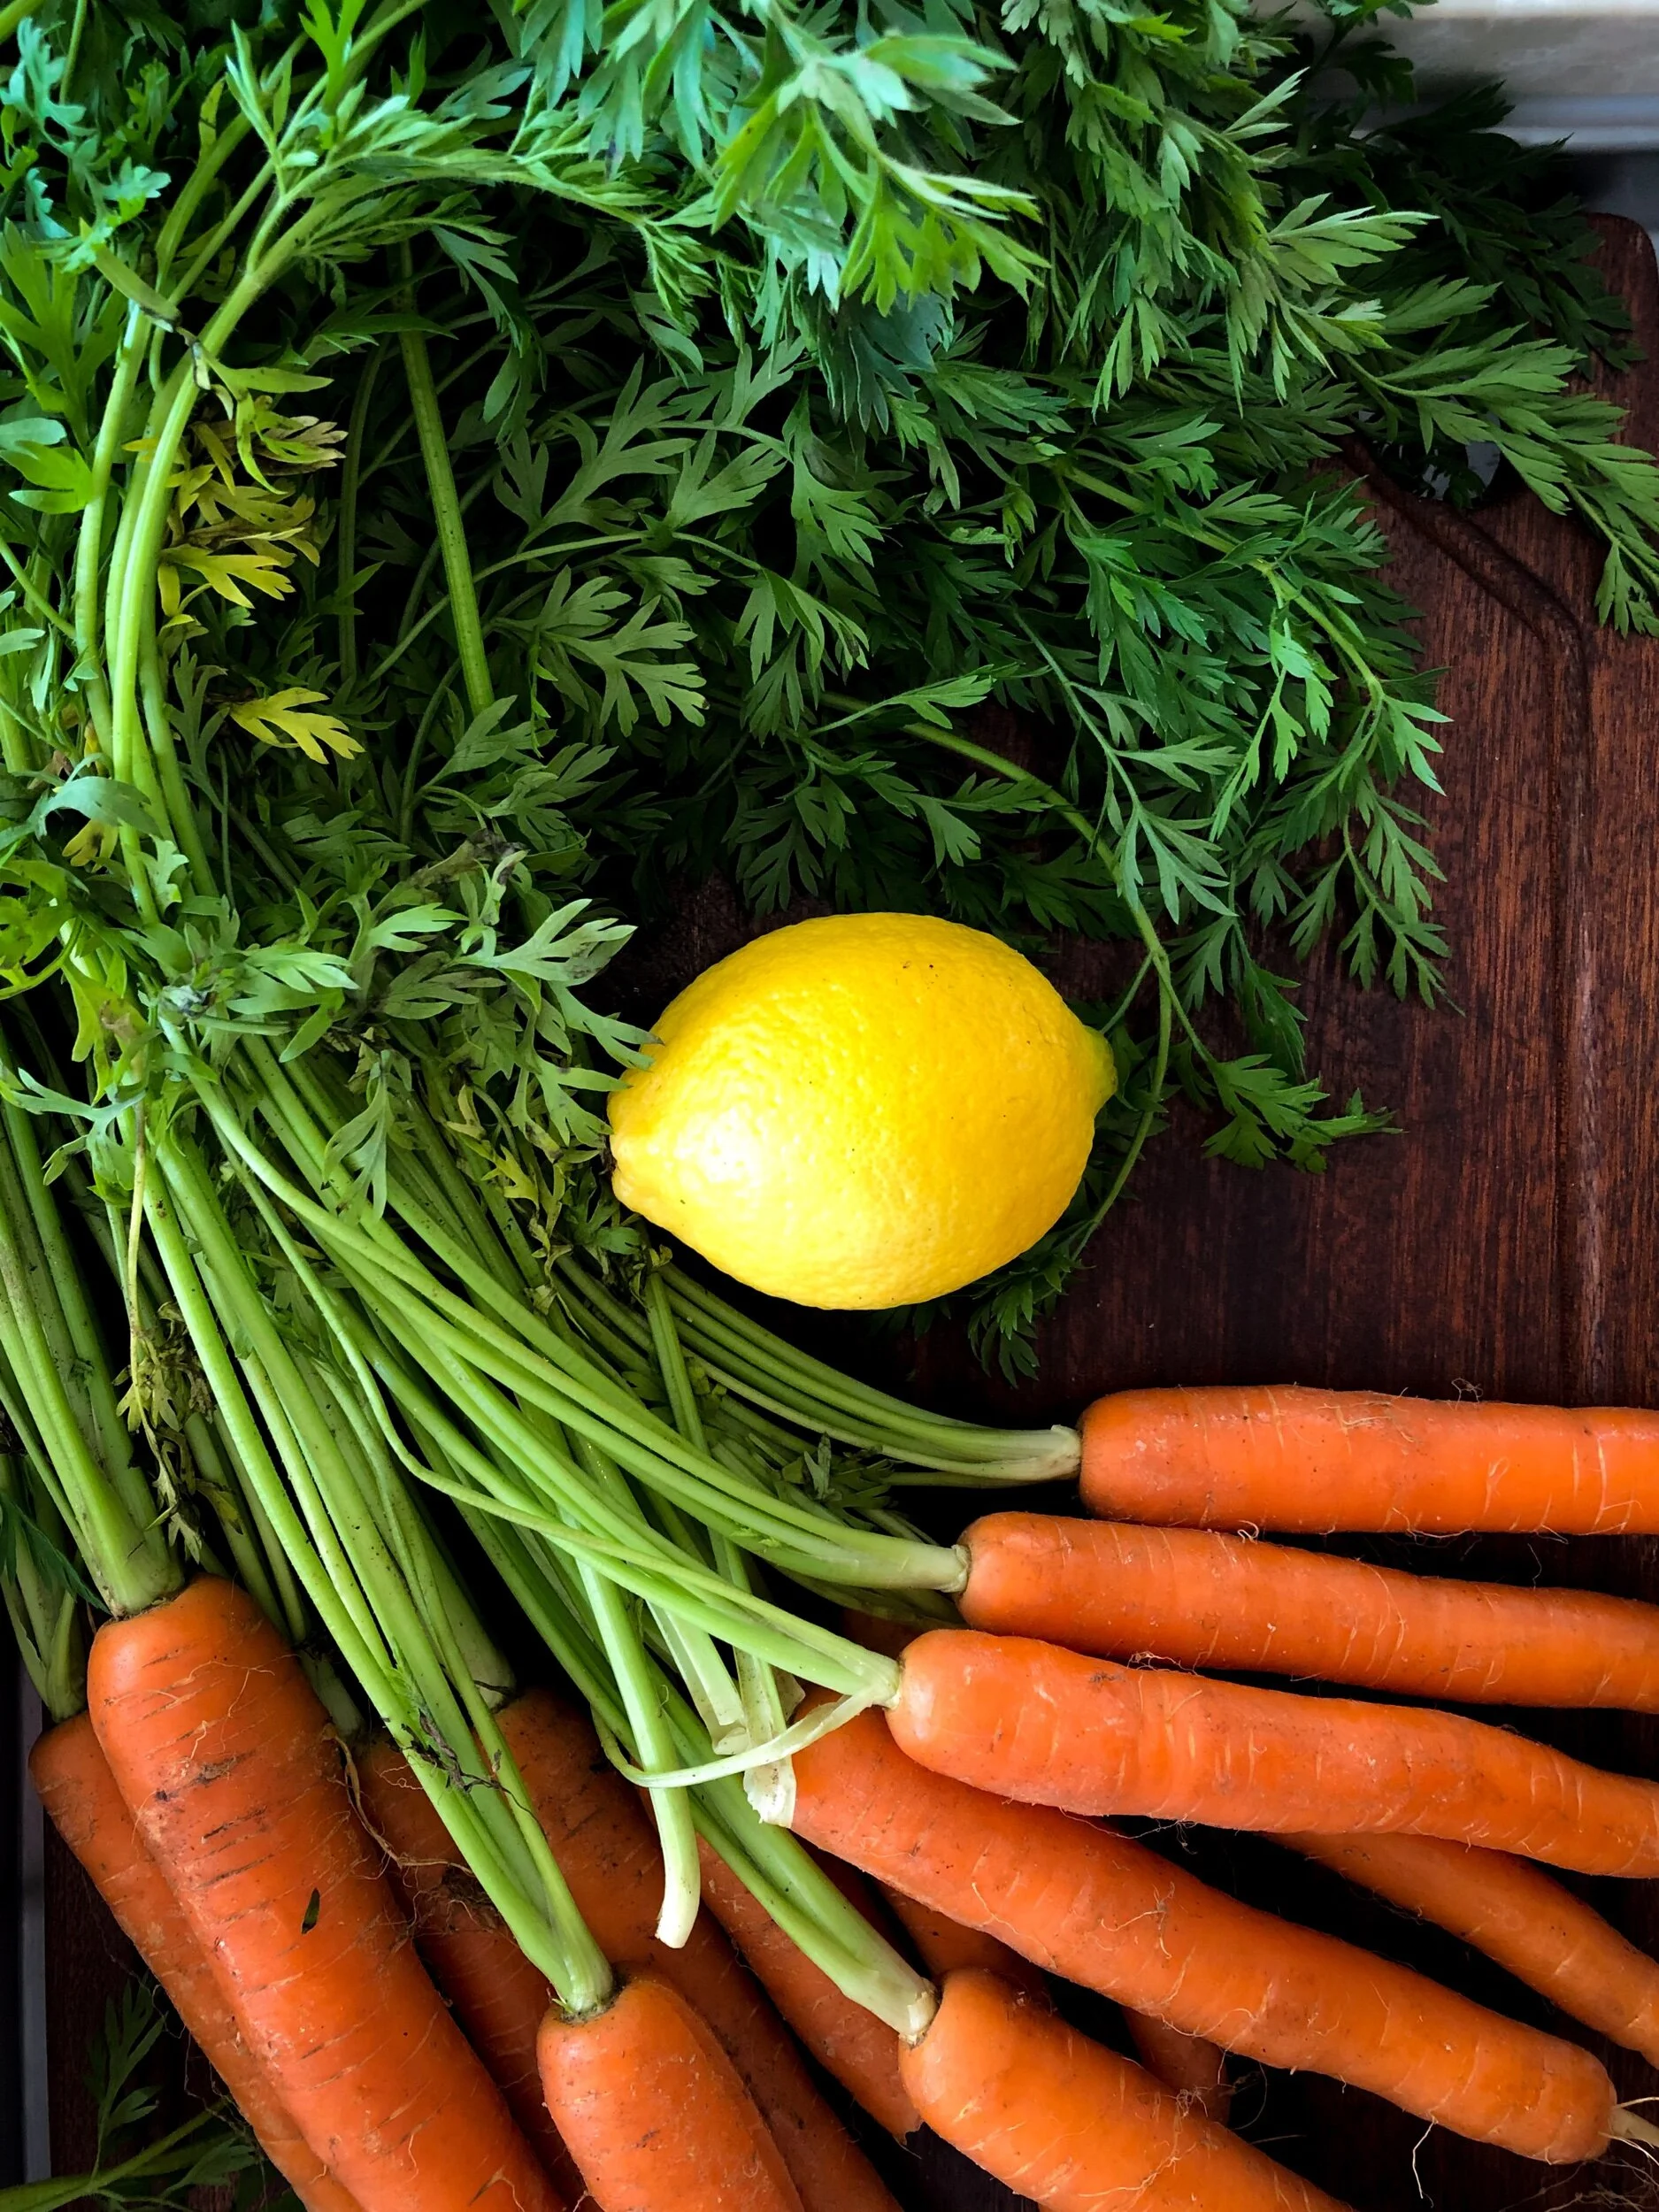
As for the carrot tops, there isn’t really too much you need to worry about. Choose two bunches of carrots that look healthy and well hydrated. The best option is to support someone at your local farmers’ market, but there are also many grocery stores that sell carrots with their tops still attached. Carrot tops are sort of an unsung hero in the kitchen, and many people ask the farmers to take the tops off for them when they are buying their carrot bunches so you could probably even score some extra bunches for free! Last time I was buying carrots I was given an extra big handful of carrot tops when I told the farmer I actually wanted to keep mine.

IMG_7703.jpeg

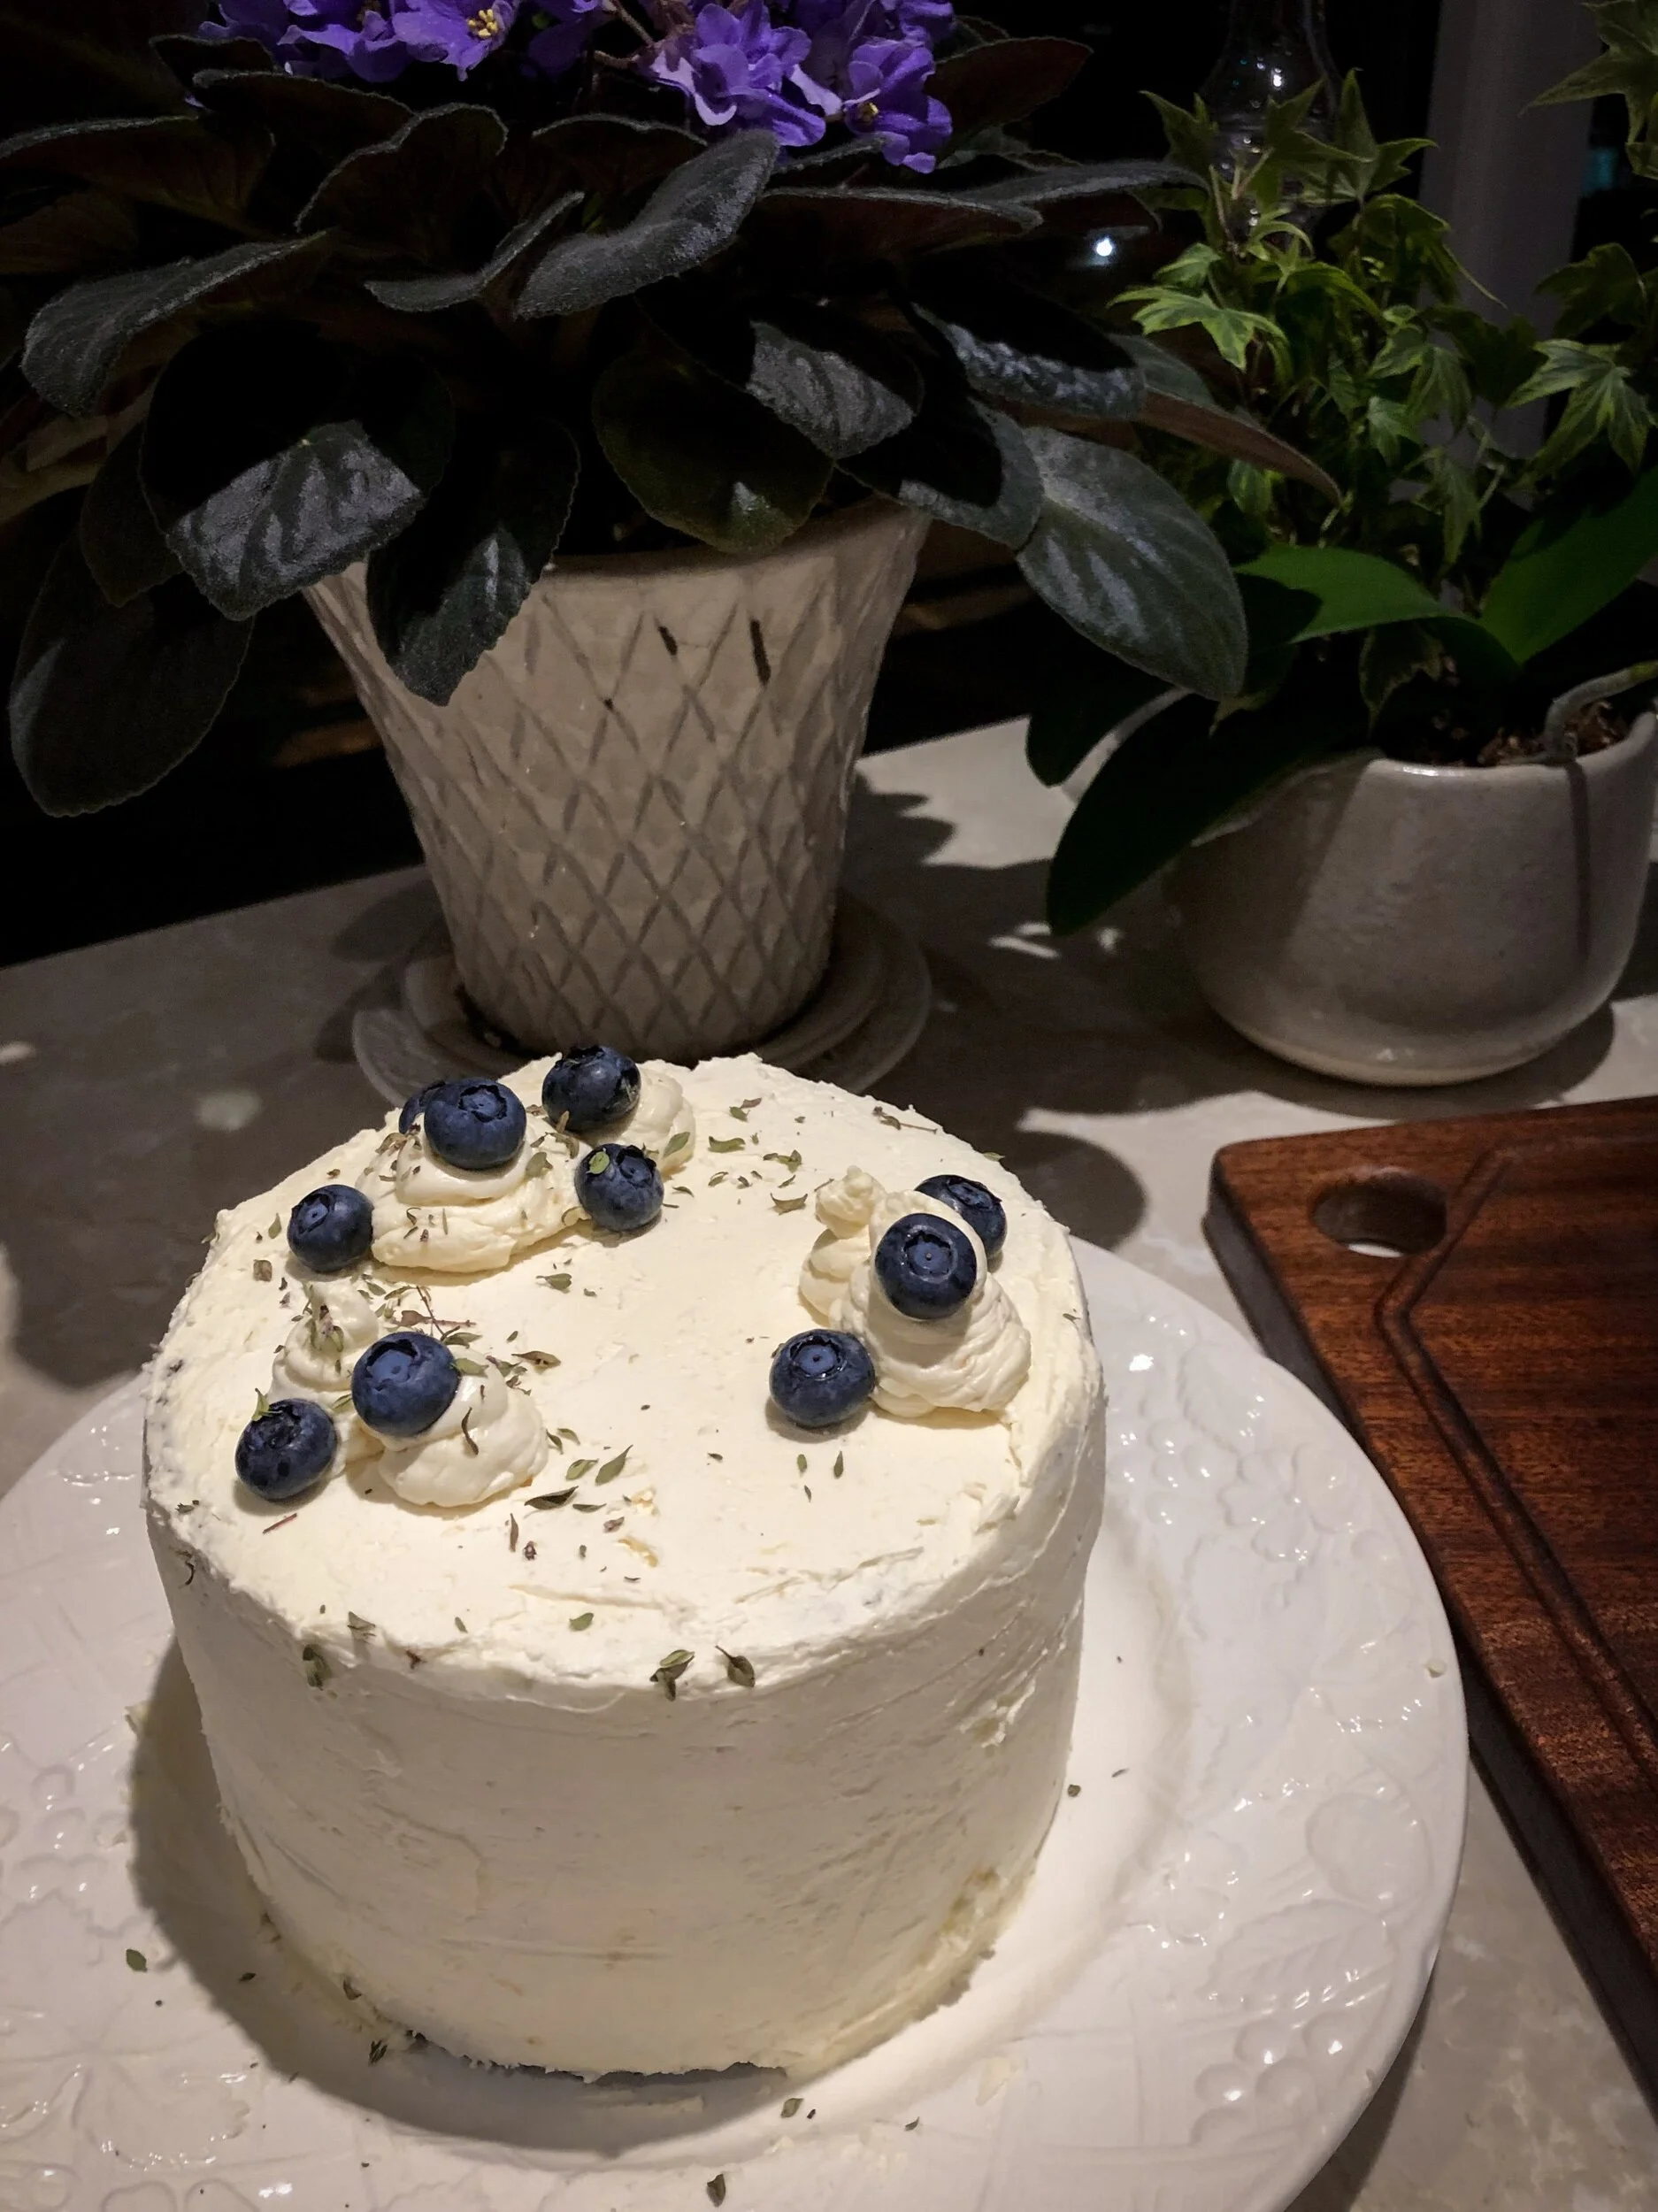
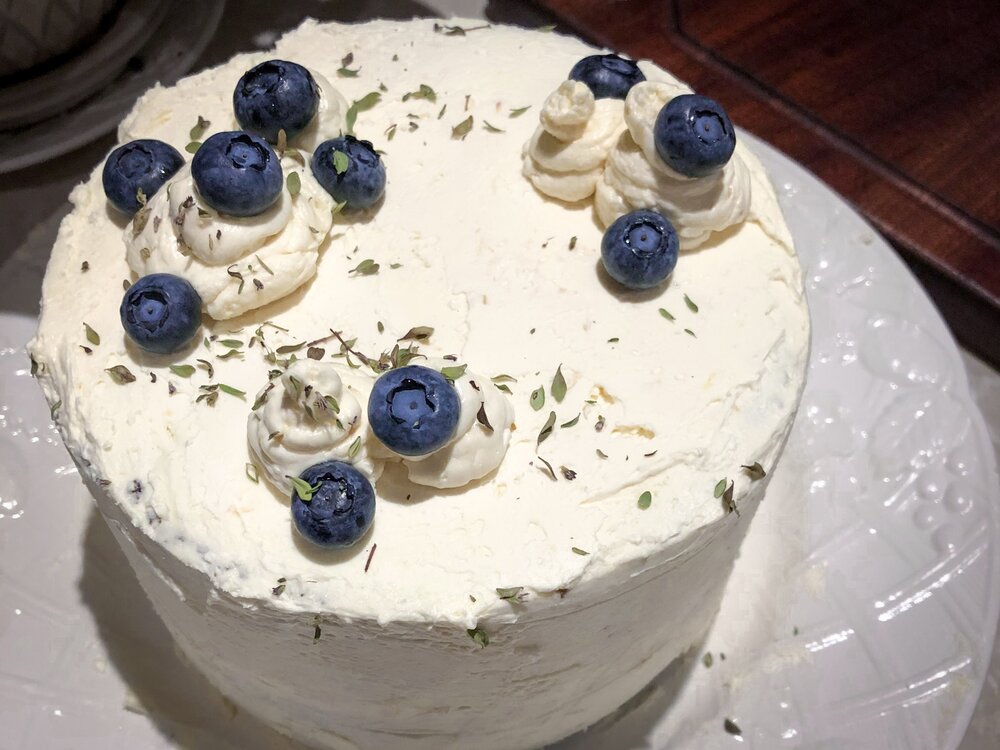
The other flavours in this cake are lemon, thyme, and cardamom. You can use fresh thyme or dried, but fresh is going to have the most punch so if you can find some it’s worth it. I recommend having a little of the dried thyme on hand for decorating since I think the little leaves looked beautiful sprinkled on top of the cake. I also put a few blueberries on the top because I couldn’t think of anything else we had on hand to make a good focal point, and it was actually a really great flavour to add. I’d consider even doing a layer of blueberry jam in the middle of the cake next time to add more of that in.

IMG_7722.jpeg

Carrot Top Cake

Makes four six inch round cakes

Ingredients

    For the Cake:

  • 2 cups flour
  • 2 tsp baking powder
  • 2 tsp baking soda
  • 1 tsp salt
  • 1 tsp cardamom
  • 2 tbsp dried thyme, or one handful fresh thyme sprigs
  • 2 cups sugar
  • 1 tsp vanilla extract
  • 1 1/4 cups oil
  • 4 eggs
  • juice and zest of one lemon
  • carrot tops from two average sized bunches of carrots
    • For the Simple Syrup or Drizzle

  • 1/4 cup sugar (if making simple syrup)
  • 1 cup boiling water (if making simple syrup - if making drizzle reduce to two tablespoons)
  • reserved thyme sprigs, or one tbsp dried thyme
  • juice and zest of one lemon
  • enough icing sugar to bring liquid to desired drizzle consistency

Instructions

    To make the Cake:

  1. Sift together the flour, baking powder, baking soda, salt, and cardamom. If you are using dried thyme you can add it to these dry ingredients as well.
  2. Blend the carrot tops, fresh thyme (but reserve the stems for later), oil, and lemon juice until mixture is a very fine purée.
  3. Whisk together eggs, sugar, and vanilla extract until everything has turned to one homogenous texture. At this point add the pureed carrot tops and oil, and mix well.
  4. Slowly mix in the sifted dry ingredients, and mix just until there are no large lumps. There will likely still be a few small ones, but that’s ok. I like to do this part with my hands so I can feel what’s going on with the mixture, but you don’t have to if that’s not your thing.
  5. When baked pour into your desired shape of cake pan. This mix made four six inch round cakes for me, but you can pour it into two loaf pans, or one large rectangle. Just make sure you’re leaving room in your chosen baking pan for the cake to rise.
  6. Bake at 350 degrees Fahrenheit until a cake tester inserted comes out clean. For my six inch rounds this was about 25-30 minutes. It is a good idea to rotate the cakes in the oven at just over the halfway point so everything bakes evenly.
    • If you are icing a layer cake and want to make simple syrup:

  7. Boil one cup of water, and dissolve the 1/4 cup sugar into it. Throw in the lemon juice and zest and reserved thyme stems (or dried thyme). It is a good idea to finely chop the thyme stems before throwing them in, but if you forget it’s not necessary. Allow to infuse until cool and then strain out the solids.
  8. Use this syrup to brush on your layers of cake before icing them to keep everything moist. Extra syrup can be used in mixed drinks, or however you would normally use a simple syrup.
    • If you want to make a drizzle to ice your cake:

  9. Boil water in a teakettle, and pour a few tablespoons of it over chopped thyme stems, or dried thyme. Allow this to cool and infuse for a while as your cake bakes and cools.
  10. Strain out the solids from the infusion, and combine this with lemon juice, zest, and enough icing sugar to make a drizzle in a consistency that you like. Pour over cooled cakes, allow to dry before slicing, and enjoy!
July 19, 2020 /Kelsey Fast
baking, cake, carrot tops, recipe
Eat
Comment
IMG_7196.jpeg

Lilac Macarons with Rhubarb Ginger Buttercream

May 30, 2020 by Kelsey Fast in Eat

For the past few weeks my entire neighbourhood smells of lilacs. They are so abundant it seems like everyone’s yard has at least one shrub, and the public walkways are even lined with them. There are even a few feral shrubs that have self-seeded and are now growing along the highway and in some of the ditches. I usually do something each year to capture their beautiful aroma and create something sweet. In past years I’ve done flavoured sugar, and ice cream. This year it occurred to me that lilac would be a lovely macaron flavour.

Jump to the recipe.

IMG_7135.jpeg
IMG_7199.jpeg
IMG_7188.jpeg

I decided not to let the teeny issue of never having made macarons before stop me, and embarked on a few test batches. The general consensus seemed to be that while fiddly, macarons aren’t as difficult as their reputation would have you believe. I tried some basic ones with French meringue, but when I tried to make them that way with my lilac sugar it was too coarse and heavy to dissolve properly in the egg whites, so I decided to go with the Swiss meringue method, since that seemed to have a greater chance of getting everything dissolved. I bet that the Italian method would work really well here too and I might try that one next time.

The key thing I found with getting the texture right was making sure the mix was liquid enough before you finish the “macaronage” stage. My first few batches had some real problems with lumpy tops because I couldn’t get my mix to the right stage. I think I read so many times to “be careful not to overmix” that I was making the opposite problem. I also had to adjust some of the proportions and that helped me get the right consistency. Some of the recipes talked about a “honey” or “lava” consistency for the finished batter and I definitely found those images helpful. I think even this batch I just did could have been taken a little bit further, but they still ended up with fairly smooth tops.

IMG_7200.jpeg

I’m going to write this recipe as a bit of a choose-your-own-adventure where you can decide which meringue method works best for you. I will say that if you are using heavier sugar (like in this recipe) make sure you choose either Swiss or Italian or you’ll never end up with stiff peaks. I’m also going to suggest that you head on over to YouTube and watch some videos on your preferred meringue method (and a video of macaronage if you’ve never done these before) if you’re feeling a bit hesitant. There are very many different macaron methods, so which you use just depends on what you’re working with and what is most comfortable for you.

I’m not going into massive amounts of detail here with macaron technique, because I am not an expert. I think these macarons look pretty good, but there was still a bit of an issue I was having with hollow shells, so I am not the best resource when it comes to the technical side of things. I was such a fan of the flavours and overall result of these that I still wanted to share how I made them even if they weren’t technically perfect. I will share different tips and tricks that I found helpful as a beginner, though and I hope my explanations are complete enough. Please let me know in the comments if you have any questions!

IMG_7189.jpeg
IMG_7160.jpeg
IMG_7172.jpeg

The inspiration for the filling came from wanting to pair seasonal flavours together. I think that rhubarb and ginger are made for each other, and both of those pair so nicely with florals! Initially I thought I’d just fill it with a curd, but right before filling them I decided to change it up and use the curd in a buttercream. I think that was the right choice because the curd was just slightly too edgy for the lilacs as it was. The other thing I do when working with lilac is add a little bit of food dye. When you cook with lilac the delicate purples and pinks tend to shift to a sort of murky brown. I try to stay with natural colouring as much as possible when I’m cooking, but I also want my creations to be appetizing when I’m done with them too!

Lilac Macarons with Rhubarb Ginger Buttercream

Ingredients

    For the Macaron Shells:

  • 3 egg whites
  • 90 g lilac sugar (can sub regular unflavoured sugar)
  • 100 g finely ground almond flour
  • 100 g icing sugar
  • For the Filling:

  • 2 cups rhubarb
  • 1 cup sugar
  • 3 egg yolks
  • 1 cup unsalted butter, plus three tablespoons
  • 4 cups icing sugar
  • 2 tbsp ground ginger

Instructions

    For the Macaron Shells:

  1. Sift together the almond flour and icing sugar for the macaron shells. Some recipes call for blitzing this mixture in a food processor and sifting again to make it even smoother, but I had no trouble using mine as is just sifting one or two times to remove the larger lumps.
  2. For Swiss meringue (essential to do this or the Italian method if you are using heavy sugar like the lilac sugar) Heat a few inches of water to boiling in a pot large enough to hold the heatproof mixing bowl you are going to make your meringue in. Lightly whisk the egg whites and lilac sugar together and then put the bowl over the pot so that it is near to but not touching the boiling water. As this heats continue whisking the mixture until it starts getting very foamy. You want to make sure you’re getting all the sugar dissolved as you do this part. Don’t cook the eggs - you should be able to touch them with a finger and feel that they are warm but not too hot. At this point whisk the mixture on high speed until you reach glossy stiff peaks. One way to check if you are unsure is that if the bowl is turned upside down everything will stay put inside.
  3. Fold your almond flour and icing sugar mixture into the meringue slowly. I like to do one third at a time. Continue folding until you have fully incorporated all the ingredients, and your mix has a honey-like texture. It is a little bit counterintuitive to beat so much air into the egg whites only to deflate it all at this stage, but it is necessary or you won’t be able to pipe it, or make nice smooth tops. Some recipes have you count the number of folds you do, but for me it was easier just to watch until the mix had the right texture - it slowly flowed and I could make a figure-eight with what was dripping off my spatula. You also want to gently fold in any gel food dye you are using at this point - ideally right before you are finished all your folds so you aren’t overmixing.
  4. At this point preheat your oven to 300 degrees Fahrenheit. I know my oven runs cold, so I increased my temperature to 325 degrees.
  5. Transfer the batter to a piping bag fitted with a larger circular tip. In my case I just chopped the end off a piping bag and did it with no tip because that was what I had on hand. Some of them weren’t perfect circles, but they were pretty close.
  6. Pipe even circles onto a parchment or silicone lined baking tray. You can draw or print out a template if you like, but for me it was simple enough to freehand them. Pipe in a steady stream holding the bag completely vertically, and at the end give your piping bag a little twist to finish off the edge. If there is a little bit still sticking up it should settle down if your mixture was liquid enough.
  7. Take your baking tray and bang it on the counter a few times to try to get rid of any air bubbles and to try to settle any irregularities you might have remaining on the surface of the shells.
  8. Sprinkle a little more of the lilac sugar on the tops while the shells are still wet enough for it to stick. This is optional, but I think it looks beautiful and adds more of the lilac flavour and aroma to the finished macaron.
  9. Leave the tray somewhere for about 30 minutes until the tops dry out - this is what creates the unique shape with the smooth top and frilly “feet”. Before they go in the oven the tops should be dry enough that touching them lightly with a finger leaves no impression.
  10. Bake for about eight minutes, and then rotate the pan and bake for another seven. Bake times may vary with your oven, so watch them closely. You want them to be dry with no browning or caramelization.
  11. After the shells have cooled put them in an airtight container in the fridge for a day or so (if you can be that patient) before filling them. They will age into an even nicer flavour, but if you are pressed for time they will still be delicious if you fill them right away.
  12. For the Buttercream:

  13. Chop rhubarb and stew with a little water on the stove. Add sugar and simmer until mixture is thick. Add egg yolks (remember to add a bit of hot to your eggs to temper them first) and cook on medium-low until thick. Don’t let this mixture boil. Press through a sieve and stir in three tablespoons unsalted butter. Allow to cool to room temperature or put in the fridge until you plan to make the buttercream.
  14. Bring the rhubarb curd and the rest of the unsalted butter to room temperature and then cream them together in a stand mixer using the paddle attachment.
  15. Add the powdered sugar and ground ginger (sifting out any large chunks beforehand) and continue to beat until there are no lumps. If your rhubarb for the curd was on the greener side add some gel food colouring (I did - remember that it’s better that food looks appetizing than being a stickler for absolutely no unnatural colouring!).
  16. Pipe the buttercream in the centre of a macaron shell and sandwich it together with another. Ideally speaking each layer should be the same thickness as the others for a uniform and balanced look. I piped mine with the star shaped piping tip because that was all I had on hand so I tried to make it look unique. You can make yours look more traditional if you like, or experiment with whatever you think would look most beautiful!
May 30, 2020 /Kelsey Fast
baking, edible flowers, lilac, macarons, cookies, spring
Eat
Comment
IMG_2069.JPG

Sumac Ginger Honey Hearts

February 06, 2019 by Kelsey Fast in Eat, Find

Hello! There used to be a whole section here with me describing the amazing Flourist sifted red spring flour I use in my baking. I was trying to add something to this and some other old articles, and I’m not sure how but it all got deleted! Continue reading for the recipe, and some more details about how to find and use sumac.

{Jump to the Recipe}

Sumac berries infusing in cold water.

Sumac berries infusing in cold water.

Strained and completed sumac infusion.

Strained and completed sumac infusion.

I have to admit, that making these cookies is a bit of an involved process. This is especially true if you are foraging the sumac, and processing it yourself as I did. Here are some instructions that are very helpful if you want to go that route. If not, you can usually find dried and ground sumac at specialty spice stores, and I even saw it at my local Bulk Barn (bonus shopping here because at some locations you can bring your own container and your purchase will be zero-waste). I’m sure there are online options as well.

Sumac is a shrub that grows native in many areas of North America. You can identify it by it’s compound leaves, and large, compact berry clusters that stick straight up from the branches. The berries aren’t juicy, and they are covered by tiny hairs, and malic acid which gives it the distinct sour, almost citrus-like flavour. In most areas you’ll want to harvest the berries in July, and before any large rainfall hits as this will wash away much of the malic acid. That said, it’s not unheard of that sumac berries are still harvestable later on in the year - just rub them with your finger, and then lick it to see if your finger tastes sour (that will be the malic acid that transferred to your finger). If they still taste sour they are still good to use! The easiest way of processing them is just to bring the berry clusters home and let them dry thoroughly. Store them somewhere they won’t get dusty (I have mine from last summer crammed in a 1/2 gallon vintage mason jar) and they are ready to use whenever you need them.

IMG_2067.JPG

Some of you may have been told that Sumac is poisonous. In the plant world there are many different common names, and sometimes poisonous and non-poisonous plants even share the same one. This is the case with sumac. Poison sumac (Toxicodendron vernix) only grows in swampy areas, whereas the sumac we are looking for (Rhus glabra, Rhus typhina, or Rhus copallina, depending on the species that is local to you) prefers dry landscapes. It also has red berries, whereas poison sumac has white. There really is no chance that you will mistake the two. One thing you will want to be cautious about, is that sumac is related to mangoes, cashews, and poison ivy. If you are especially sensitive to some of these other plants please take caution if you are trying sumac. This post on identifying sumac varieties from Eat the Weeds is an excellent resource, but please make sure you consult more than one resource before eating anything you have foraged.

As always please take care when foraging, and make sure you are 100% certain of what you are gathering and eating. The best option is learning from someone who is an expert on the local plants for your area. Use more than one resource when identifying plants that are new to you like field guides, and reputable online resources - the more specific to your location the better. Spend a lot of time examining the different features of the plant you are looking for. Never be content to identify a plant by one feature alone.

IMG_2070.JPG

Now to explain more about making the cookies themselves! They do take some time to make, but I promise you the end result is worth it! I originally made these at Christmas time (being inspired by traditional Danish Christmas cookies like Honninghjerter, and Pebernødder) and they were the first to disappear from the cookie platters! The holidays were very busy, and even though I had originally planned to post the recipe back then, but I ran out of time. I think that turned out to be a good thing in the end though, because they are also so perfect for Valentine’s Day!

IMG_1682.JPG

You’re going to need to start the sumac infusion ideally two days before you want to have the cookies (although you could get away with the day before, but they are better if you have a bit longer for letting the dough chill). All of the colour in these cookies is completely natural - there is no food colouring at all! The lovely pink in the glaze comes from the colour of the sumac infusion itself, and that is also where the sour flavour from the sumac shines the brightest. Since lemon or other citrus is often paired with ginger in holiday baking, I thought sumac would be a delicious pairing with the ginger and I set out working on making a ginger-forward, spice cookie that blended well with the natural sour, fruity flavour of the sumac.

IMG_1914.jpeg

The day after your sumac has infused, start making your dough. This is essentially a sugar cookie with a lot of spices that gets rolled out a little thicker than normal. You’ll also want to make sure you have time to chill the dough for a day if possible. The flavours need time to mingle together in the dough before baking. if you have to speed things up at least chill the dough for a couple hours. This will also make rolling them out easier.

Make sure you leave a fair amount of room between the cookies on the sheet because they tend to puff up a bit, and spread ever so slightly. I also put in the instructions to roll them out a bit thicker than many of these are in the photos. This is because we found out after eating them all that the thicker ones were better!

IMG_2066.JPG

When your cookies are baked, decorating them is very fun! Prepare your sumac glaze to be a little runnier than your ginger one. You’ll be dipping the cookies into this glaze. Try to let as much excess run off back into the bowl as you can. I found that I had a lot of glaze pooling under the cookies as I let them dry on parchment paper. This wasn’t necessarily a bad thing because it tasted really good to have extra glaze, but it was a little less professional looking, and the glaze didn’t go as far. If this happens to you too and you run out of glaze just make a little more and keep going. No big deal!

When the cookies are all dipped let them dry before drizzling the ginger glaze over top. This will make sure that when you sprinkle the candied ginger over top it will only stick to the white icing. I did some with candied ginger, and some without, but everyone ended up liking the ones with ginger better. If you’re a little more sensitive to the heat of ginger feel free to leave that step out - they look and taste great without it too!

IMG_2068.JPG

Sumac Ginger Honey Hearts

Ingredients

    For the Cookies

  • 3 cups flour
  • 1 cup butter
  • 3/4 cup sugar
  • 3/4 cup light honey
  • 1 large egg
  • 2 tbsp sumac infusion (prepared ahead of time)
  • 2 tbsp dried sumac powder
  • 1/2 tsp salt
  • 1 tsp vanilla extract
  • 2 tsp ground ginger
  • 2 tsp fresh ginger (grated, or very finely minced)
  • 1/2 tsp nutmeg
  • 1/2 tsp white pepper
  • For the Glaze and Decoration

  • 3 cups icing sugar (approximate)
  • 2 tbsp sumac infusion
  • 1 tsp ground ginger
  • 1 tsp vanilla
  • 1 tbsp milk/water
  • 2 tbsp corn syrup (divided)
  • 1 cup candied ginger (to be finely minced)

Takes two days, serves several dozen cookies depending on the size of the cookie cutter used.

Instructions

  1. Two days before you want the finished cookies, prepare you sumac infusion. If you are using fresh/dried sumac berries, add a couple drupes worth of berries to a pint jar, and combine with 1 cup cold water. Leave in the fridge overnight. If using sumac powder you either purchased or prepared yourself, add 3 tbsp powder to one cup of cold water and leave in the fridge overnight.
  2. The day before you want to bake the cookies prepare the dough. This dough really needs to be chilled overnight to let the flavours come into their own more fully before baking. If you don’t have time for this, at least chill the dough for a couple hours, but overnight will be better.
  3. Cream butter, sugar, and honey together until well emulsified. You shouldn’t be able to see any sugar crystals, and the resulting mixture should be light and fluffy.
  4. Add the egg, vanilla, sumac powder, 2 tbsp sumac infusion, and continue to cream the mixture until well emulsified. It should all look like one cohesive mixture with no visible clumps.
  5. Add the salt, baking soda, and spices. Mix well.
  6. Last of all, add the flour slowly, mixing on low. Depending on the humidity levels of the flour and your kitchen you might need to add a little more or less, so keep an eye on the dough as you add the flour and stop early, or add a little extra depending on how it looks and feels. Don’t let the dough get too dry, though. It will firm up and be easier to work with after it spends some time in the fridge, and you don’t want your finished cookies to be too floury. Aim for your dough to be fairly sticky at this point, but not overly runny.
  7. Transfer to an airtight container and leave in the fridge overnight, or at a bare minimum a couple hours.
  8. At this point preheat your oven to 350 degrees Fahrenheit. Roll out the cookies to a 1 cm (or just under 1/2 inch) thickness, using a little more flour on your work surface and rolling pin to keep the dough from sticking. Cut into hearts, and continue this process until all your dough is used up. I don’t find too big of a difference after re-rolling the excess dough a few times. I also feel that ingredients - especially foraged ones - are precious, so I like to make sure I use as much of my dough as possible. The yield here will depend on the size of cookie cutter you use, but you should end up with a couple dozen cookies either way.
  9. Leave some space between the cookies on the baking trays, because they do tend to puff up and spread just a little bit, but they will definitely still maintain their heart shape after all of this.
  10. Bake the cookies until they are just barely beginning to brown on the edges. This will be about 15 minutes per tray, depending on how your oven runs. Mine seems to run a bit cooler than most, so I often end up needing to leave things in a little longer. You can also usually tell when the cookies are almost done because you’ll start to smell them as they bake.
  11. Remove the cookies from the oven and allow them to completely cool before you start decorating them.
  12. While waiting for the cookies to cool this is a good time to start preparing your glazes. You’ll do one in a larger amount with the sumac infusion, and one with ginger powder and vanilla.
  13. Combine 2 cups icing sugar, 1 tbsp corn syrup, and sumac infusion to make your first glaze. Add the infusion slowly so that you get the right consistency. You want it to be thick enough to coat whatever is dipped in it, but runny enough that the excess will still drip off when you dip the cookies. If you overdo it, you can always add more icing sugar to thicken.
  14. For your second glaze, add the remaining cup of icing sugar and corn syrup, as well as the ginger powder, vanilla extract, and milk/water (go slowly as you add this - you may not need it all). You want this glaze to be slightly thicker than the other since it will be used as a drizzle over the finished cookies.
  15. Dip all the cookies in the sumac glaze first, allowing the excess to drip back into the bowl as much as possible rather than just leaving them to drip on the parchment paper or whatever you’re going to let them dry on (this just makes a tidier looking end result - if you don’t get it all don’t worry you’ll just have some of the glaze pooling underneath the cookie). I started having problems with pooling, so I started leaving the freshly dipped cookies on a cooling rack for a few minutes before transferring to parchment to continue drying.
  16. Drizzle cookies with the ginger glaze, and while this is still wet sprinkle with the very finely chopped candied ginger. Allow this to dry completely before you handle the cookies.

While the prize for the giveaway on my Instagram feed was sponsored by GRAIN, this post is not. I have been their customer for the past few months and wholeheartedly endorse their product based on my own experience. All thoughts and opinions expressed are completely my own.

February 06, 2019 /Kelsey Fast
baking, cookies, eat, foraging, food, in my kitchen, recipe, sumac, GRAIN
Eat, Find
Comment
IMG_1902.JPG

Sumac Curd and Frangipane Galette des Rois for Epiphany

January 08, 2019 by Kelsey Fast in Eat

This year our Epiphany celebrations were pretty low-key, although I did spend a couple days making a really gorgeous galette des rois for our dessert. Even though we didn’t have a big event or anything to write that much about both the glaze for the ham and the dessert featured locally foraged sumac that I gathered in the summer it seemed appropriate to write something up about them. This is “A Forager’s Home”, after all! I am also super happy with how the galette turned out, so even though you wouldn’t be able to make it in time for Epiphany this year, I highly recommend that you try it out sometime for some different event!

My home processed sumac powder.

My home processed sumac powder.

Sumac grows everywhere in my neighbourhood. It is native to North America, and loves a dry environment, so a lot of people here have used it in the landscaping. If you can’t find some wild, you might see some in a neighbour’s yard and they probably won’t mind sharing a few of the bright red cones with you. Just make sure you ask permission for any foraging you’re doing on private property! There are lots of tutorials online for how to process your own sumac, but I’ve found the easiest way is to dry the drupes, and then pulse them in a blender (this removes the berries from the large, very hard seeds), and then sift the red powder out from the larger pieces leftover. For this recipe you can just use the whole berry clusters submerged in water rather than going through the trouble of grinding them, or you can do what I did - pulse the water and drupes together so they will infuse to their fullest potential.

Epiphany dinner this year was ham, mashed potatoes, roasted veggies (roasted in the pan underneath the ham for maximum deliciousness), and Brussels sprouts (roasted with olive oil, balsamic vinegar, and dried cranberries).

Epiphany dinner this year was ham, mashed potatoes, roasted veggies (roasted in the pan underneath the ham for maximum deliciousness), and Brussels sprouts (roasted with olive oil, balsamic vinegar, and dried cranberries).

The dinner was delicious, although the cut of ham we had was a little difficult to work with. I love the quality of the pork we received from our friends’ farm, but the butcher seemed to do some interesting things to it. There was a lot of connective tissue in the middle of what was labelled a “bone in ham” (note the conspicuous lack of a bone). I’m not sure if this was just because one large ham was portioned into smaller roasts, or because it was actually boned, and that this was the result. Either way I was disappointed not to have the bone to do a split pea soup with afterward, but sometimes that’s how things go.

I am happy to report that the honey glaze I wrote about a few days ago worked perfectly on this ham. I used Jaime Oliver’s method of poaching the ham first, and then finishing it in the oven. I think it turned out fairly nicely although I’m not sure if the poaching was necessary or not. I may have left it in the oven too long afterward because some of it was a bit on the dry side. However, I am planning on using the poaching liquid to use as soup stock now since I don’t have a bone in this ham to make any with.

Sumac drupes infusing in water. Such a beautiful colour!

Sumac drupes infusing in water. Such a beautiful colour!

The main thing I wanted to share in this post was the recipe for the galette. You can use store-bought or make your own puff pastry. I recently did a workshop at Blue Bunch Farm on making laminated pastry, so I thought I’d give it a go making my own. I am really pleased with the result, although I am sure it doesn’t look terribly professional. I have to say that now that I understand the process of making puff pastry it isn’t as intimidating as it seemed, and if you’re interested in giving it a shot I’d say go for it! My pastry has a really rich colour and flavour because I used GRAIN Red Spring Wheat Sifted flour.

I started it all by infusing some sumac drupes in water overnight in the fridge (you can also use ground sumac you purchased for this infusion - just try googling a recipe for “sumac tea”, or do a bit of experimenting to get the right ratio of sumac to water). The resulting liquid was such a gorgeous colour I was immediately excited to make it into a curd for the galette. Sumac has a tangy, fruity flavour reminiscent in some ways of citrus. To turn the sumac liquid into a curd, you follow the basic process for making a lemon curd. Combine the sugar and eggs, add them into the sumac liquid in a double boiler, and cook it gently - stirring constantly - until thick. Add a few pats of unsalted butter at the very end (optional if you need to be dairy free - this is just for looks and a bit of texture, but it will still be delicious without) and you’re done! The only downside was that If found once the sumac infusion was heated it lost it’s brilliant red colour and turned sort of brownish. Because I knew I was going to be layering this with frangipane I decided to add some food colouring to make it a bit more visually appealing. I don’t love using artificial colour in my recipes, but we really do eat with our eyes first, and I wanted the two layers to be visually distinct in the finished tart, so I felt it was necessary. If you have strong feelings about it feel free to omit it. It will still taste delicious!

Sumac infusion.

Sumac infusion.

Finished sumac curd.

Finished sumac curd.

For the frangipane, I’m sure my methods weren’t exactly orthodox, but they were effective! I just threw everything together in my Vitamix blender and pureed until it was all smooth. This may not be typical frangipane, but it was delicious, and very smooth. I was happy with the result in the end, so either copy my method, or follow something more traditional. Either will be just perfect.

For the puff pastry, I used the recipe I learned from Monika at Blue Bunch Farm during my workshop (I’ll be reviewing my experience with the workshops there in a future post, so if you want more information “watch this space”). I really like making it, and the most difficult part is just the amount of time it takes to put it together. Feel free to use store-bough if you like, but this will taste a whole lot more delicious if you try to find some that uses real butter in their recipe. I also found I had very little problem with the filling escaping my pastry this year. In my previous post about Epiphany you can see the frangipane seeping out the sides of my tart. My finished tart dough was flavourful, and very flaky. I think it has a bit more personality than one made with conventional flour as well since the GRAIN flour I used is sifted, but nothing at all like your standard bleached all purpose flour. It’s not exactly whole wheat, but there is a lot more of the whole grain in the finished product which leads to more flavour. This flour is also milled so freshly that you need to keep it in the fridge or freezer, because it will go rancid at room temperature. It’s beautiful flour and I love working with it.

Once you have your pastry and your fillings, cut in a circular shape, spread a layer of frangipane, and then cover that with a layer of sumac curd. Put the top layer of pastry over everything and crimp the edges tightly so that none of your filling escapes. Make surface level slits in a pattern you like on top, and brush with an egg wash. I also sprinkled some sugar over the top just to make it all a little more special and delicious.

Galette des rois! Put one whole almond in the filling if you want to be really traditional. Whoever finds it in their piece wins a special prize!

Galette des rois! Put one whole almond in the filling if you want to be really traditional. Whoever finds it in their piece wins a special prize!


Sumac Curd Frangipane Galette des Rois

Ingredients

Sumac Curd

  • 1 cup sumac infused water (pulse 3-5 sumac drupes in 1 cup water in a blender and leave in the fridge overnight to infuse)
  • 5 Egg Yolks
  • 1/2 cup sugar
  • 5 tbsp unsalted butter

Frangipane

  • 1/2 cup freshly ground blanched almonds
  • 1/4 cup butter
  • 1/4 cup sugar
  • 1/4 cup butter
  • 1 egg
  • 1 tsp vanilla

Finished Tart

  • 1 recipe puff pastry
  • 1 egg
  • 1 tbsp cream
  • sugar for dusting

Takes Several Hours, serves 1 tart.

Instructions

  1. To make the curd, whisk the egg yolks into the sugar, and then combine with the sumac infused water. Cook in a double boiler until mixture is thick and coats the back of a spoon. You should be able to see trace lines when you draw your spoon/whisk through while stirring. Remove from heat and stir in butter. Push through a fine mesh sieve just in case some of the egg didn’t cook perfectly.
  2. Combine all the frangipane ingredients in a high powered blender or food processor, and blend on high until smooth. Alternatively whip the butter and sugar together in a mixer until thick and creamy and you can see no sugar crystals. Add the egg and emulsify, and then stir in the vanilla and ground almonds. Beat the mixture until thick, creamy, and homogenous.
  3. Roll out your puff pastry according to your recipe’s instructions and cut two circles. I used an 8 inch cake tin as a pattern to trace. Spread a thick layer of frangipane, leaving a little bit uncovered around the edges. Cover that layer with a layer of sumac curd, and then cover with the other circle of pastry. Crimp edges so that no filling will escape.
  4. Using a sharp knife cut some steam vents on top of the pastry, but don’t cut all the way through to the filling. Whisk the egg and tbsp of cream together and brush on top of pastry. To get a really burnished crust do this in several layers, allowing each coat to dry before adding the next. Sprinkle with sugar
  5. Bake in a 425 degree Fahrenheit oven for about 5-10 minutes until the pastry has started to colour. At this point turn the temperature down to 375 degrees, and continue baking for roughly 20 more minutes, or until your pastry is obviously puffed, golden, and fully cooked.
January 08, 2019 /Kelsey Fast
baking, Epiphany, food, foraging, holiday, pie, recipe, sumac
Eat
2 Comments

Douglas-Fir Sugar Cookies

December 07, 2018 by Kelsey Fast in Eat, Find

It’s beginning to look at least a little bit like Christmas over here! There isn’t all that much snow compared to the last couple years, and November was unseasonably warm. No matter what the weather is doing Christmas is on its way and I’ve got a great sugar cookie recipe to share with you!  

Douglas-fir might be a common choice for Christmas trees, but the one behind this plate of cookies is an artificial tree so don’t use this as an example if you’re trying to make a positive ID!

Douglas-fir might be a common choice for Christmas trees, but the one behind this plate of cookies is an artificial tree so don’t use this as an example if you’re trying to make a positive ID!

Where I live Douglas-fir trees are one of the dominant features in our landscape. You can see a whole bunch of them in the panorama shot below of my old backyard view. Pseudotsuga menzesii aren’t a true fir tree at all, and come in a couple varieties - one coastal, and the other inland. The latter ‘Rocky mountain Douglas-fir’ (or pseudotsuga menziesii var. glauca) is what we typically find in our area. They have a few different features, but their uses are the same. I haven’t had a chance to taste the coastal Douglas-fir, so I can’t comment on the difference, but this recipe could be made with either. The main thing I’ve observed is that the cones are slightly different shapes, and there are a few other differences in the overall growth habit of the trees.

There are very few naturally occurring coniferous trees in the BC Interior that are poisonous - and in fact all trees in the family Pinaceae which includes the Douglas-fir are completely edible. The main danger you might come across the Western yew. This is not actually a coniferous tree, but it is an evergreen and is very toxic, so make sure you know what you’re gathering. You can tell it’s yew because of the way the needles connect to the branches, and the little red “berries” called arils that grow on it. These arils themselves are technically edible, but the seed inside them, and the branches they grow on are one of the most toxic substances growing in nature. I don’t say this to scare you off foraging from trees, but rather to encourage caution and that you’ve studied enough to feel confident on your ID. Eat the Weeds has an excellent article about yew that covers much more than I have time for here, and the Provincial Government of BC has a really great online guide to common native trees in this area.

The flavoured sugar I made this spring/summer was using the green cones of the Douglas-fir. I really loved the way the sugar turned out, and was already dreaming of making Christmas cookies in the shape of Christmas trees, using actual Christmas trees as one of the ingredients! These are really easy to identify if you’re a little nervous about your tree identification skills. If the cones you’ve gathered look like my photo below you can be fairly confident that you’ve not gathered anything poisonous, but please don’t rely on my photos alone for identification purposes. Pick up a reputable field guide (like the BC Government one I linked to above), and use more than one feature as your basis for identification. Douglas-fir cones have these little bracts that stick out which makes them easy to spot. There is a legend that a little mouse tried to hide in the cones from a forest fire and got stuck there. When the cones are fully dried (like in the wreath I have in my shop) you can see how the bracts look like the hind feet and tails of little mice! This makes them really easy to identify.

This sugar cookie recipe is great using the flavoured sugar (and I’m already thinking about making some lilac or rose flavoured ones with the floral sugars I made earlier this summer too), but it would be equally as good as one done with just plain granulated sugar. I also want to go out and try to make some sugar with the mature needles of the tree and see how that tastes. I was kind of hoping that the sugar and the resulting cookies would be greener, but as you can see the outside of the cones were a very light green, and when you cut them open they are white inside, so what I ended up with was a very light coloured sugar that actually turned more yellow in time, and didn’t colour the resulting cookies at all. I also want to do a taste comparison with the mature needles because I think the taste would be stronger, and I want to know if that would be a good thing, or an overpowering thing! Most of the advice you find online about using pine/fir/spruce needles for food is that you usually gather the immature tips in the spring when they are the most tender. If I end up doing a follow up experiment I’ll definitely be posting the results either in a follow-up post, or editing this one to reflect it!

As it is, the taste of the fir cones is fairly subtle, but it comes through such a simple recipe like this in a really pleasing way. You aren’t going to raise any eyebrows if you include these on your holiday cookie platter, but they still have a little extra something in their flavour profile that sets them apart from your average sugar cookie. The flavoured sugar when it is fresh tastes almost like a Sour Patch Kids candy - acidic and almost citrusy. This is because Douglas-fir naturally contains a lot of vitamin C. I found that over the months of storage the brightness in the flavour mellows somewhat and you notice more of the resinous tree flavours that were more of a backdrop when the sugar was fresh.

Here you can really see the little flecks of Douglas-fir cones in the dough.

Here you can really see the little flecks of Douglas-fir cones in the dough.

You don’t need anything special for this recipe, although I highly recommend GRAIN flours. They’re not paying me to say this, but I so appreciate what they are doing, and the quality of the flour they produce. I know exactly which place in Canada (Etzikom, AB) the wheat for my flour was grown in and that makes me very happy.

I also like to use a marble rolling pin (because of the weight of it, and because you can throw them in the freezer to make them really cold for rolling out pastry), and I love the shape of this vintage cookie cutter I found in an antique store even if the handle and backing part make it a little tricky to see if you are overlapping your cookies when you cut them.

I also found that chilling the dough for this recipe was really important. It helped the flavour from the sugar seep into the dough more, and also helped make it easier for rolling. It ended up being a bit on the sticky side for sugar cookies, so you’ll need to flour your rolling/cutting surface, but try not to add too much or else that’s all your cookies will taste like. Just use the bare minimum to keep things from sticking. Also please note that the temperature in the recipe below is not a typo! I used to think that you were supposed to cook sugar cookies at a hot temperature for a very short time, but my pastry chef friend showed me another way that in my opinion results in a much nicer cookie. You’ll need between 20-25ish minutes per batch in the oven, but it is so worth it in the end for the overall texture so just trust me and give it a try. You’ll also need to rotate the tray in the oven, and what I mean by that is halfway through the baking time (after 10-13 minutes) you’ll pull the tray out and turn it so that the cookies that were in the front of the oven are now in the back. This was another step that no one really taught me before, but it helps ensure the cookies are all baked evenly.

Douglas Fir Sugar Cookies

Ingredients

  • 1 cup butter
  • 1 cup Douglas fir Sugar
  • 1 large egg
  • 1 tsp vanilla
  • 1 tsp baking powder
  • 1/2 tsp salt
  • 2 cups flour (plus more for dusting when rolling dough)

Takes 1 hour, serves 5 dozen.

Instructions

  1. Preheat your oven to 250˚F.
  2. Cream butter and sugar in mixer until butter is light and fluffy, and no granules of sugar remain. This step is particularly important for these cookies because the homemade flavoured sugars tend to be on the coarser side and you don’t want big sugar crystals in your finished cookies.
  3. Add the egg and vanilla and cream until emulsified and the mixture is homogenous.
  4. Sift dry ingredients together in a separate bowl, and add slowly to the egg/sugar/butter mixture.
  5. Chill dough in the fridge for a minimum of two hours or up to two days. Dust counter with flour roll to 1/4 inch thickness. Cut into desired shapes. You can choose to re-roll the scrap dough as many times as you like but the more you do it the more flour will be incorporated and the quality of the cookies will suffer some, but not to the point of making them less delicious. I chose to use all my dough since my flavoured sugars are a bit precious and I wanted to make as many cookies as possible without wasting.
  6. Place on parchment lined baking sheets in preheated 250˚F oven. Bake for 10-13 minutes, rotate cookie sheet so the cookies in the back are now in the front, and bake for another 10-13 minutes until cookies are baked through but have not begun to colour on the edges.
December 07, 2018 /Kelsey Fast
cookies, baking, foraging, food, holiday, Winter, Douglas-Fir, Christmas
Eat, Find
2 Comments
  • Newer
  • Older

Terms and Conditions | Privacy Policy | Shipping and Returns

Powered by Squarespace