Sumac Curd and Frangipane Galette des Rois for Epiphany
This year our Epiphany celebrations were pretty low-key, although I did spend a couple days making a really gorgeous galette des rois for our dessert. Even though we didn’t have a big event or anything to write that much about both the glaze for the ham and the dessert featured locally foraged sumac that I gathered in the summer it seemed appropriate to write something up about them. This is “A Forager’s Home”, after all! I am also super happy with how the galette turned out, so even though you wouldn’t be able to make it in time for Epiphany this year, I highly recommend that you try it out sometime for some different event!

My home processed sumac powder.
Sumac grows everywhere in my neighbourhood. It is native to North America, and loves a dry environment, so a lot of people here have used it in the landscaping. If you can’t find some wild, you might see some in a neighbour’s yard and they probably won’t mind sharing a few of the bright red cones with you. Just make sure you ask permission for any foraging you’re doing on private property! There are lots of tutorials online for how to process your own sumac, but I’ve found the easiest way is to dry the drupes, and then pulse them in a blender (this removes the berries from the large, very hard seeds), and then sift the red powder out from the larger pieces leftover. For this recipe you can just use the whole berry clusters submerged in water rather than going through the trouble of grinding them, or you can do what I did - pulse the water and drupes together so they will infuse to their fullest potential.

Epiphany dinner this year was ham, mashed potatoes, roasted veggies (roasted in the pan underneath the ham for maximum deliciousness), and Brussels sprouts (roasted with olive oil, balsamic vinegar, and dried cranberries).
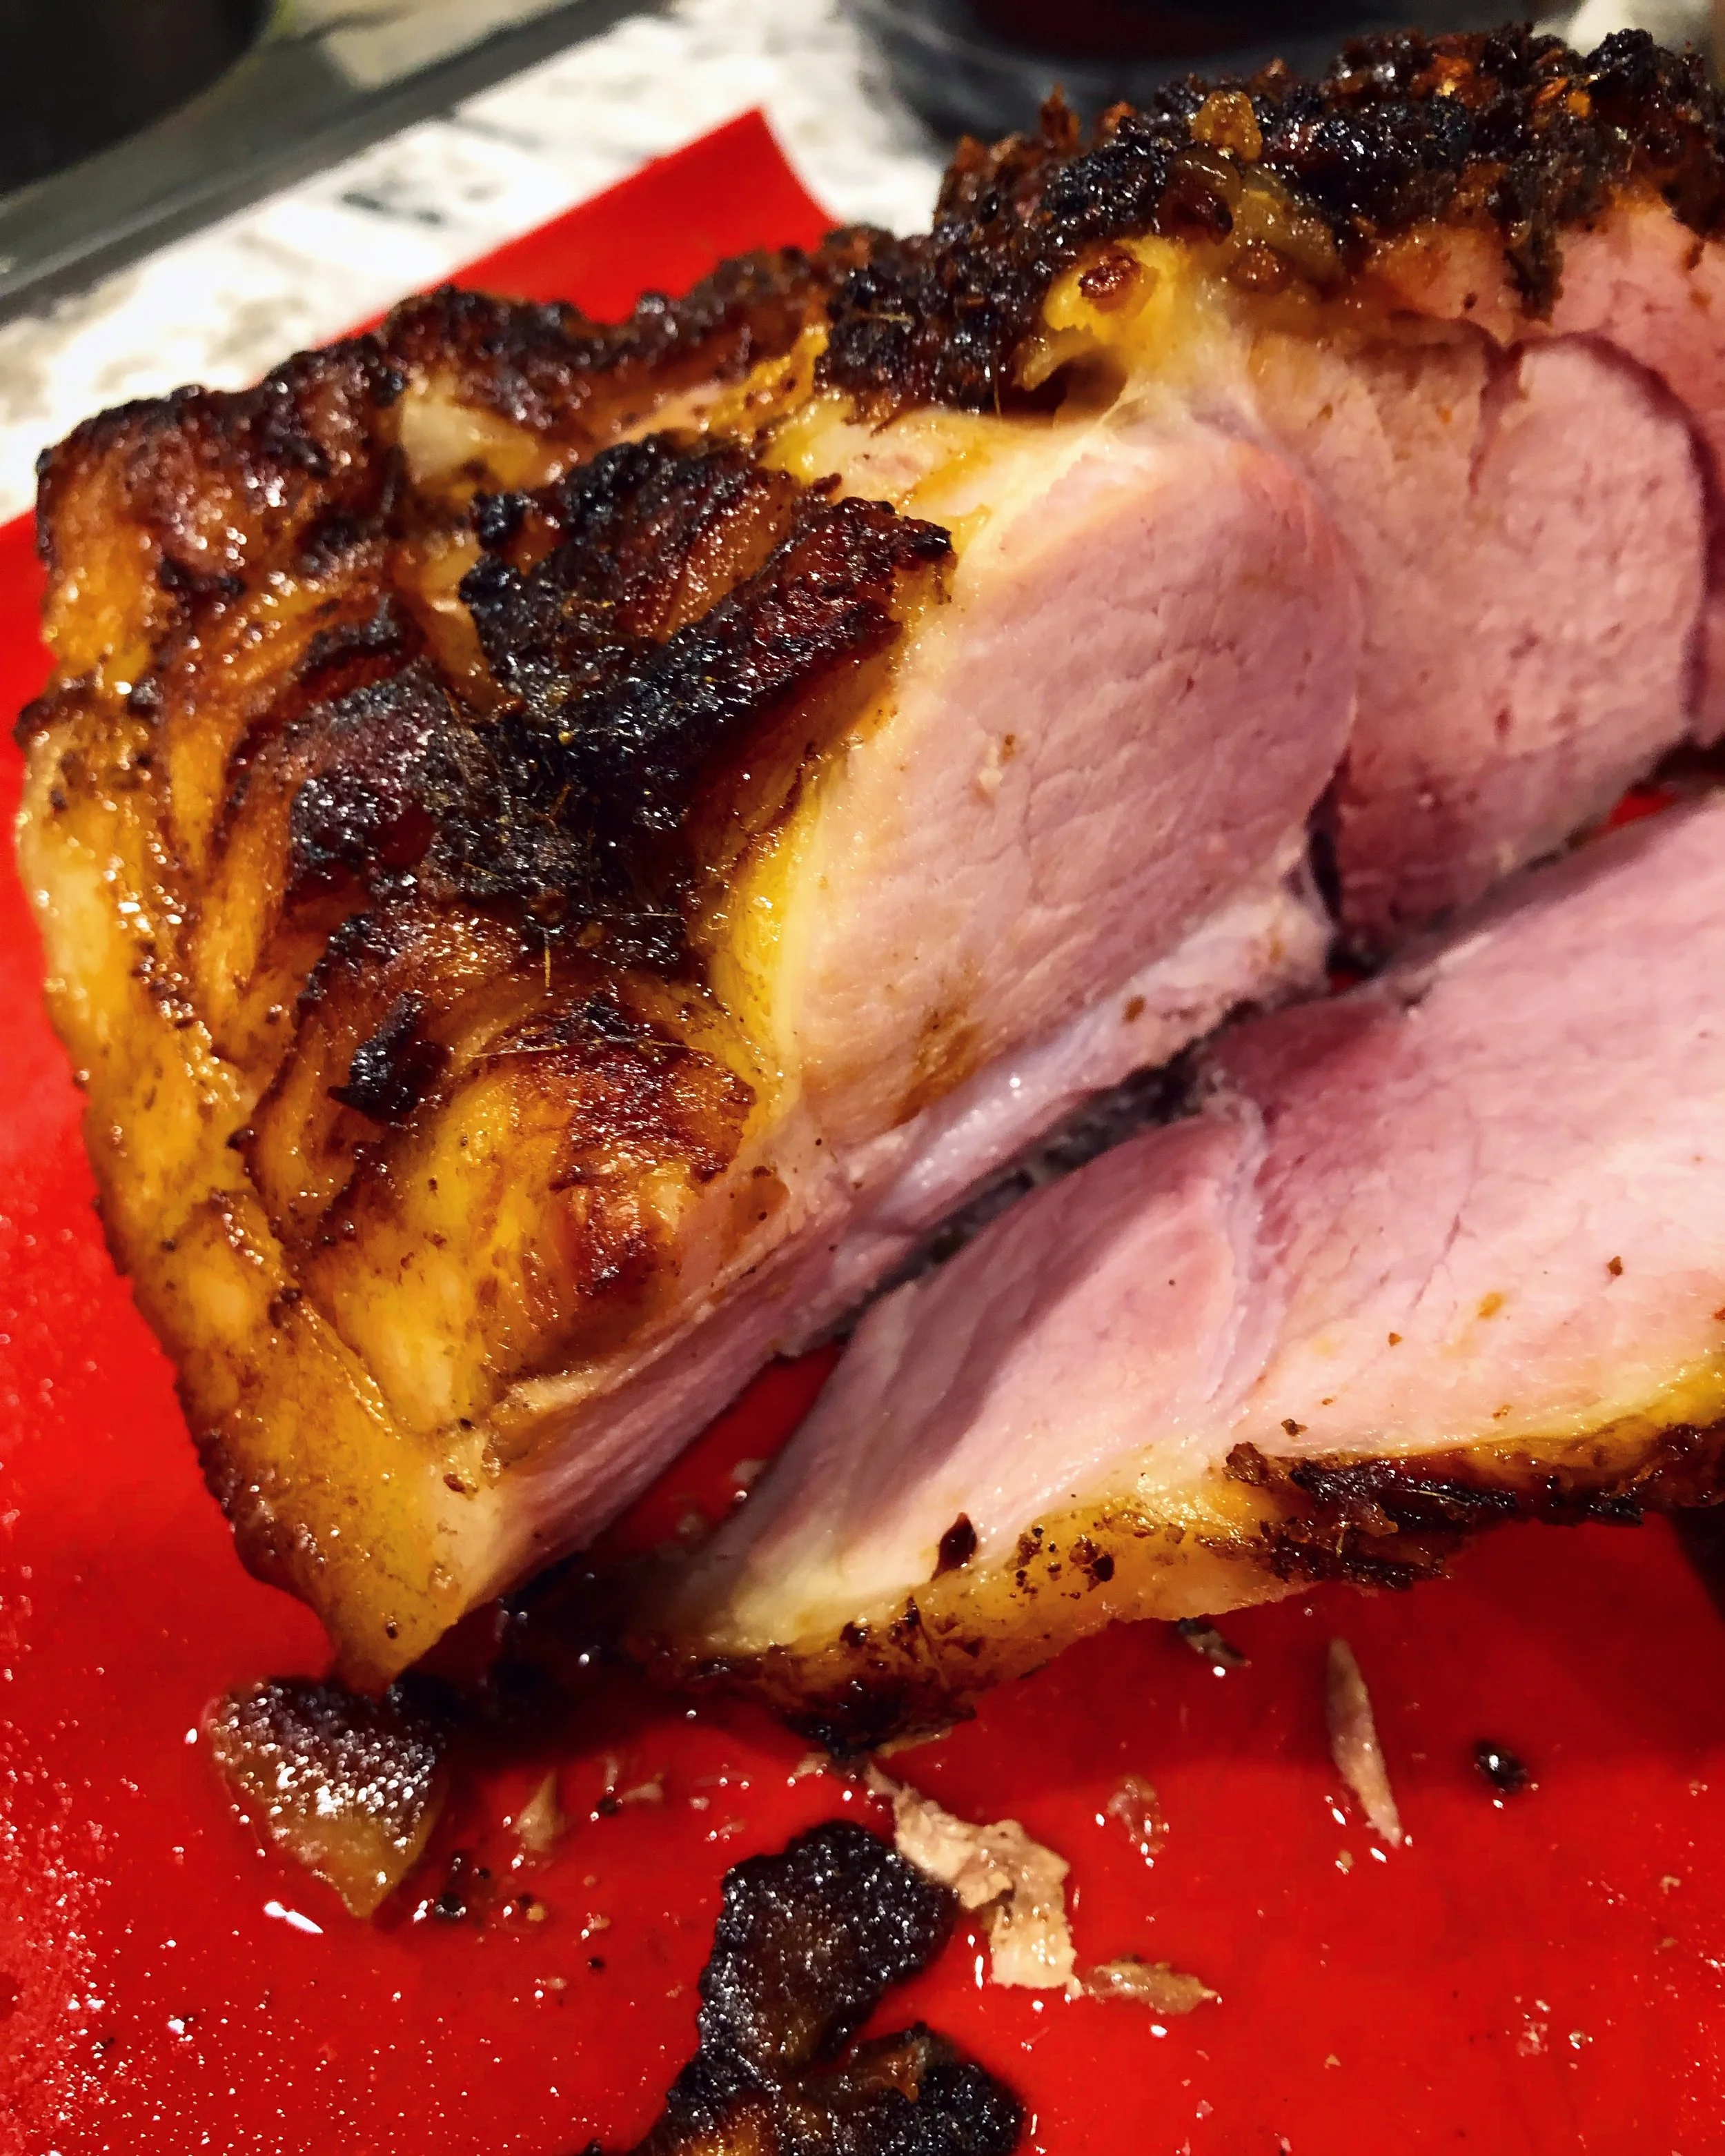
The dinner was delicious, although the cut of ham we had was a little difficult to work with. I love the quality of the pork we received from our friends’ farm, but the butcher seemed to do some interesting things to it. There was a lot of connective tissue in the middle of what was labelled a “bone in ham” (note the conspicuous lack of a bone). I’m not sure if this was just because one large ham was portioned into smaller roasts, or because it was actually boned, and that this was the result. Either way I was disappointed not to have the bone to do a split pea soup with afterward, but sometimes that’s how things go.
I am happy to report that the honey glaze I wrote about a few days ago worked perfectly on this ham. I used Jaime Oliver’s method of poaching the ham first, and then finishing it in the oven. I think it turned out fairly nicely although I’m not sure if the poaching was necessary or not. I may have left it in the oven too long afterward because some of it was a bit on the dry side. However, I am planning on using the poaching liquid to use as soup stock now since I don’t have a bone in this ham to make any with.

Sumac drupes infusing in water. Such a beautiful colour!
The main thing I wanted to share in this post was the recipe for the galette. You can use store-bought or make your own puff pastry. I recently did a workshop at Blue Bunch Farm on making laminated pastry, so I thought I’d give it a go making my own. I am really pleased with the result, although I am sure it doesn’t look terribly professional. I have to say that now that I understand the process of making puff pastry it isn’t as intimidating as it seemed, and if you’re interested in giving it a shot I’d say go for it! My pastry has a really rich colour and flavour because I used GRAIN Red Spring Wheat Sifted flour.
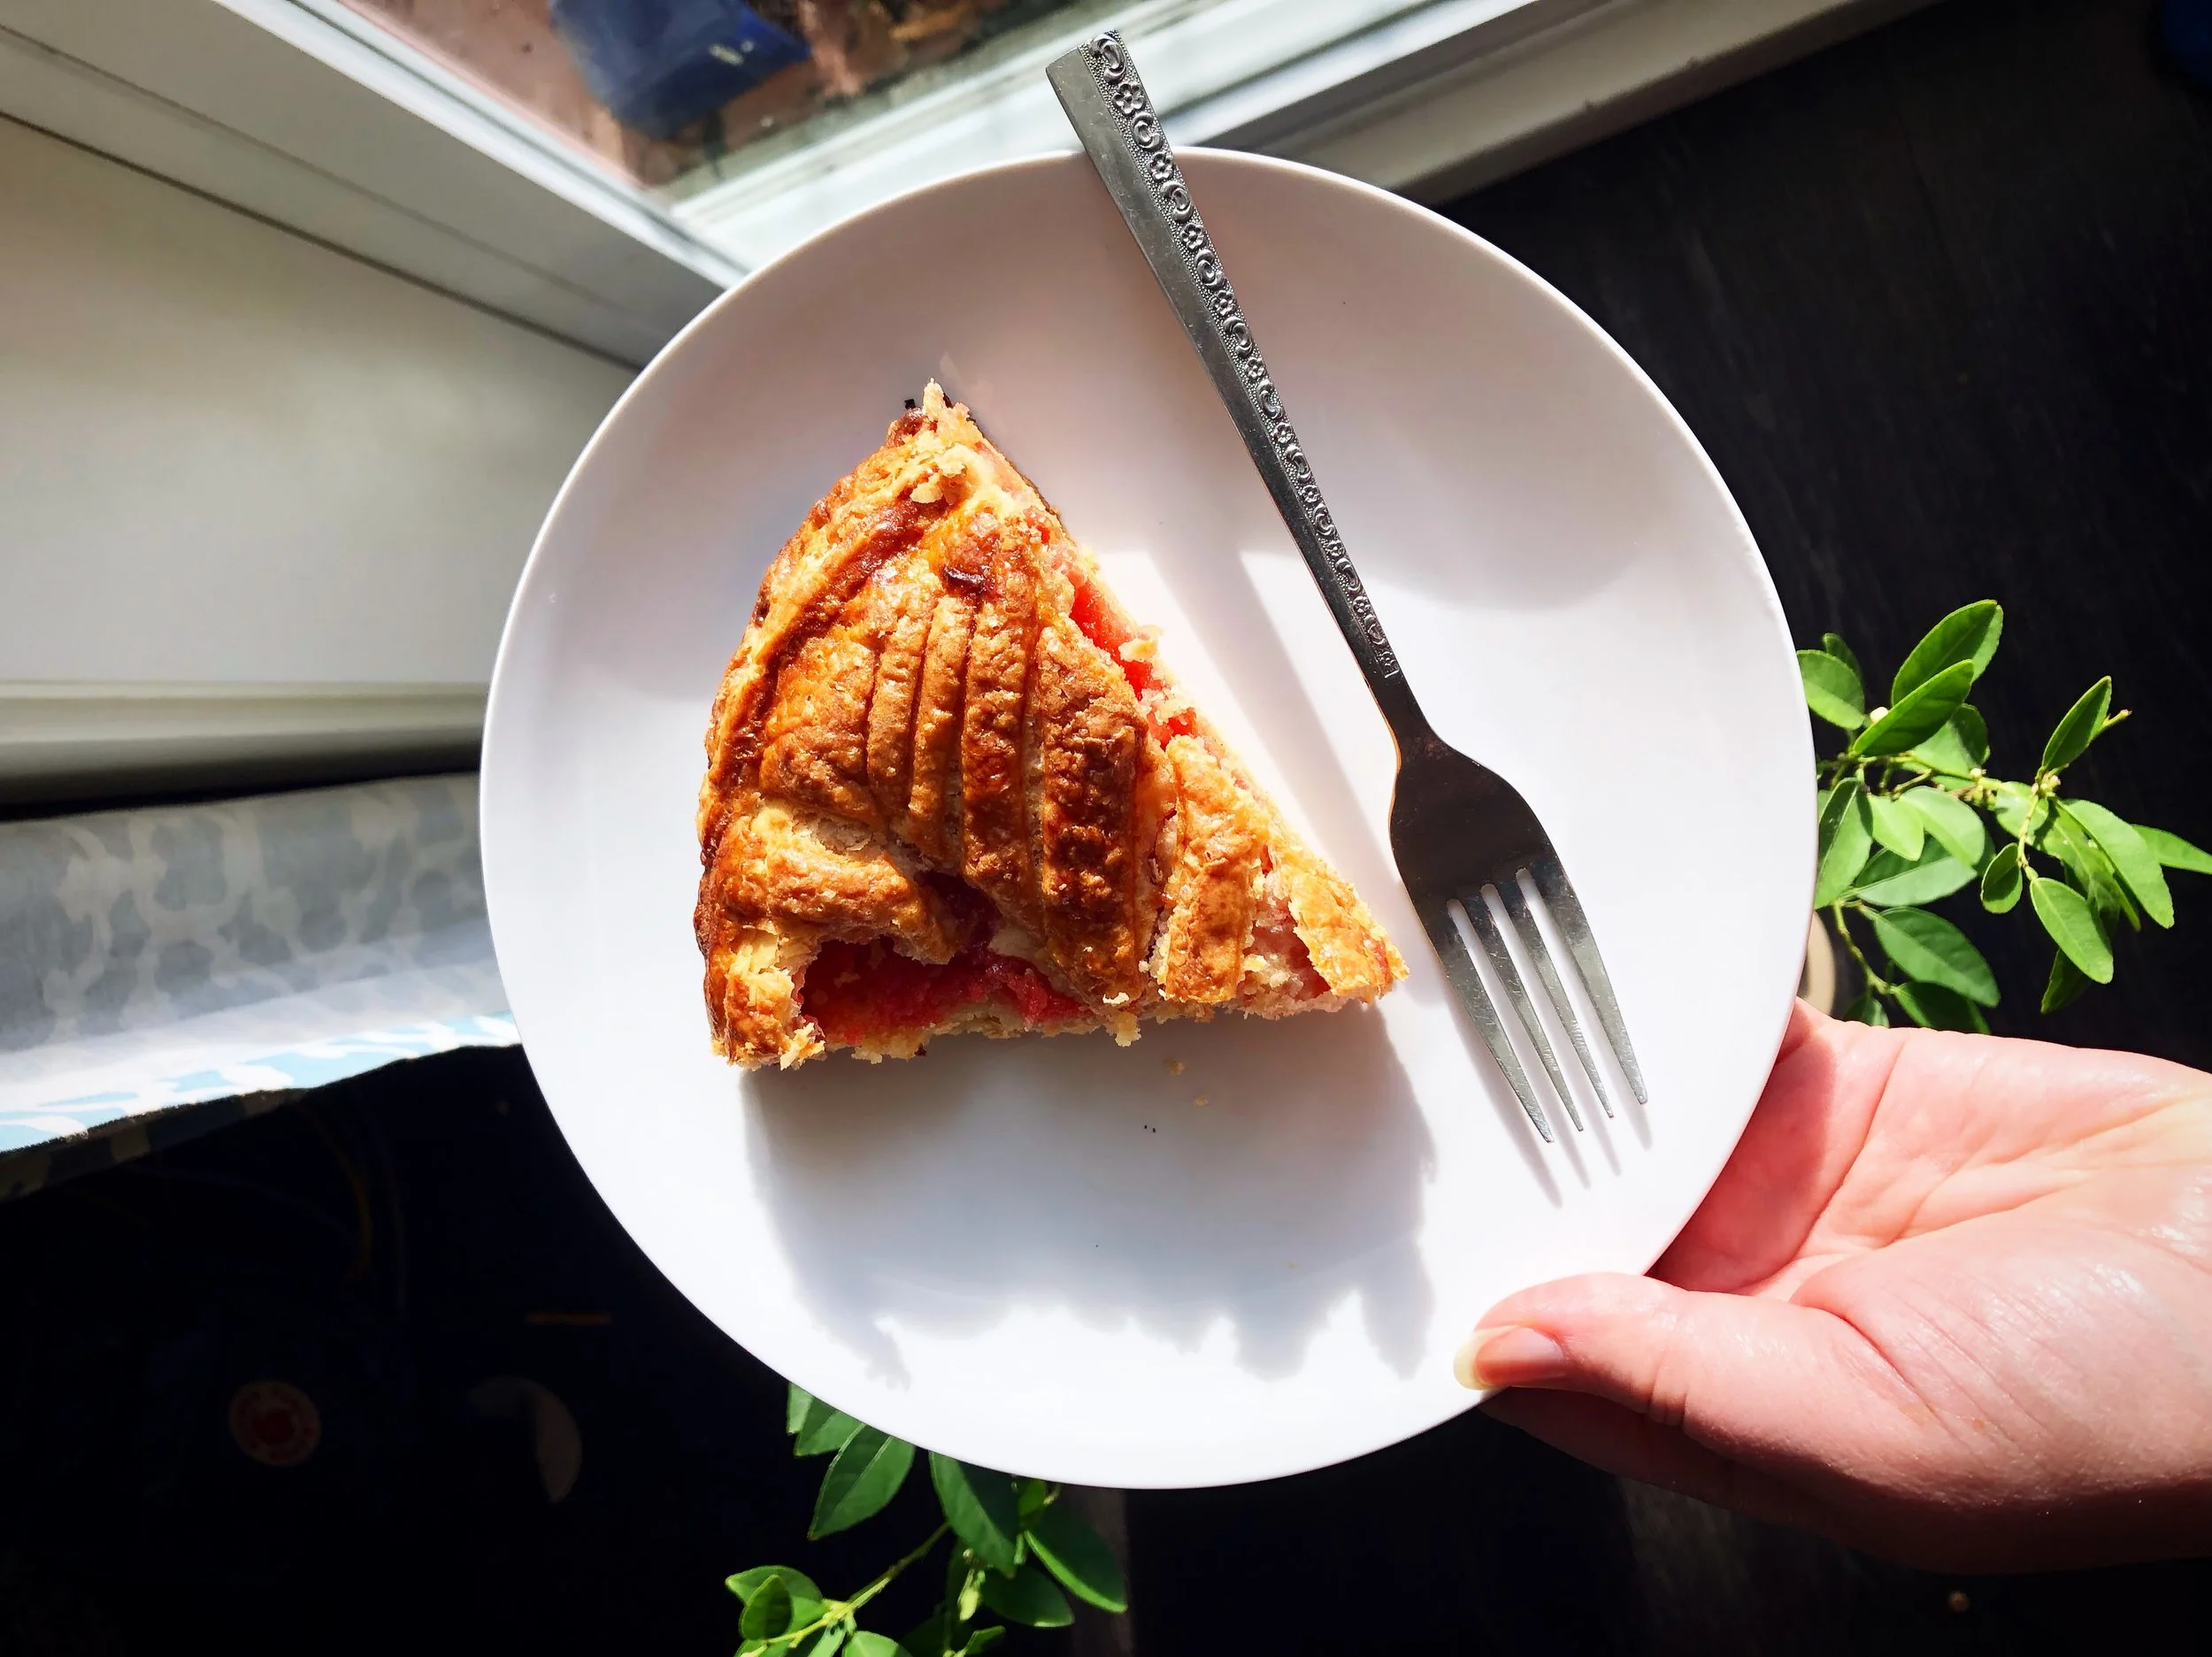
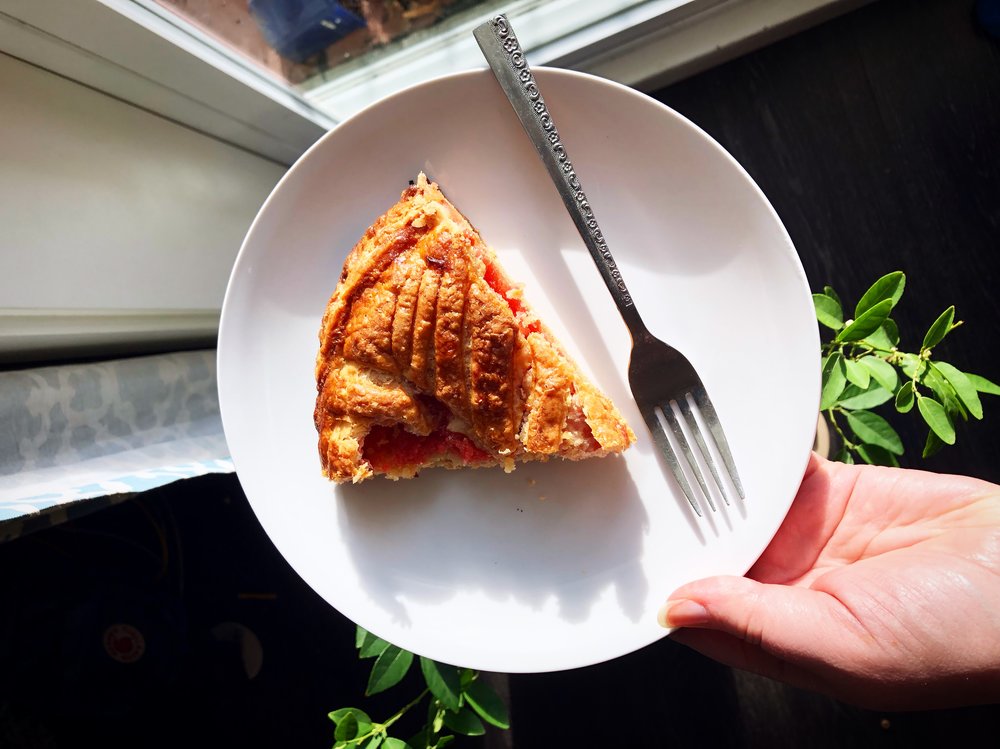
I started it all by infusing some sumac drupes in water overnight in the fridge (you can also use ground sumac you purchased for this infusion - just try googling a recipe for “sumac tea”, or do a bit of experimenting to get the right ratio of sumac to water). The resulting liquid was such a gorgeous colour I was immediately excited to make it into a curd for the galette. Sumac has a tangy, fruity flavour reminiscent in some ways of citrus. To turn the sumac liquid into a curd, you follow the basic process for making a lemon curd. Combine the sugar and eggs, add them into the sumac liquid in a double boiler, and cook it gently - stirring constantly - until thick. Add a few pats of unsalted butter at the very end (optional if you need to be dairy free - this is just for looks and a bit of texture, but it will still be delicious without) and you’re done! The only downside was that If found once the sumac infusion was heated it lost it’s brilliant red colour and turned sort of brownish. Because I knew I was going to be layering this with frangipane I decided to add some food colouring to make it a bit more visually appealing. I don’t love using artificial colour in my recipes, but we really do eat with our eyes first, and I wanted the two layers to be visually distinct in the finished tart, so I felt it was necessary. If you have strong feelings about it feel free to omit it. It will still taste delicious!
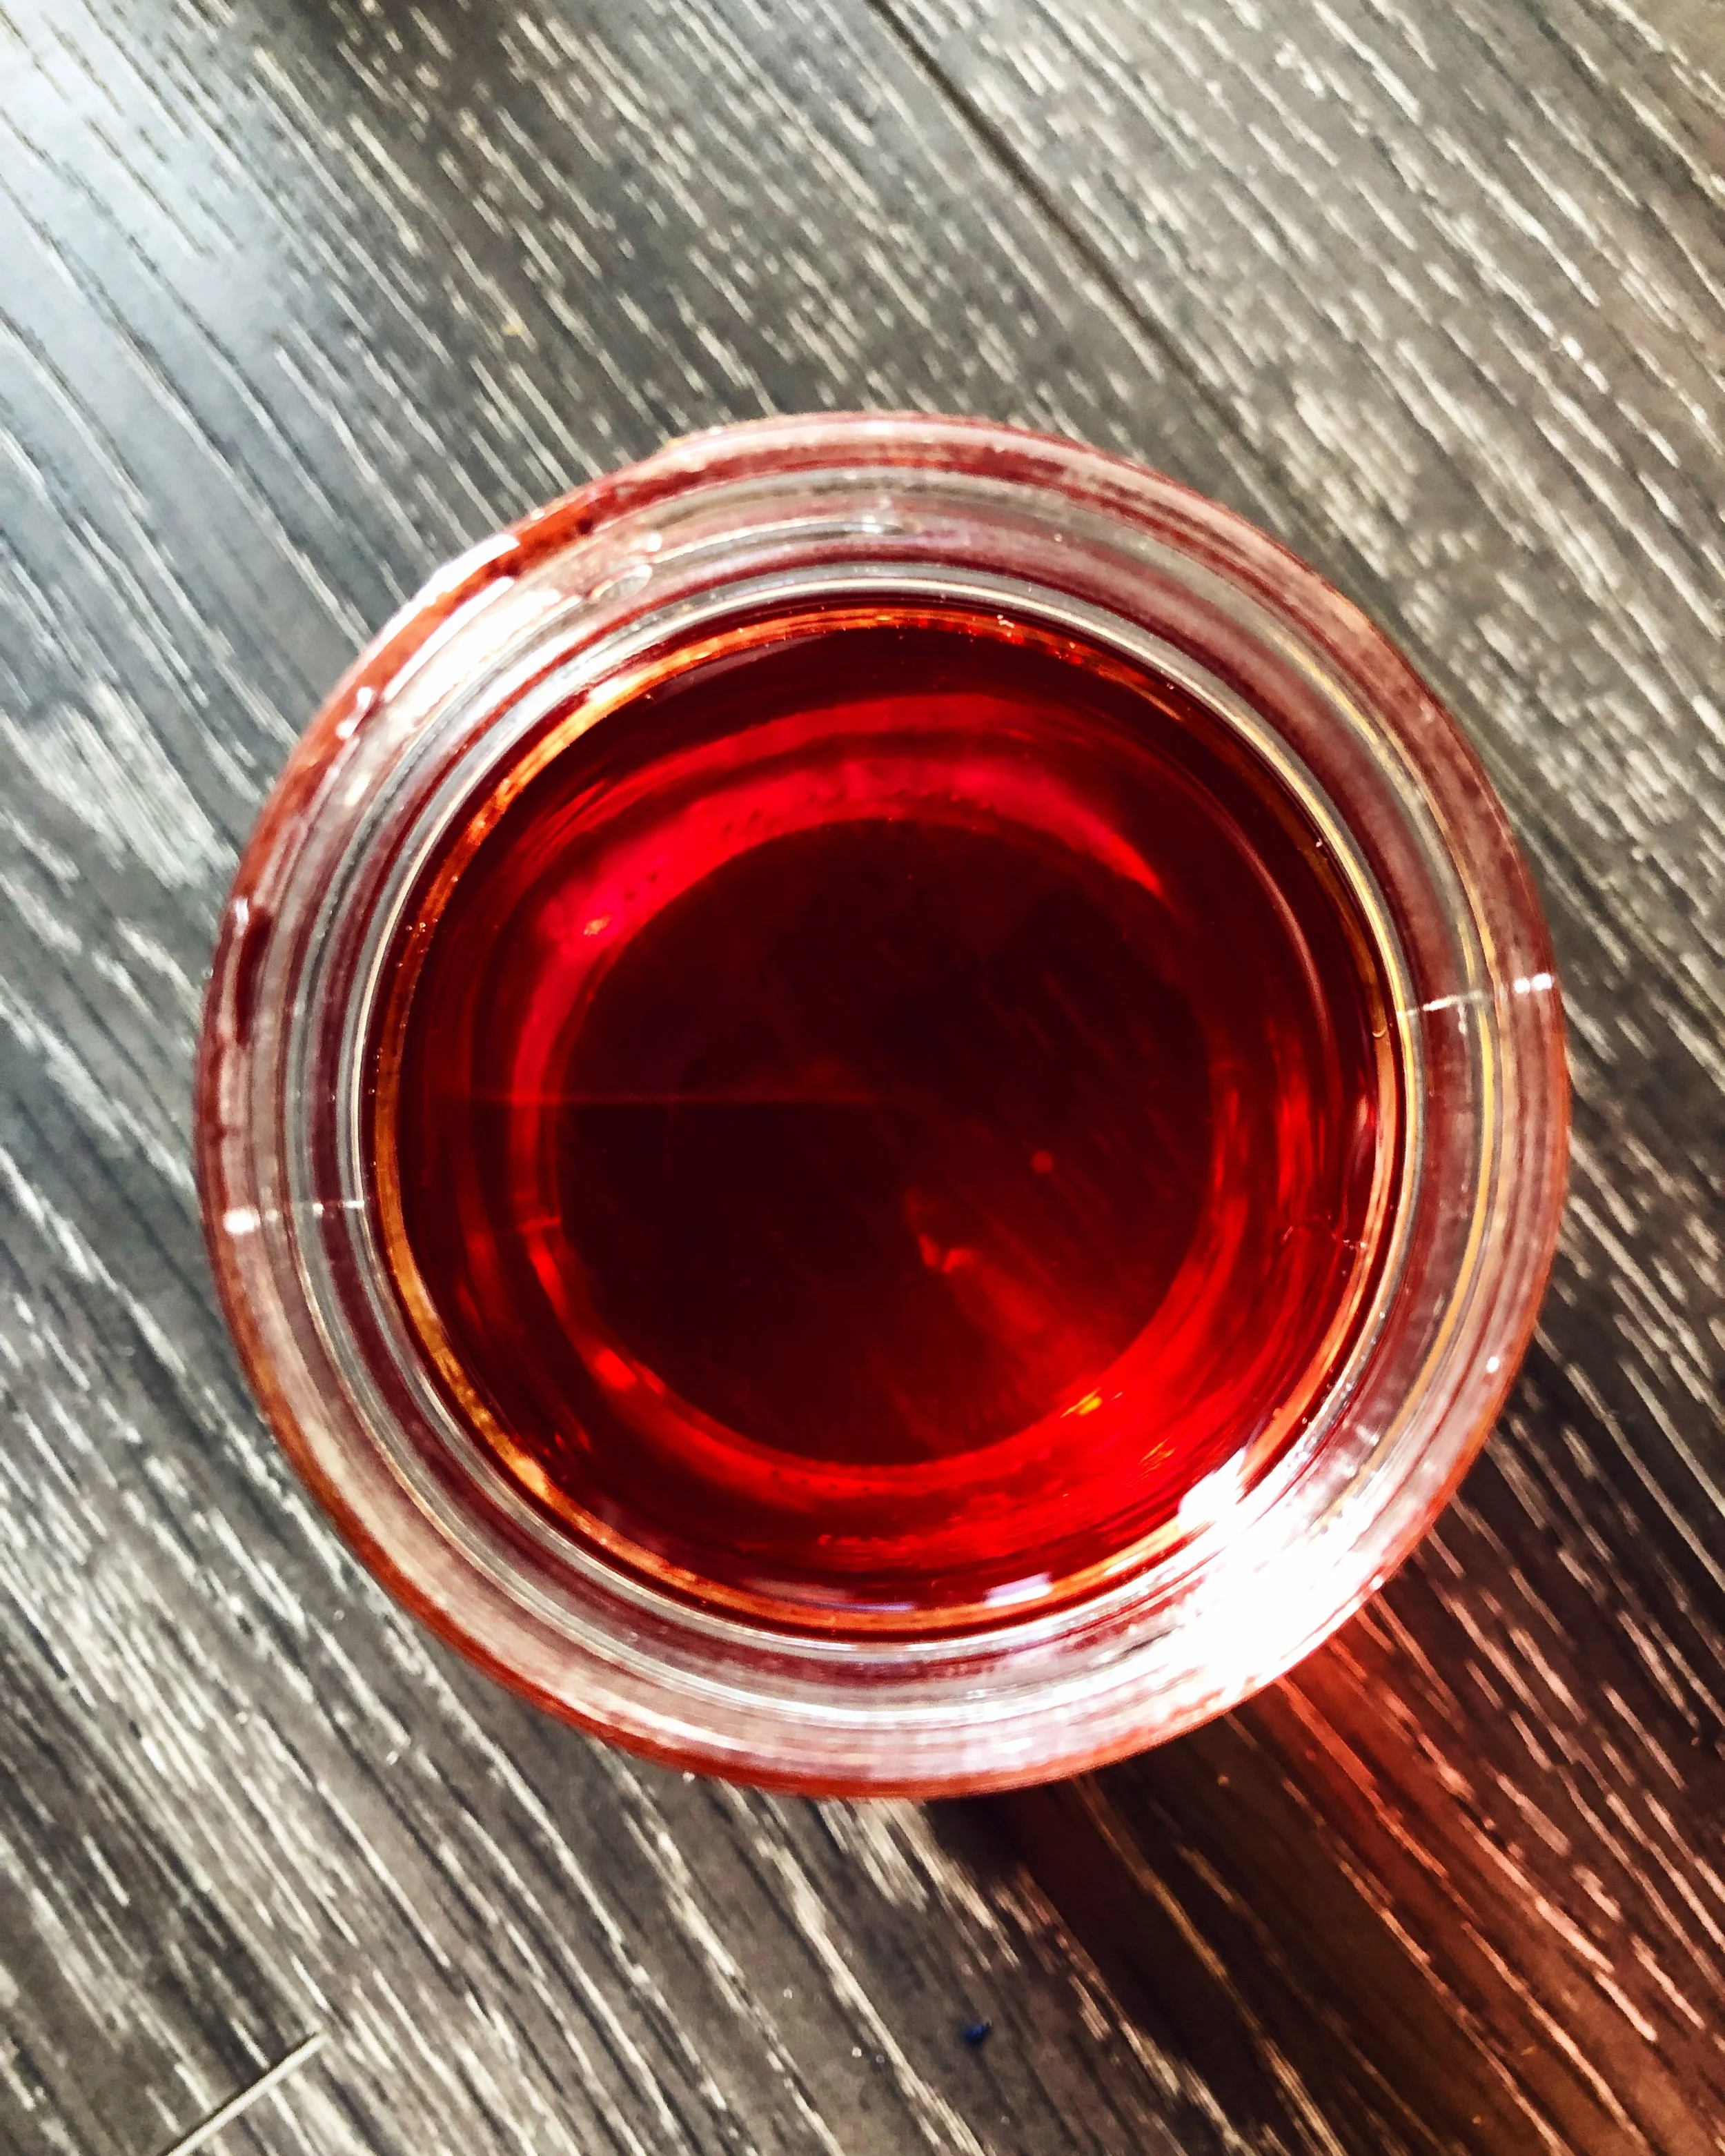
Sumac infusion.
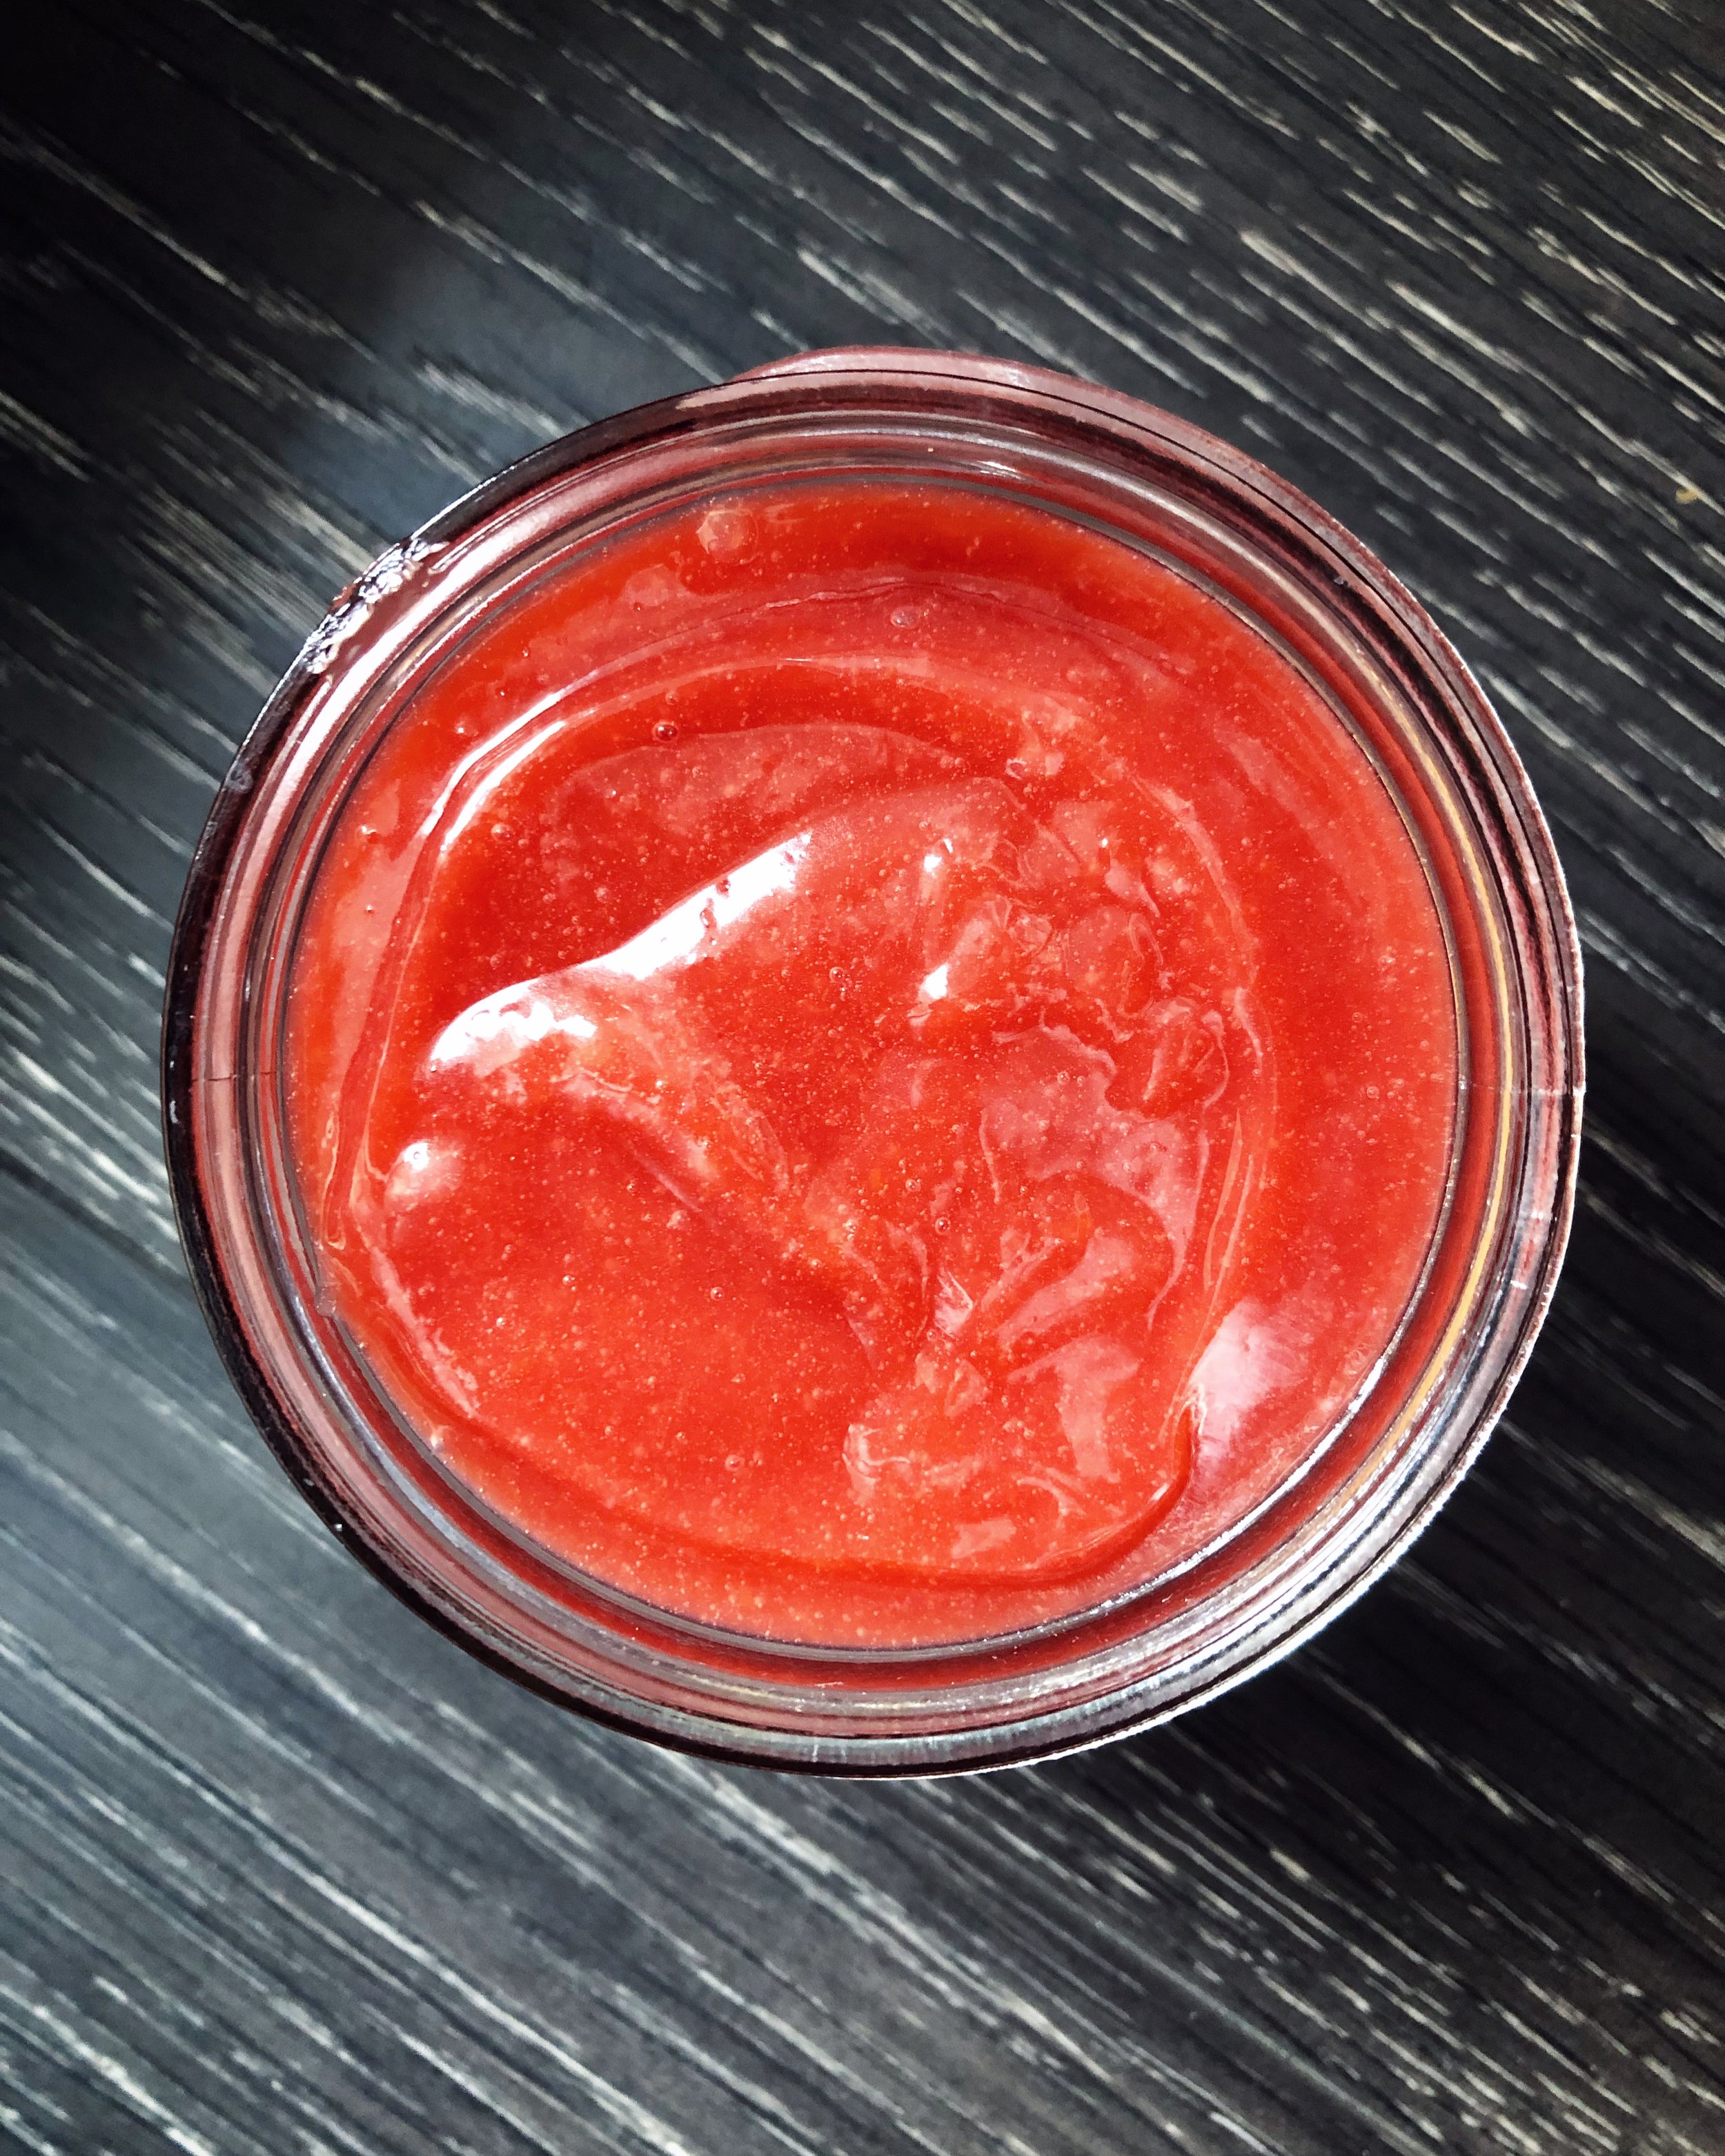
Finished sumac curd.
For the frangipane, I’m sure my methods weren’t exactly orthodox, but they were effective! I just threw everything together in my Vitamix blender and pureed until it was all smooth. This may not be typical frangipane, but it was delicious, and very smooth. I was happy with the result in the end, so either copy my method, or follow something more traditional. Either will be just perfect.
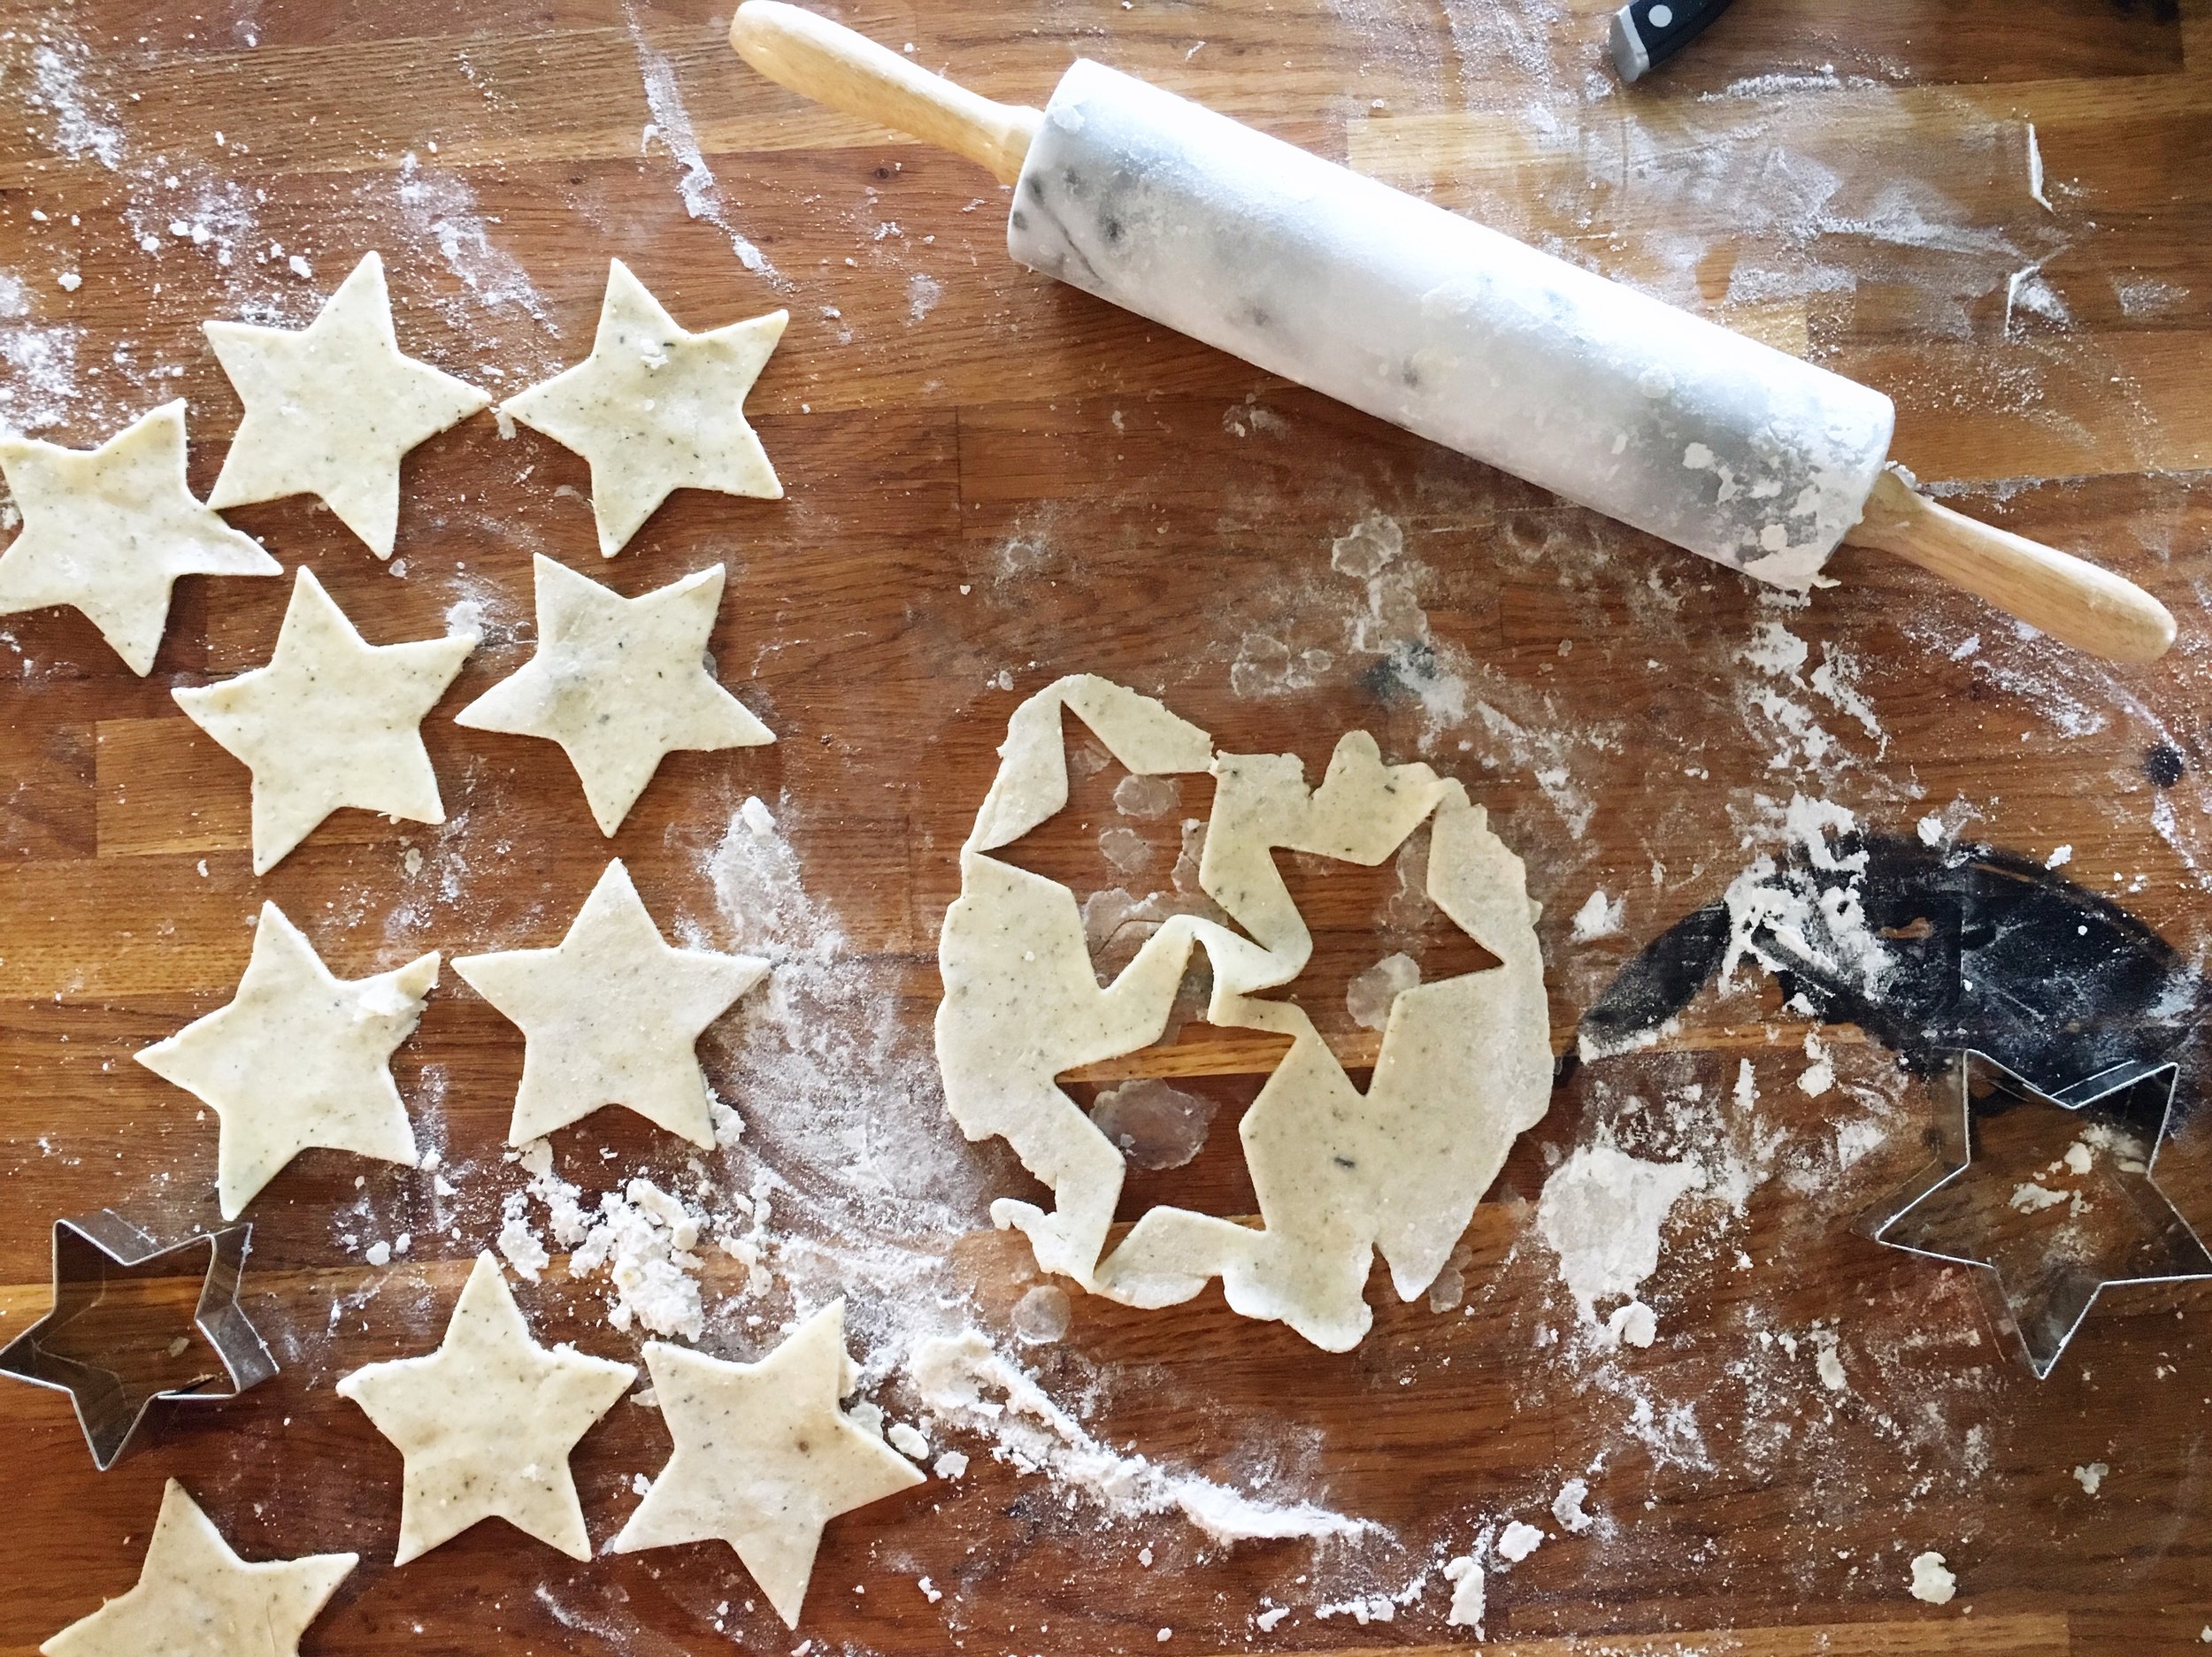
For the puff pastry, I used the recipe I learned from Monika at Blue Bunch Farm during my workshop (I’ll be reviewing my experience with the workshops there in a future post, so if you want more information “watch this space”). I really like making it, and the most difficult part is just the amount of time it takes to put it together. Feel free to use store-bough if you like, but this will taste a whole lot more delicious if you try to find some that uses real butter in their recipe. I also found I had very little problem with the filling escaping my pastry this year. In my previous post about Epiphany you can see the frangipane seeping out the sides of my tart. My finished tart dough was flavourful, and very flaky. I think it has a bit more personality than one made with conventional flour as well since the GRAIN flour I used is sifted, but nothing at all like your standard bleached all purpose flour. It’s not exactly whole wheat, but there is a lot more of the whole grain in the finished product which leads to more flavour. This flour is also milled so freshly that you need to keep it in the fridge or freezer, because it will go rancid at room temperature. It’s beautiful flour and I love working with it.
Once you have your pastry and your fillings, cut in a circular shape, spread a layer of frangipane, and then cover that with a layer of sumac curd. Put the top layer of pastry over everything and crimp the edges tightly so that none of your filling escapes. Make surface level slits in a pattern you like on top, and brush with an egg wash. I also sprinkled some sugar over the top just to make it all a little more special and delicious.
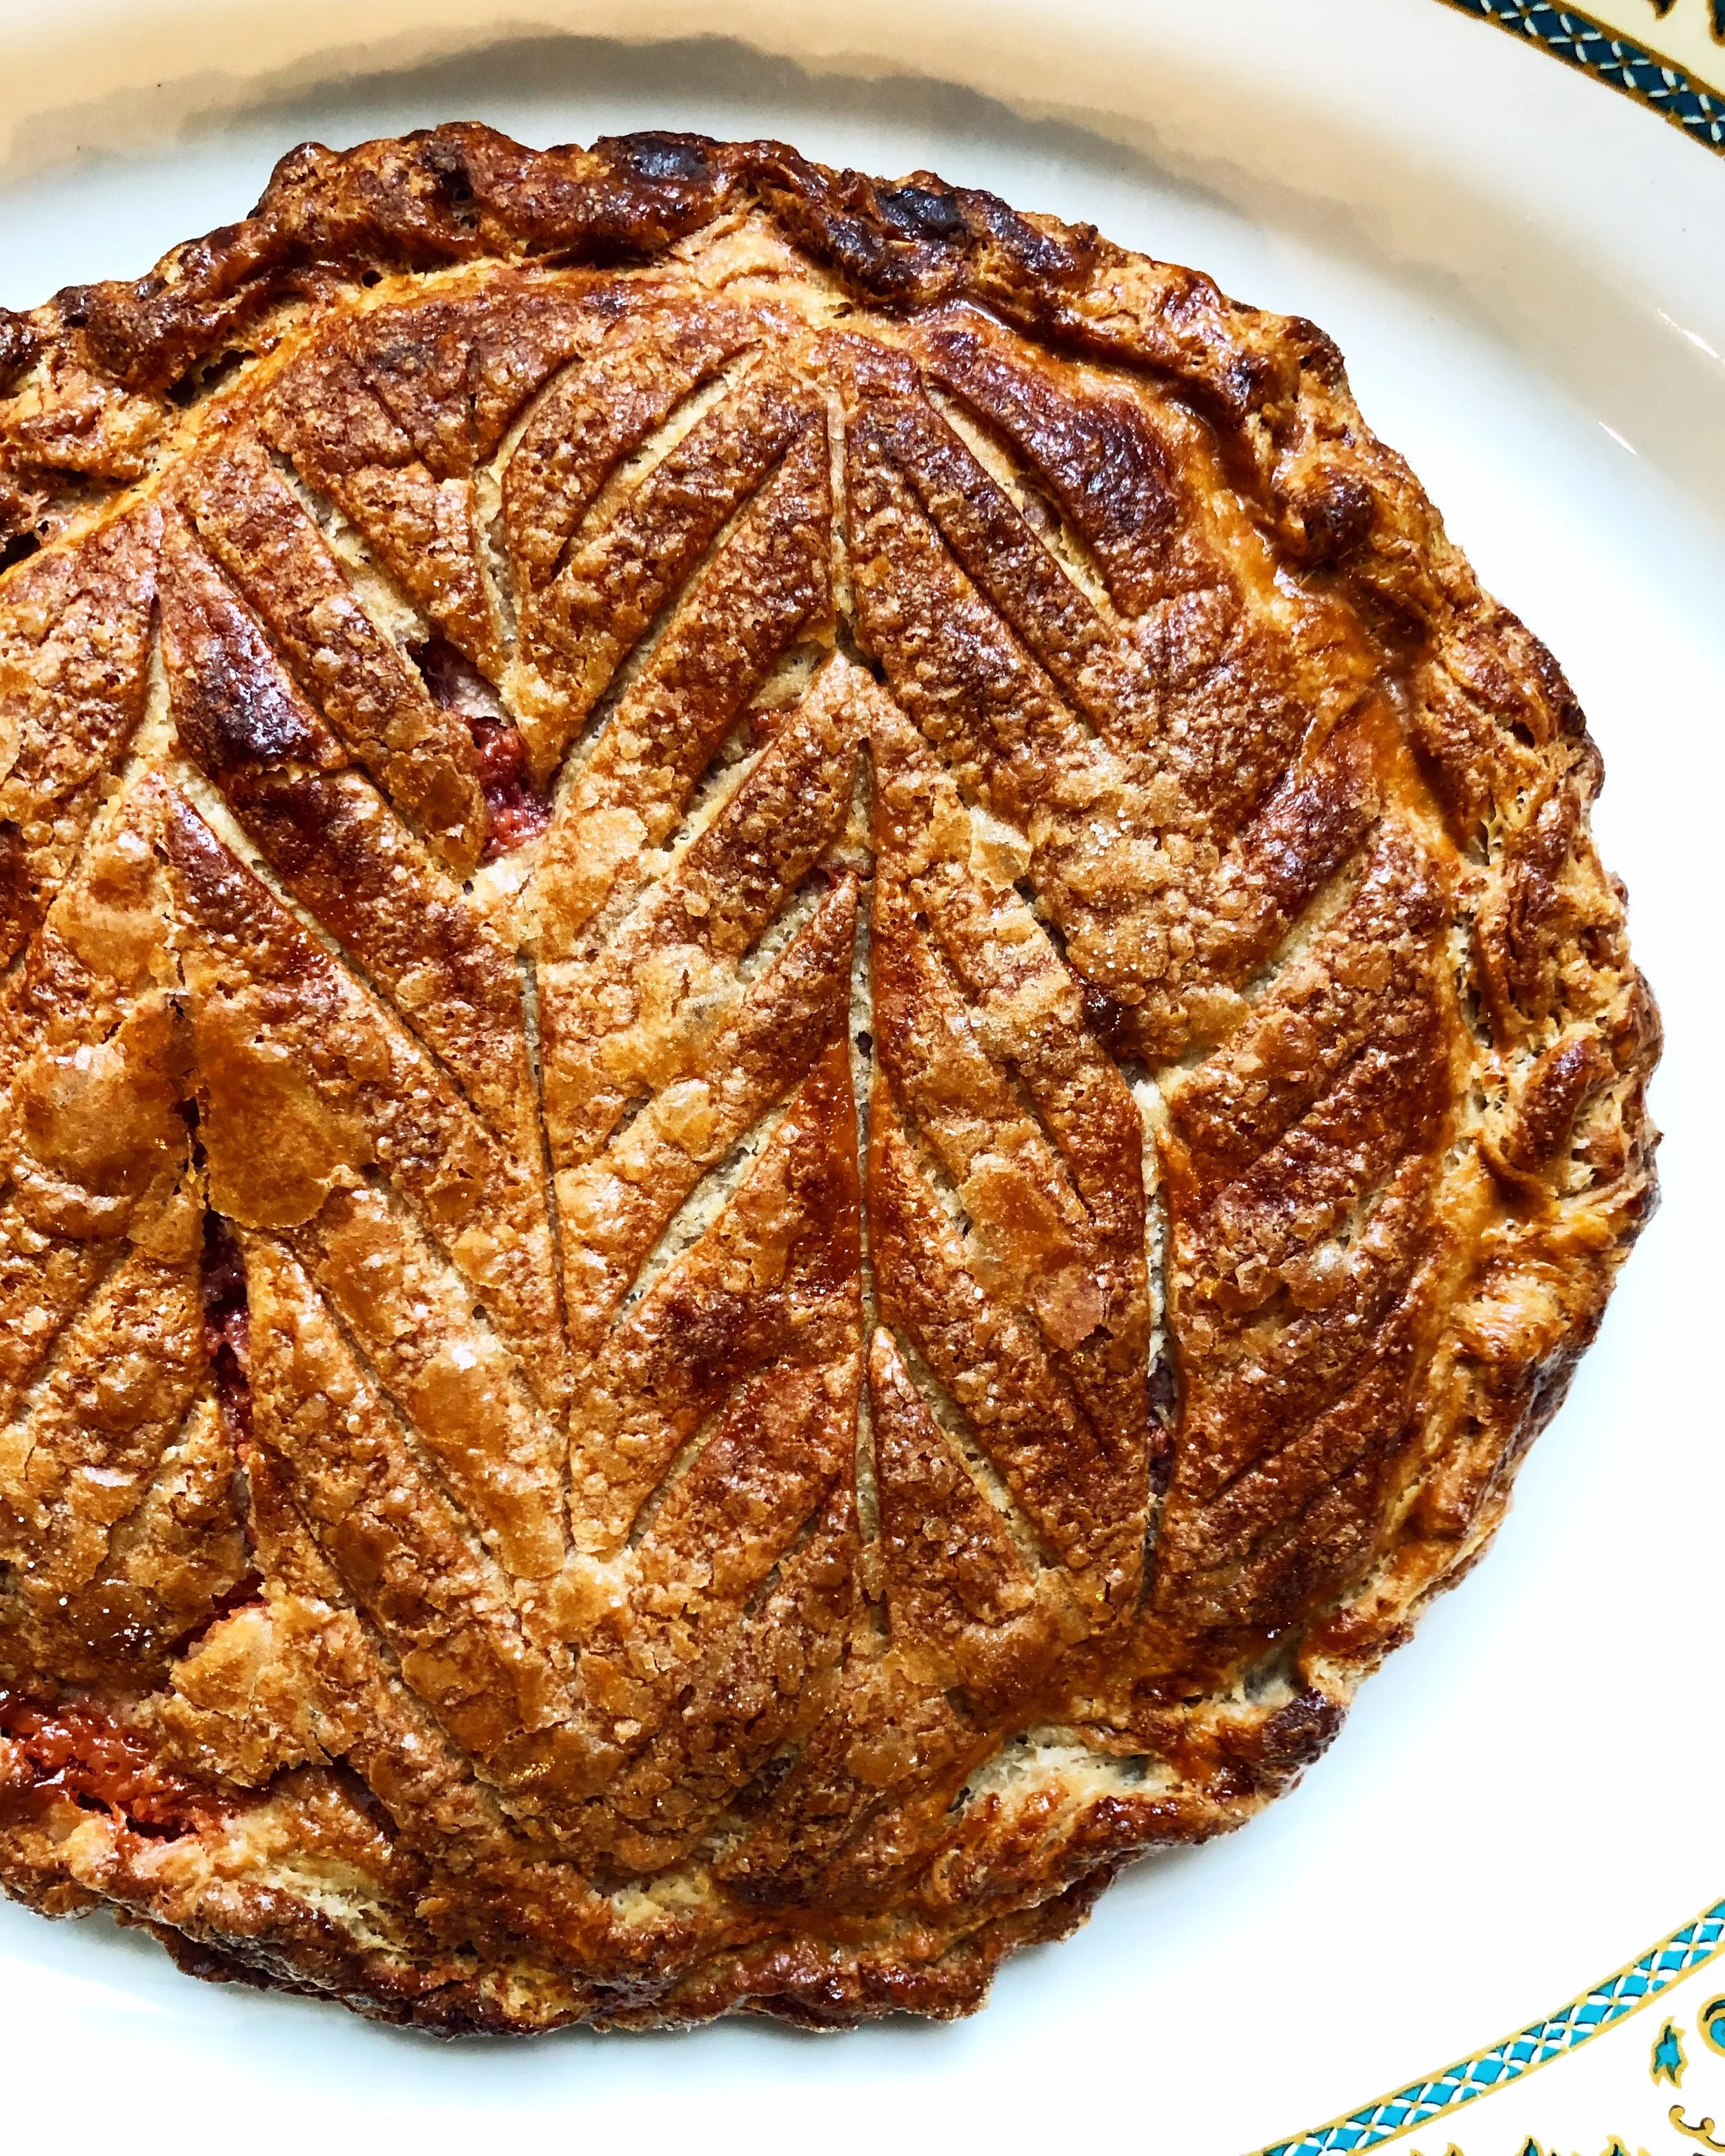
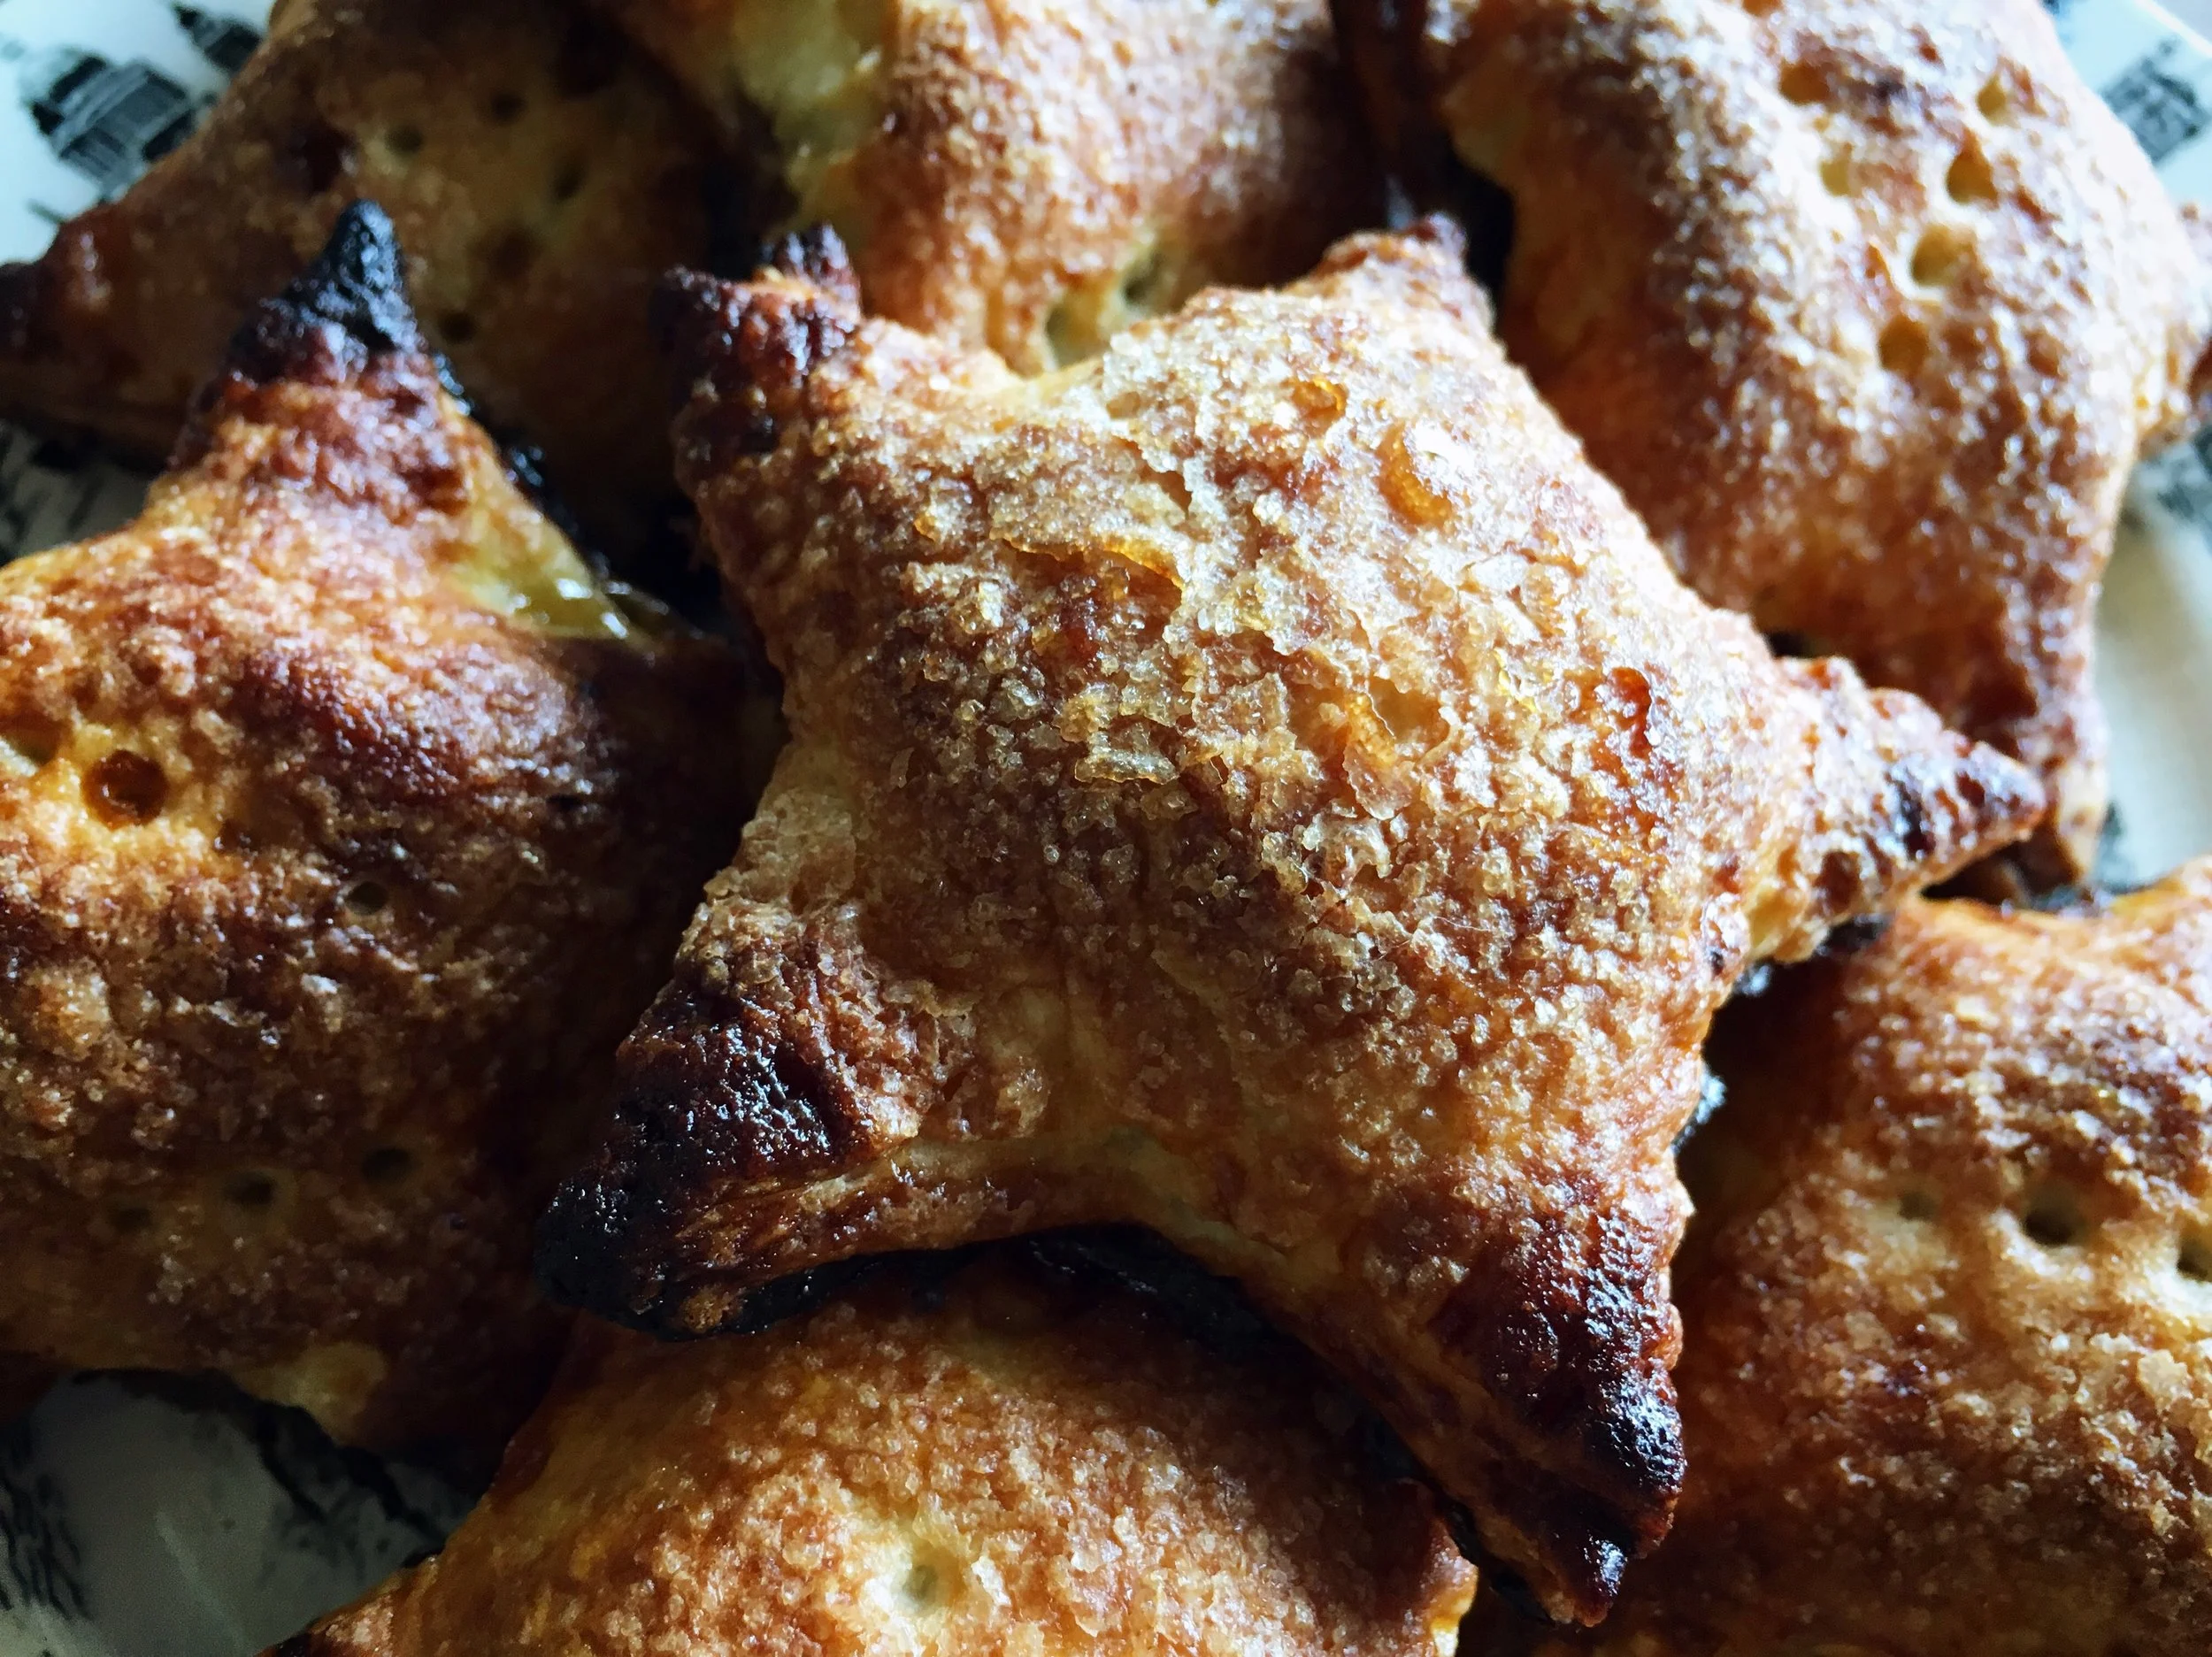
Galette des rois! Put one whole almond in the filling if you want to be really traditional. Whoever finds it in their piece wins a special prize!
Sumac Curd Frangipane Galette des Rois
Ingredients
Sumac Curd
- 1 cup sumac infused water (pulse 3-5 sumac drupes in 1 cup water in a blender and leave in the fridge overnight to infuse)
- 5 Egg Yolks
- 1/2 cup sugar
- 5 tbsp unsalted butter
Frangipane
- 1/2 cup freshly ground blanched almonds
- 1/4 cup butter
- 1/4 cup sugar
- 1/4 cup butter
- 1 egg
- 1 tsp vanilla
Finished Tart
- 1 recipe puff pastry
- 1 egg
- 1 tbsp cream
- sugar for dusting
Takes , serves 1 tart.
Instructions
- To make the curd, whisk the egg yolks into the sugar, and then combine with the sumac infused water. Cook in a double boiler until mixture is thick and coats the back of a spoon. You should be able to see trace lines when you draw your spoon/whisk through while stirring. Remove from heat and stir in butter. Push through a fine mesh sieve just in case some of the egg didn’t cook perfectly.
- Combine all the frangipane ingredients in a high powered blender or food processor, and blend on high until smooth. Alternatively whip the butter and sugar together in a mixer until thick and creamy and you can see no sugar crystals. Add the egg and emulsify, and then stir in the vanilla and ground almonds. Beat the mixture until thick, creamy, and homogenous.
- Roll out your puff pastry according to your recipe’s instructions and cut two circles. I used an 8 inch cake tin as a pattern to trace. Spread a thick layer of frangipane, leaving a little bit uncovered around the edges. Cover that layer with a layer of sumac curd, and then cover with the other circle of pastry. Crimp edges so that no filling will escape.
- Using a sharp knife cut some steam vents on top of the pastry, but don’t cut all the way through to the filling. Whisk the egg and tbsp of cream together and brush on top of pastry. To get a really burnished crust do this in several layers, allowing each coat to dry before adding the next. Sprinkle with sugar
- Bake in a 425 degree Fahrenheit oven for about 5-10 minutes until the pastry has started to colour. At this point turn the temperature down to 375 degrees, and continue baking for roughly 20 more minutes, or until your pastry is obviously puffed, golden, and fully cooked.