A Forager's Home

Grow. Find. Eat. Make.

  • Blog
  • About
  • DIY
  • Recipes
  • Foraging
IMG_3105.jpeg

Trail Mix Cookies featuring Bite Snacks Cricket Protein

June 03, 2019 by Kelsey Fast in Eat

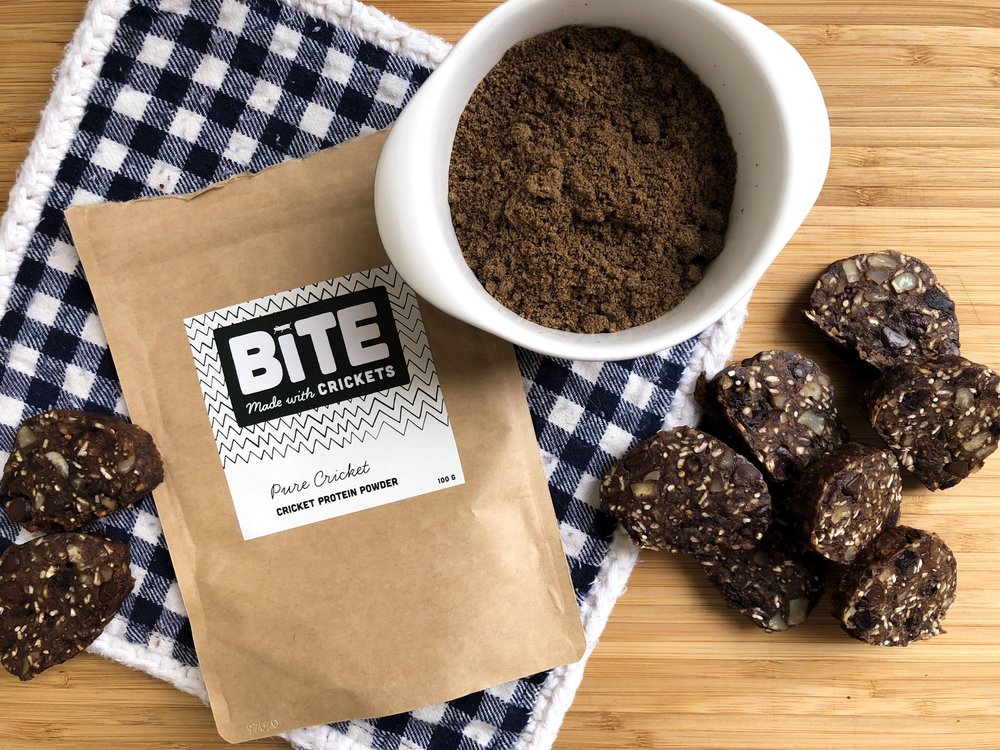
Today I have a new recipe to share with you featuring Pure Cricket protein powder from Bite Snacks. At this point it probably looks like the only thing I ever do is make cookies, but as soon as I got my hands on the protein powder my mind instantly started thinking of some sort of trail mix or breakfast cookie type thing.

{Jump to the Recipe}

IMG_3108.jpeg

Crickets as a food source are gaining in popularity these days. Or perhaps I should say that the countries that don’t traditionally consume insects are finally catching on to what 80% of the world already knows - insects are too nutritious to ignore! Crickets are an excellent source of protein, and many minerals that are essential to our diet. This is all the more amazing when you consider how few resources they use up when farmed for food.

I am all for supporting my local beef ranchers, but sustainable, grass-fed beef is so expensive it is best considered a luxury food item. With this in mind, crickets can help fill our need for dietary protein without being so hard on the planet. If you want some more info, I found this page that is a great source about adding insects into the human diet. Bite Snacks also has some great info on their site.

If you’re wondering what they taste like, I think you’d be pleasantly surprised! When I tasted the powder straight to see what I might want to make with it I thought of coffee, and the bitterness of dark chocolate. There was something very savoury and roasty, as well as a very sour note in there too. So unique! For these cookies I went with all of that and combined the powder with coffee, chocolate, and dried cranberries. I can’t wait to try it out in other recipes too. I’m sure it would camouflage well in a smoothie if you were interested in the health benefits of the crickets but were a bit squeamish about eating them.

IMG_3107.jpeg
IMG_3109.jpeg

Now about these cookies. You might have noticed I have posted some fairly complicated cookie recipes here (Douglas-fir Sugar Cookies, Sumac Ginger Honey Hearts). The reason for that is I’m not interested in adding to the noise of the food blogging world. I’m not a highly trained baker, so I don’t have enough technical expertise to add anything to the question of which chocolate chip cookie is the greatest, or anything like that. With that in mind I’m also not interested in sharing a mediocre recipe. What I am experienced in is working with unique flavours, so I’ve decided to stay in my own weird lane instead of adding yet another “Best _____ ever!” recipe to the internet. If that’s what interests you too, I hope you make some of my recipes! I’d love to hear from anyone who does and would absolutely welcome feedback!

IMG_3111.jpeg

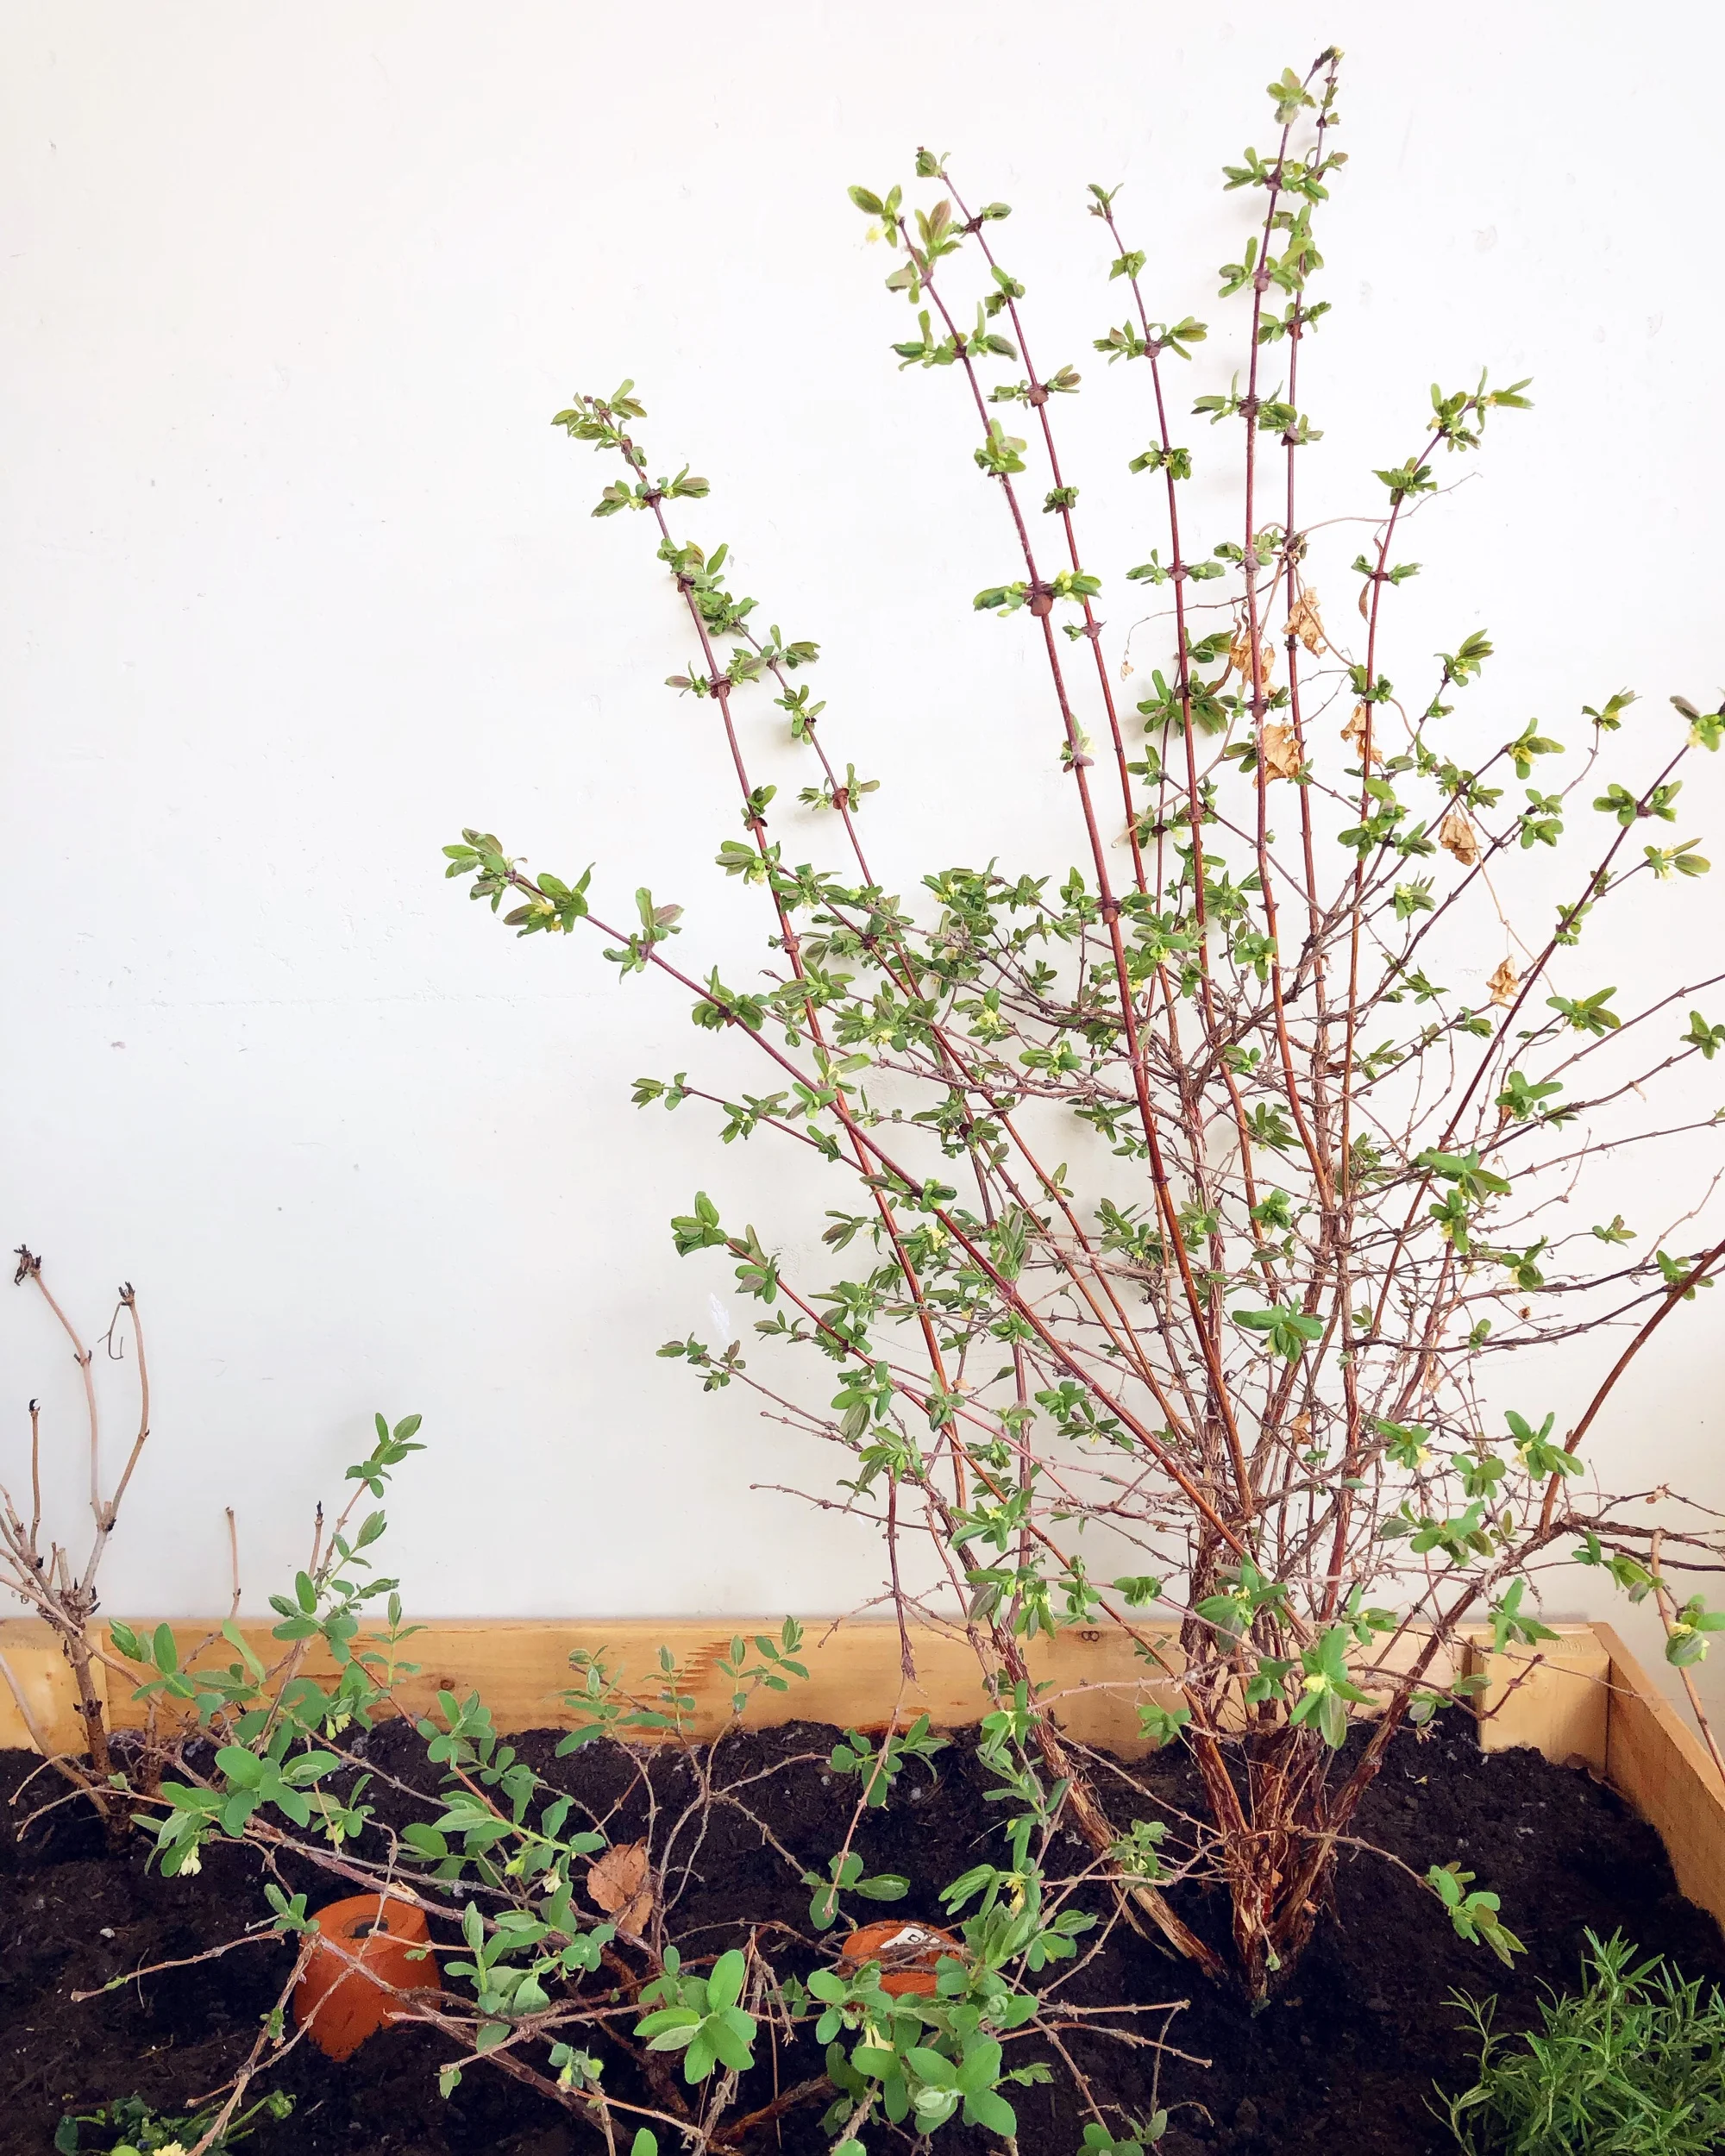
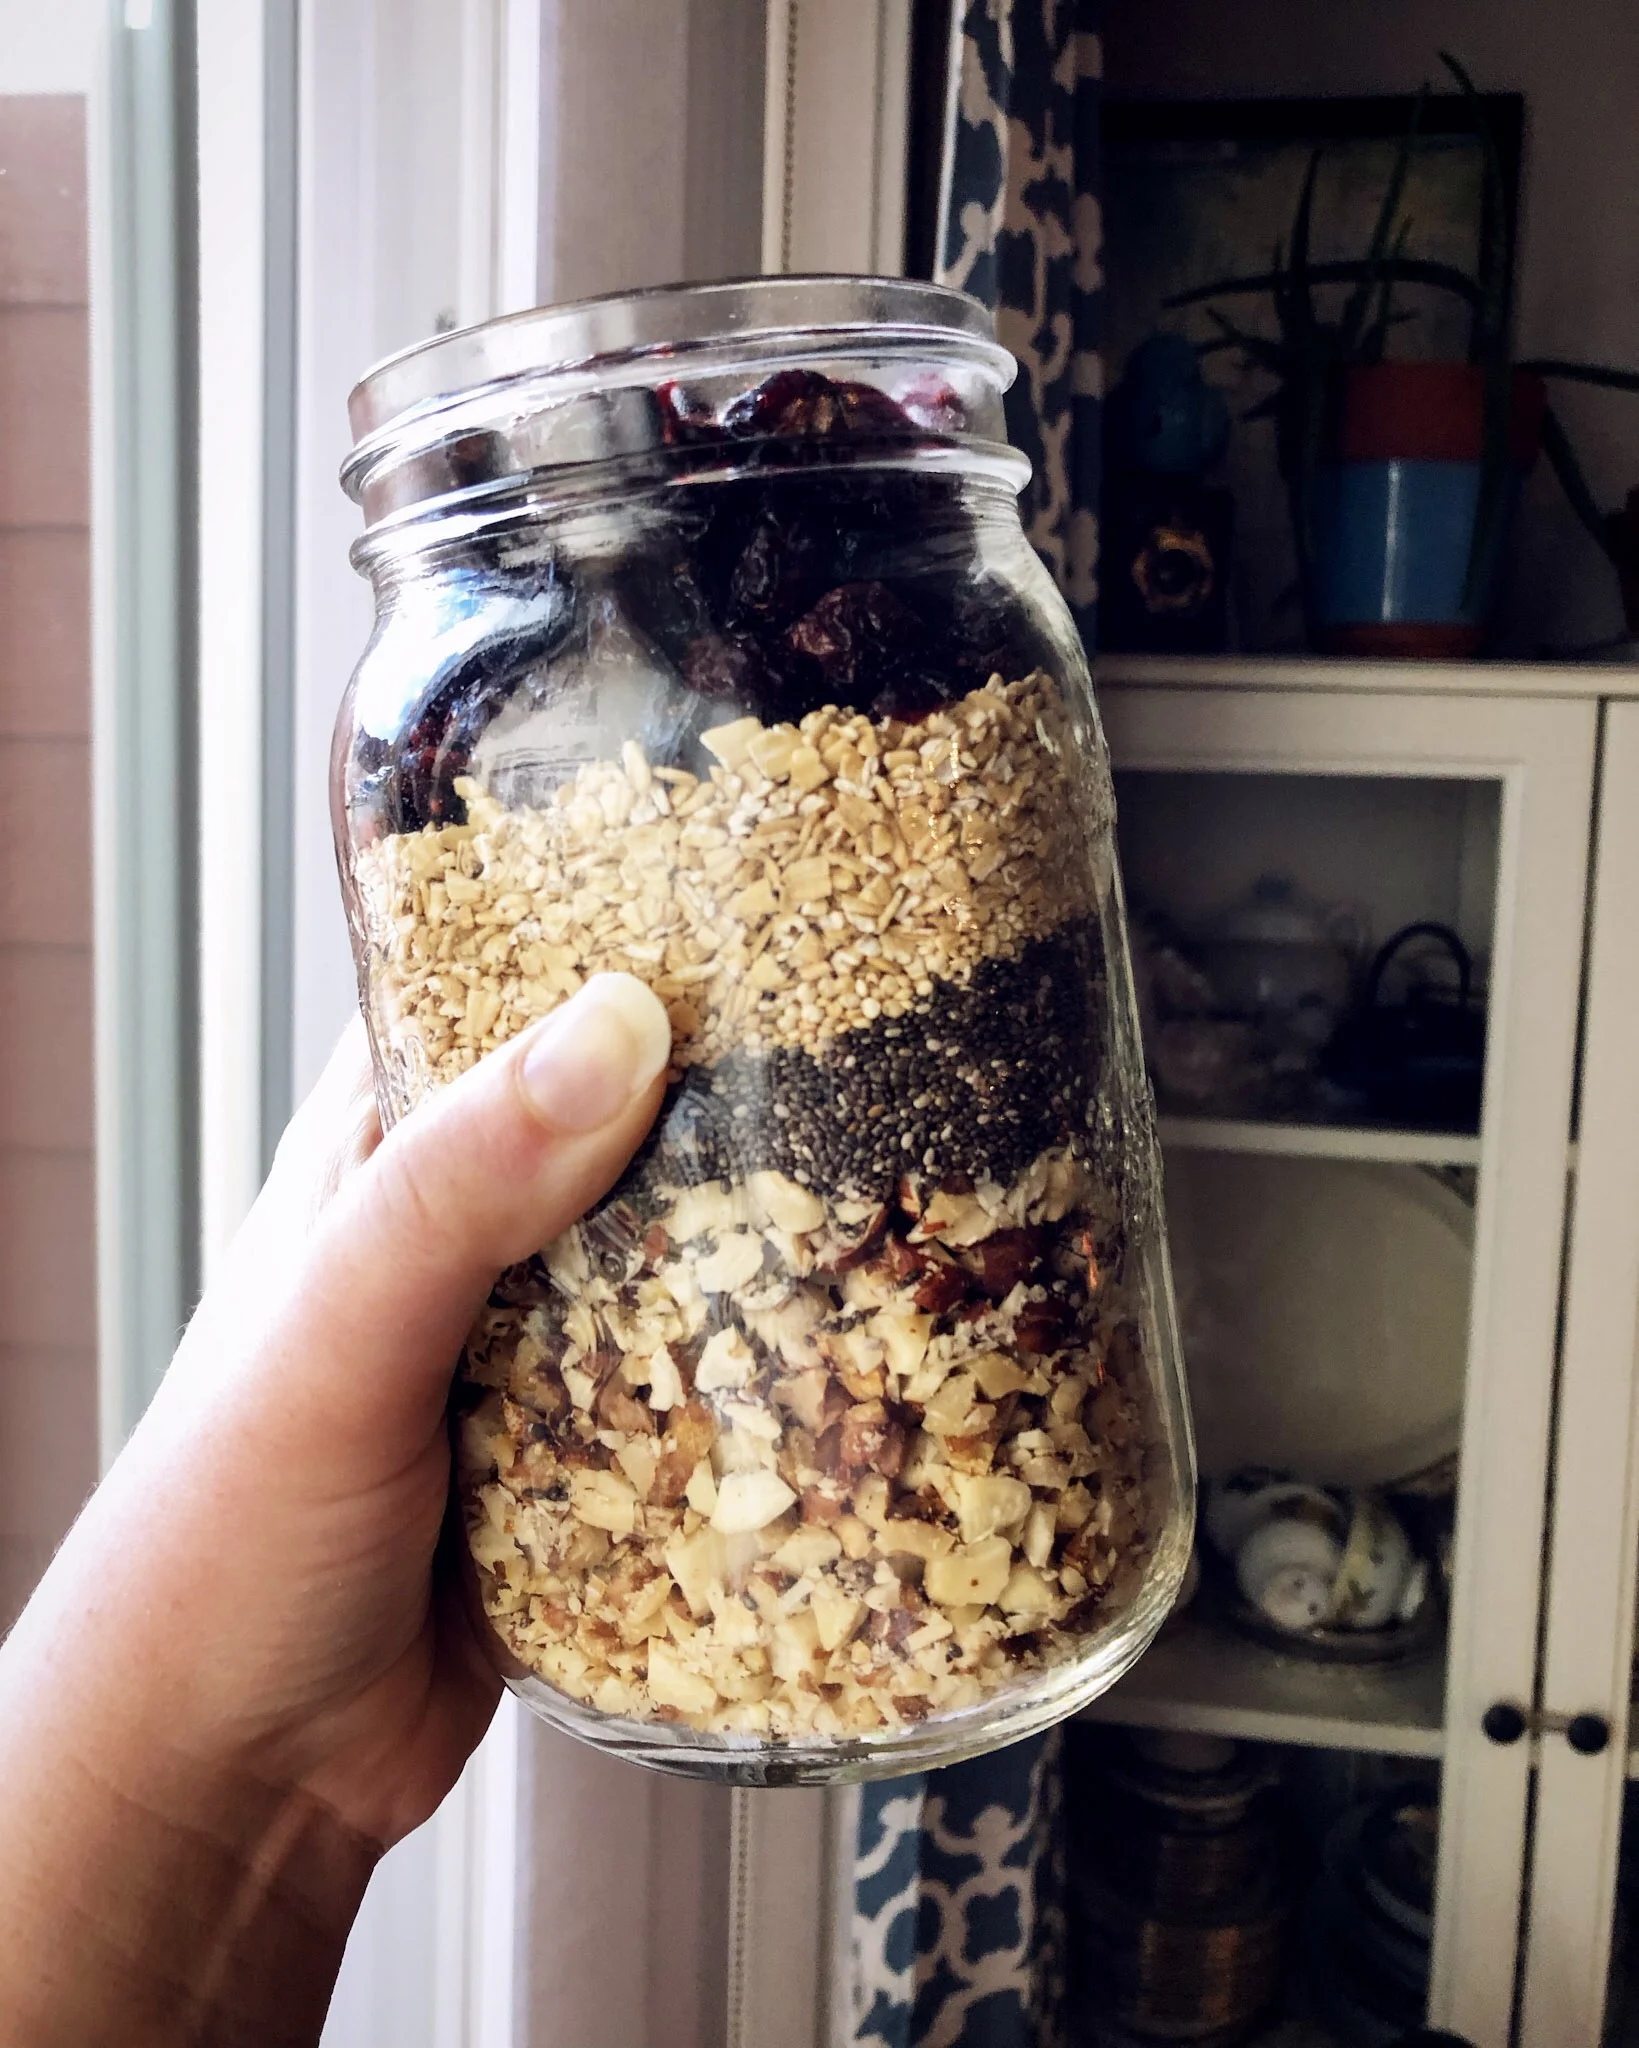
These cookies have a little bit of prep required. You’ll need to make a soaker of the nuts, chia seeds, and some of the oats the day before you make your dough. The reason I wanted to soak the nuts in these was because I was hoping for the nuts to be a part of the overall texture, not a crumbly extra. I also don’t really like eating walnuts unless they are soaked, so that was another factor.

You’ll also find some discussion - especially online in paleo focused wellness blogs - about whether or not soaking nuts and seeds make them more digestible. I’m not going to pretend to have any scientific knowledge on that count. I just like the finished result in baked goods when they are soaked better than when they aren’t.

In this recipe I have some things soaked, and some not. This was an attempt to create a variety of textures in the finished cookie. You can experiment with changing the composition of what is in the soaker. In one early experiment I added quinoa, but that didn’t really work because the quinoa was too hard still after baking, and added an unpleasant bitter flavour. Feel free to adjust this recipe to your taste! I’d love to hear what great combinations you come up with!

IMG_3106.jpeg

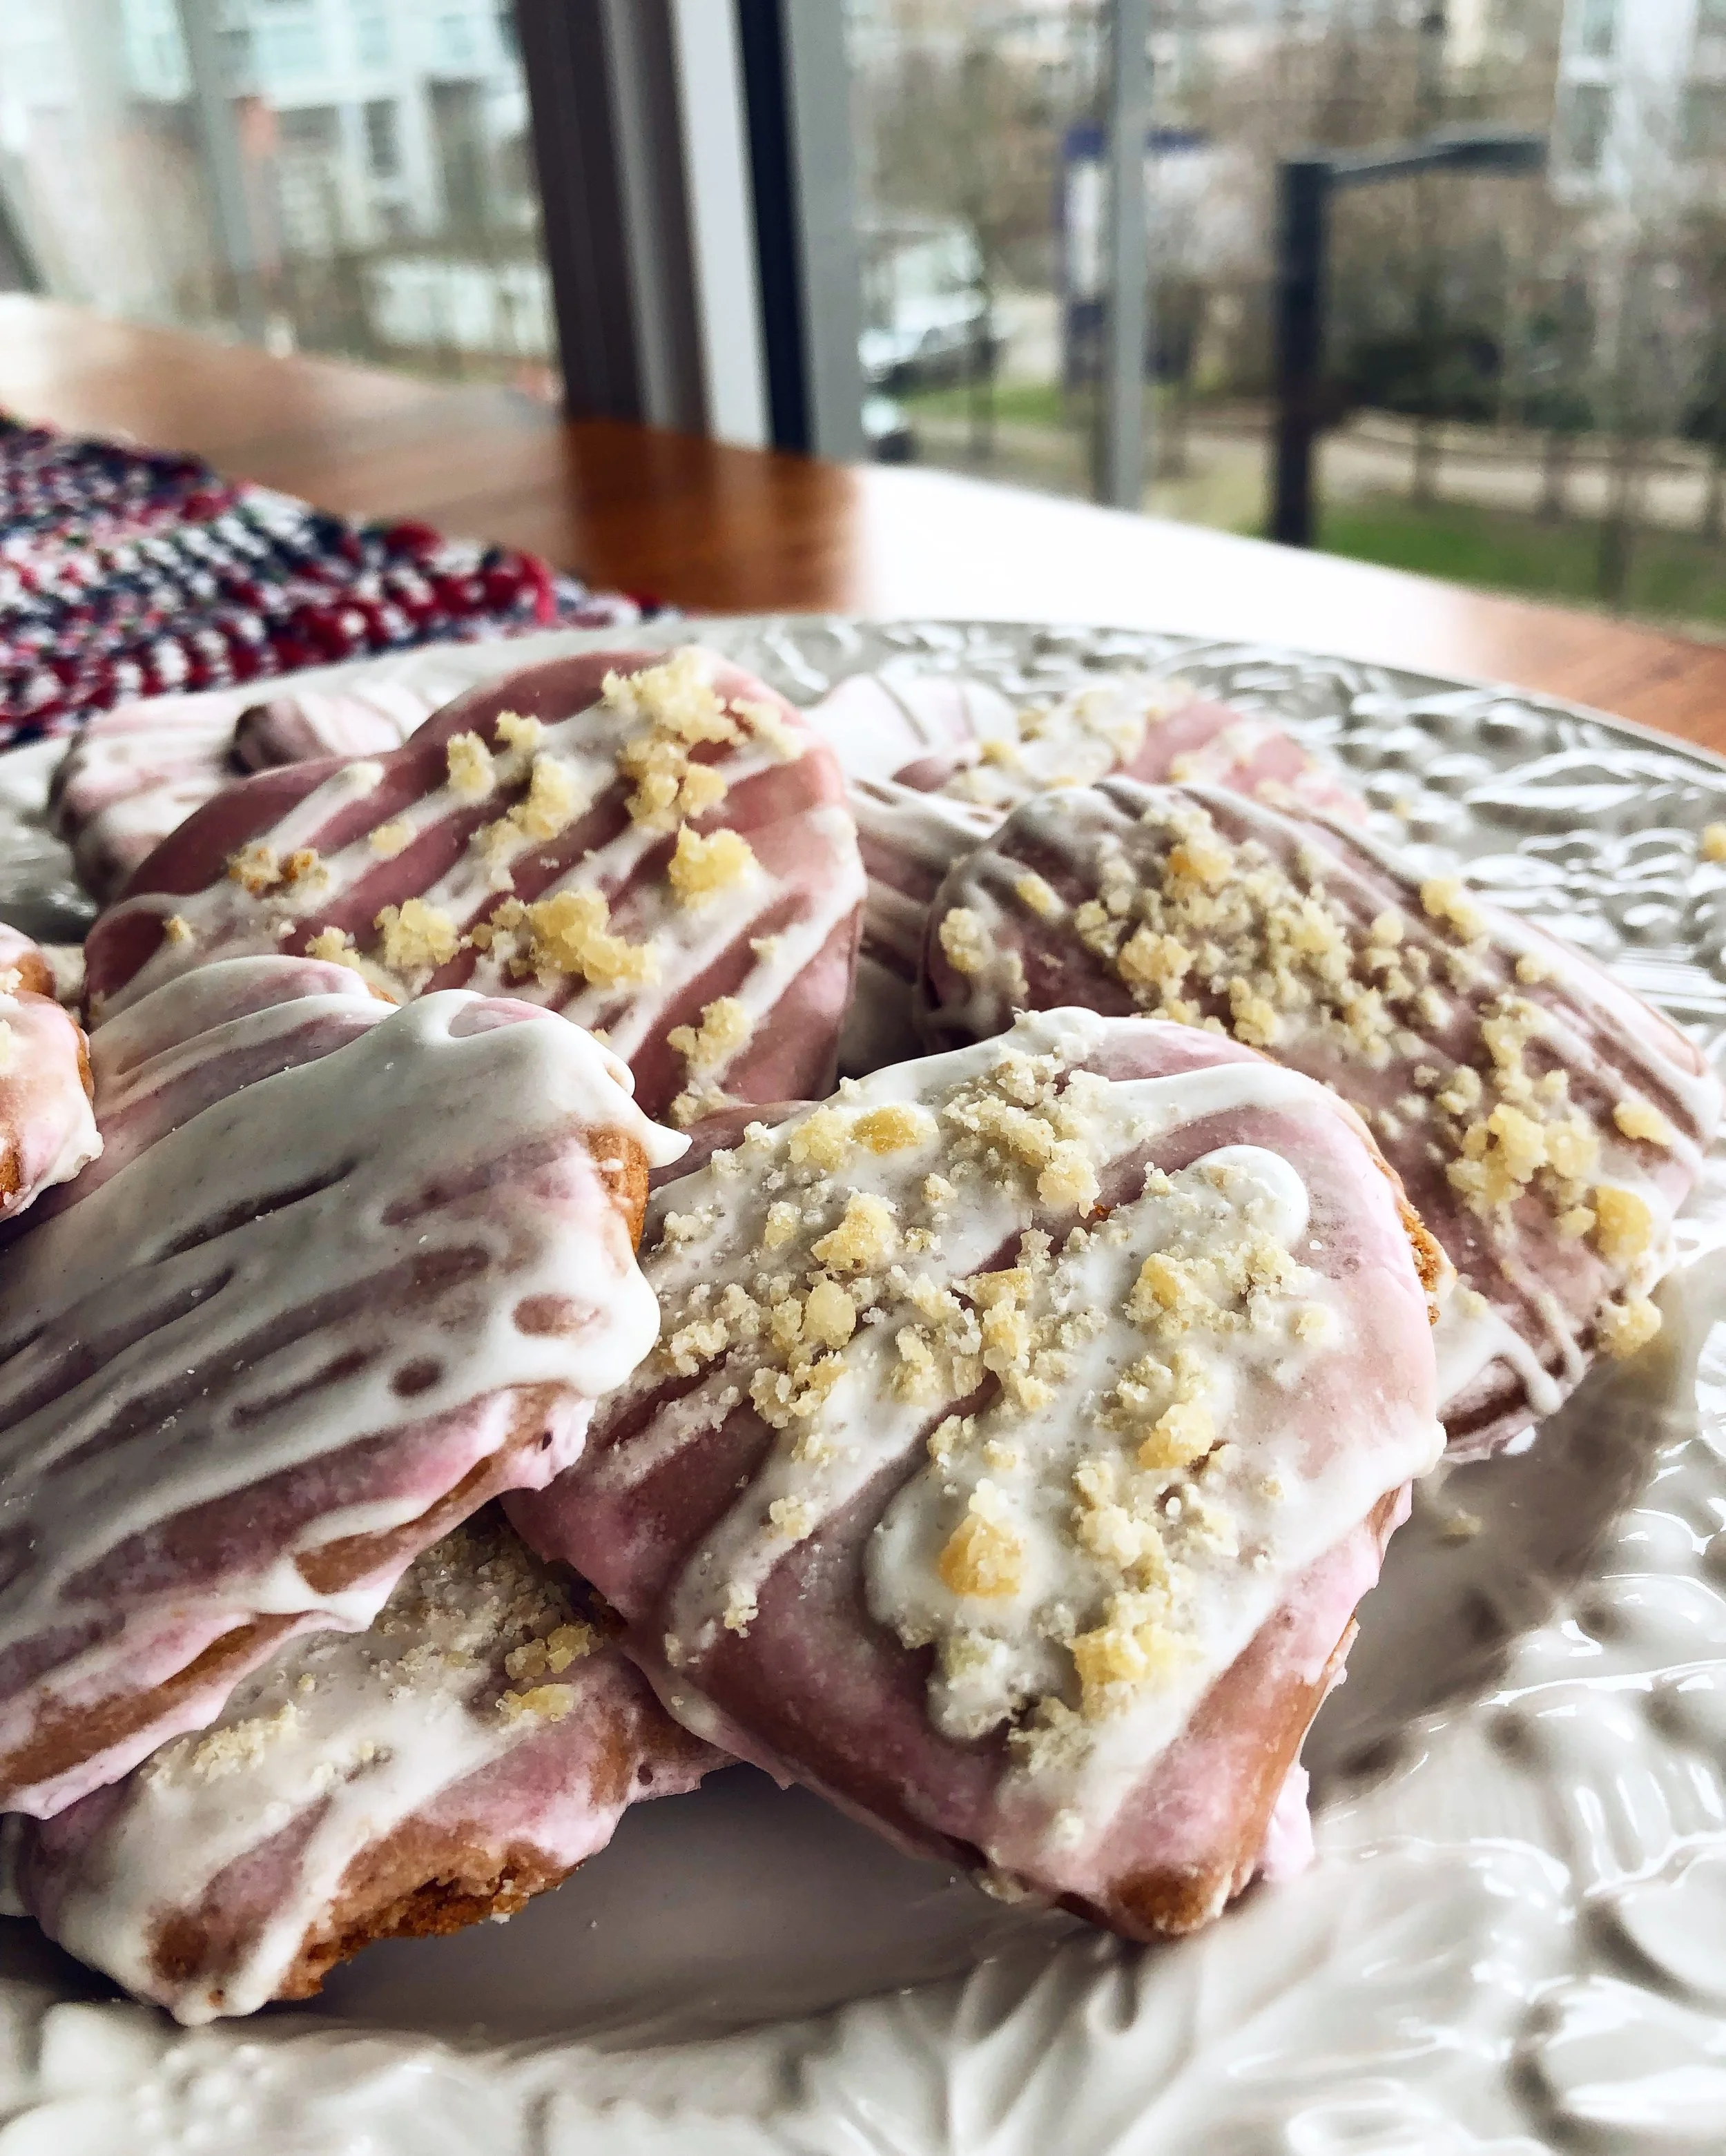
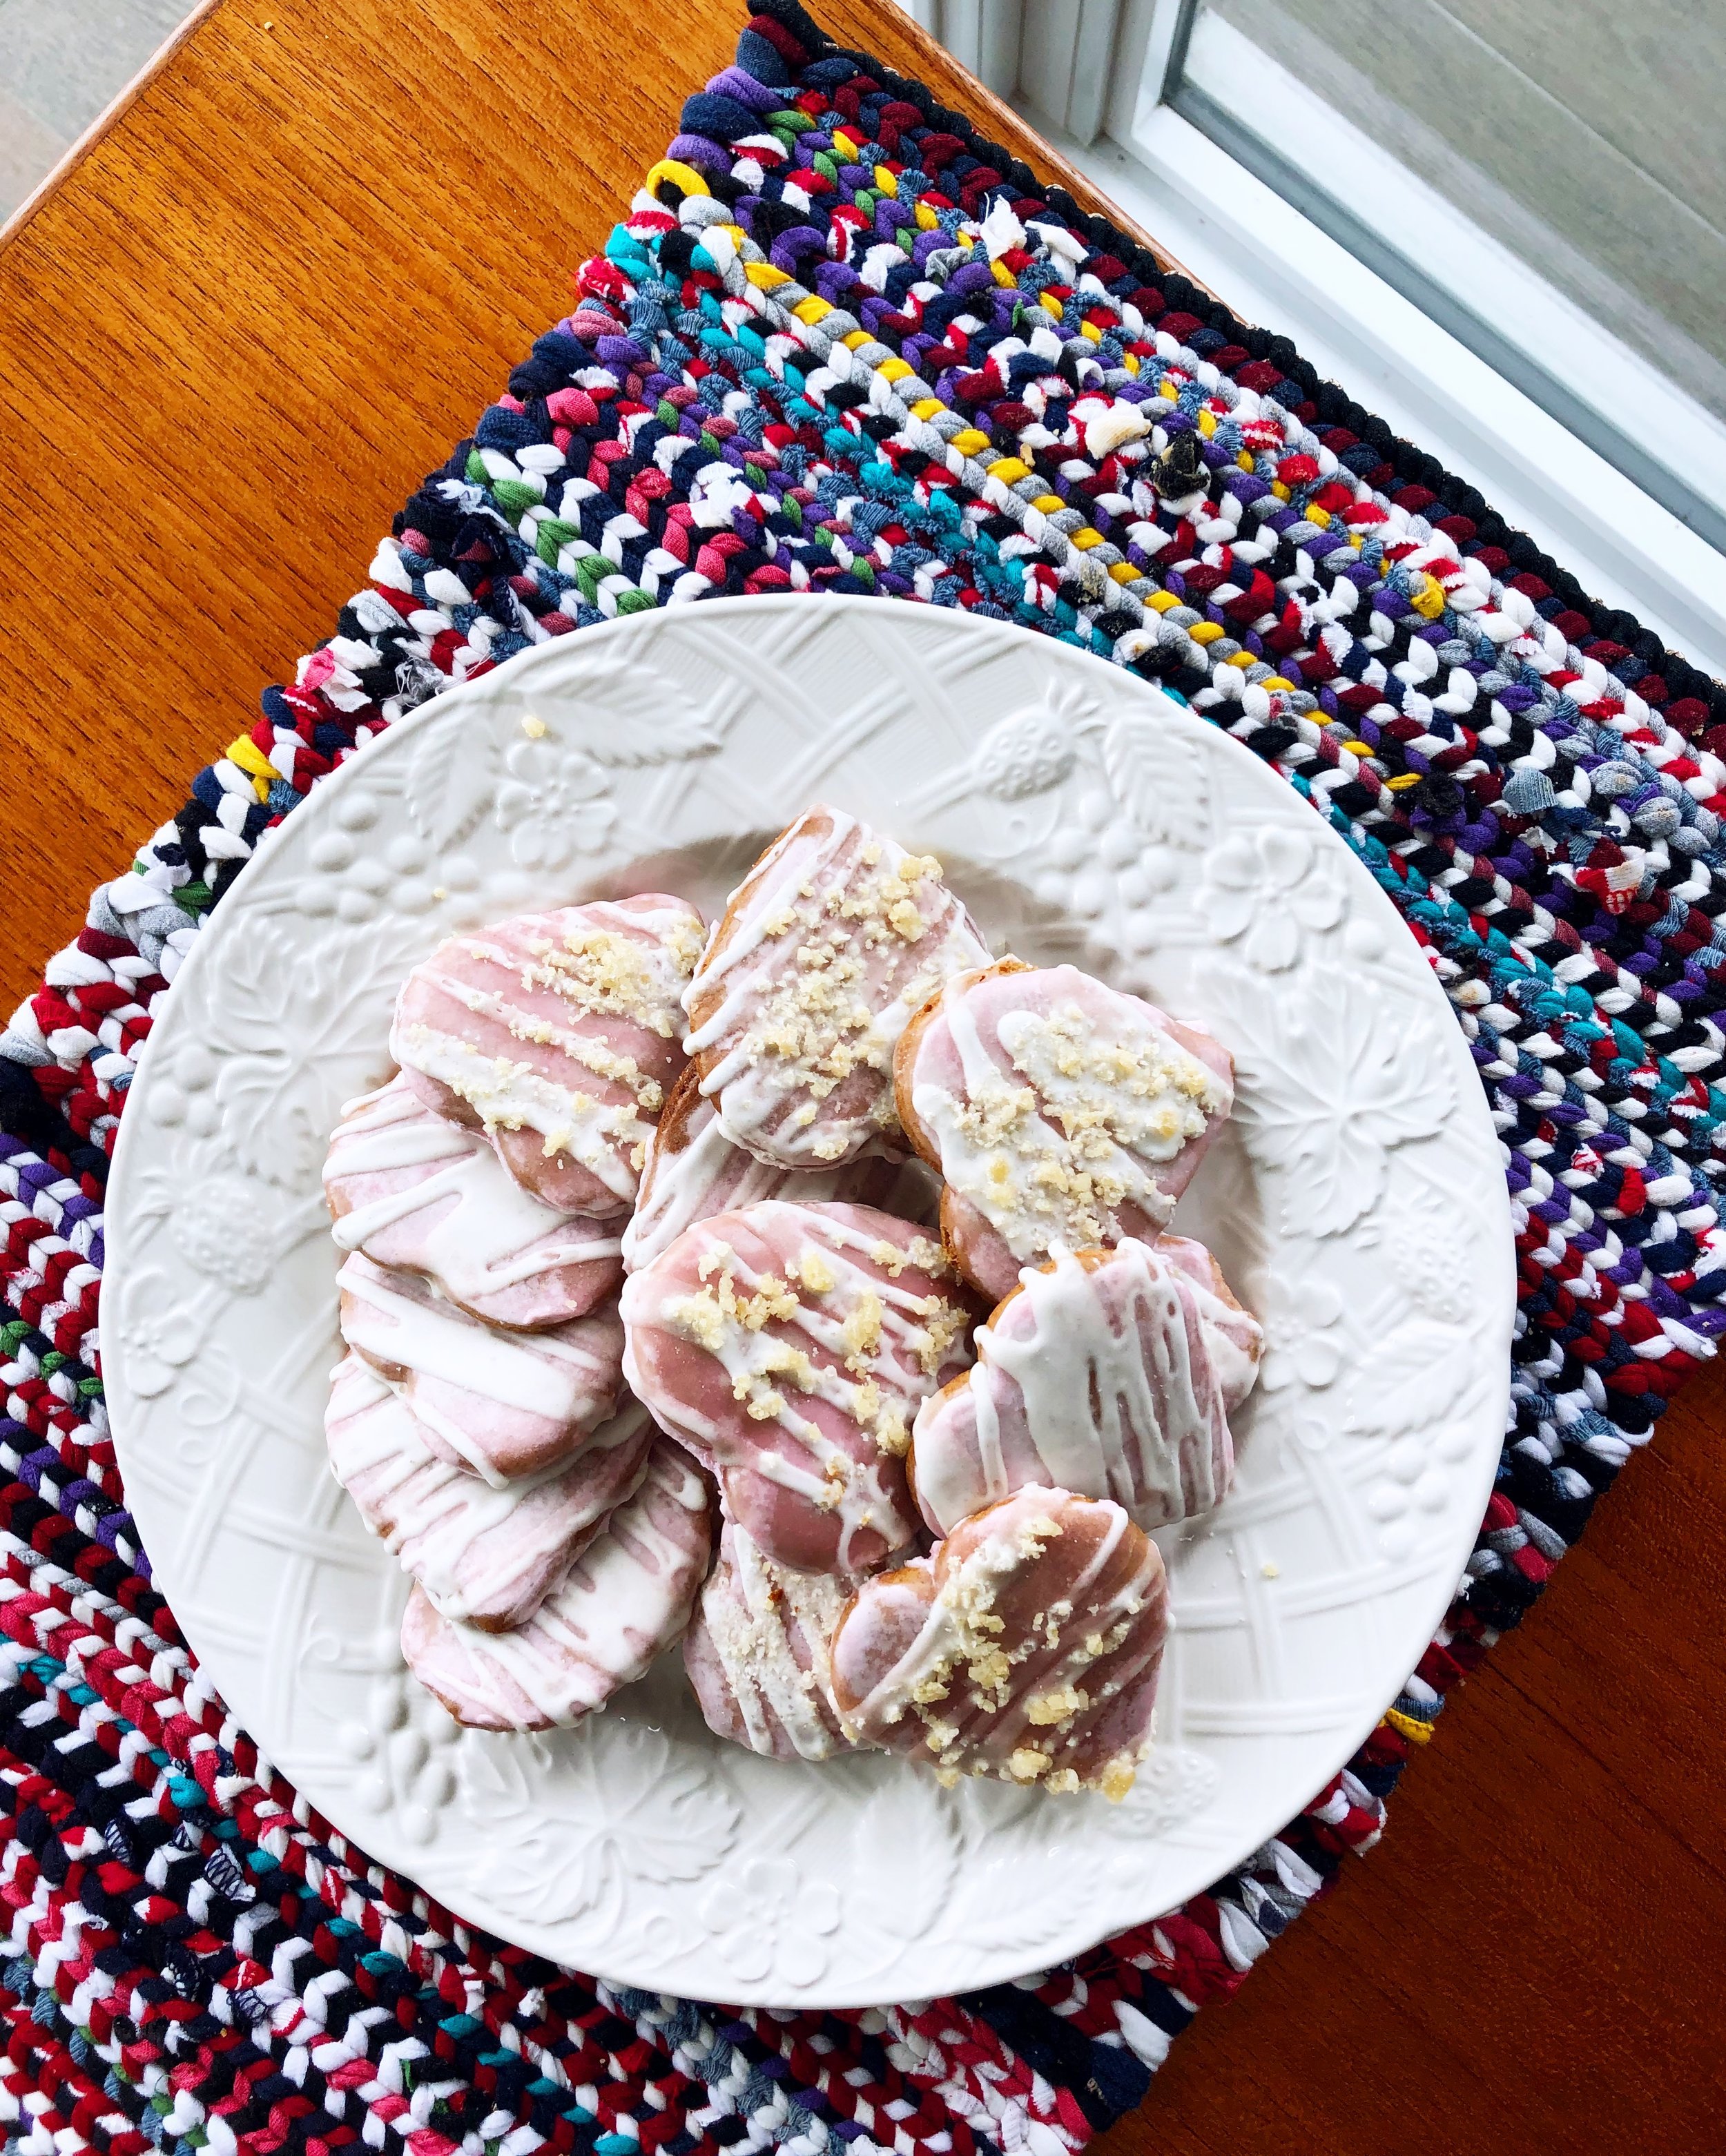
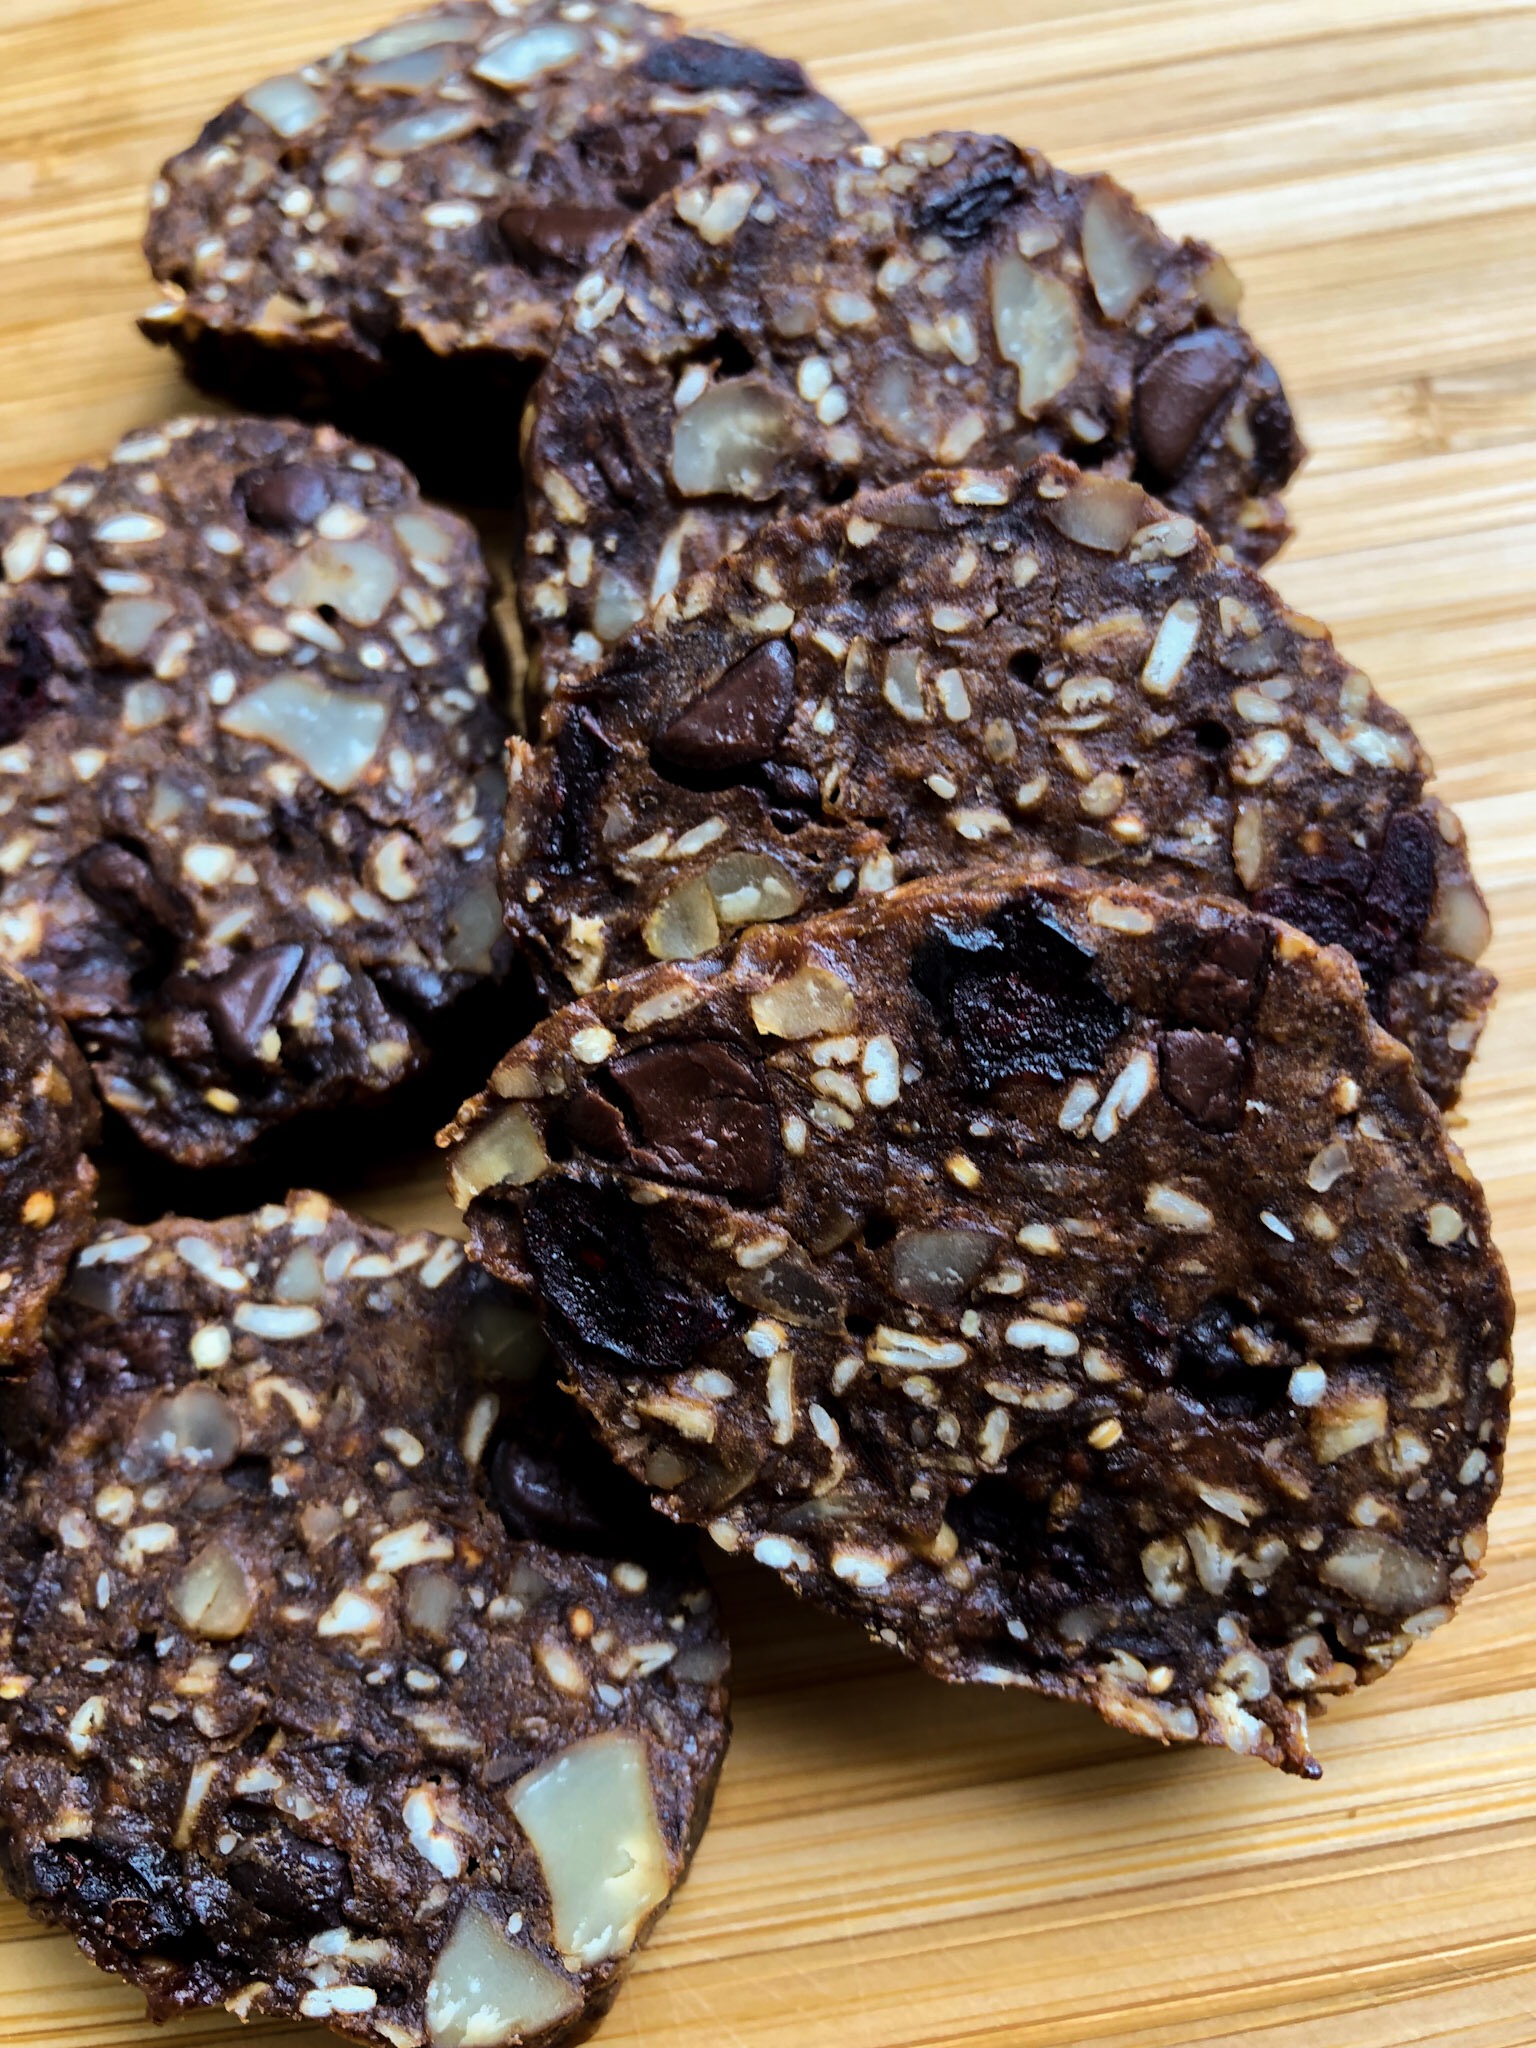
Part of my motivation in creating this cookie was as a sort of trail snack. These are loaded with protein, and nutrients, with a little refined sugar to help with the finished texture (needed for crispy edges) and chocolate to make them seem like a treat (just like in my favourite trail mixes). The other unexpected bonus is that my preschooler loves eating these! He’s so picky and protein has been a major challenge to get him to eat. These are perfect!

You’ll notice that the yield for these will vary and that depends on how large you shape your logs of dough. I went small because it’s easier for my son to eat. Feel free to try a larger diameter, but remember to adjust your baking time accordingly.

IMG_3104.jpeg

Trail Mix Cookies with Cricket Protien

Ingredients

  • 2 cups chopped, roasted nuts
  • 1/2 cup chia seeds
  • 1/2 cup oats
  • coffee or juice for soaker
  • 1 cup butter
  • 1/2 cup white sugar
  • 1/4 cup molasses
  • 1 cup date puree
  • 1 tsp vanilla extract
  • 1 tsp cardamom
  • 1/2 tsp nutmeg
  • 1 tsp baking soda
  • 1 tsp baking powder
  • 3 cups flour
  • 1/4 cup Bite Snacks Pure Cricket Powder
  • 3 tbsp cocoa powder
  • 1 tsp salt
  • 1 cup chocolate chips
  • 1 cup craisins
  • 1 cup oats
  • Optional: up to 1 cup other mix-ins like pumpkin seeds, sunflower seeds, or whatever else you like in your trail mix.

Takes two days, serves several dozen cookies depending on the size you make your logs.

Instructions

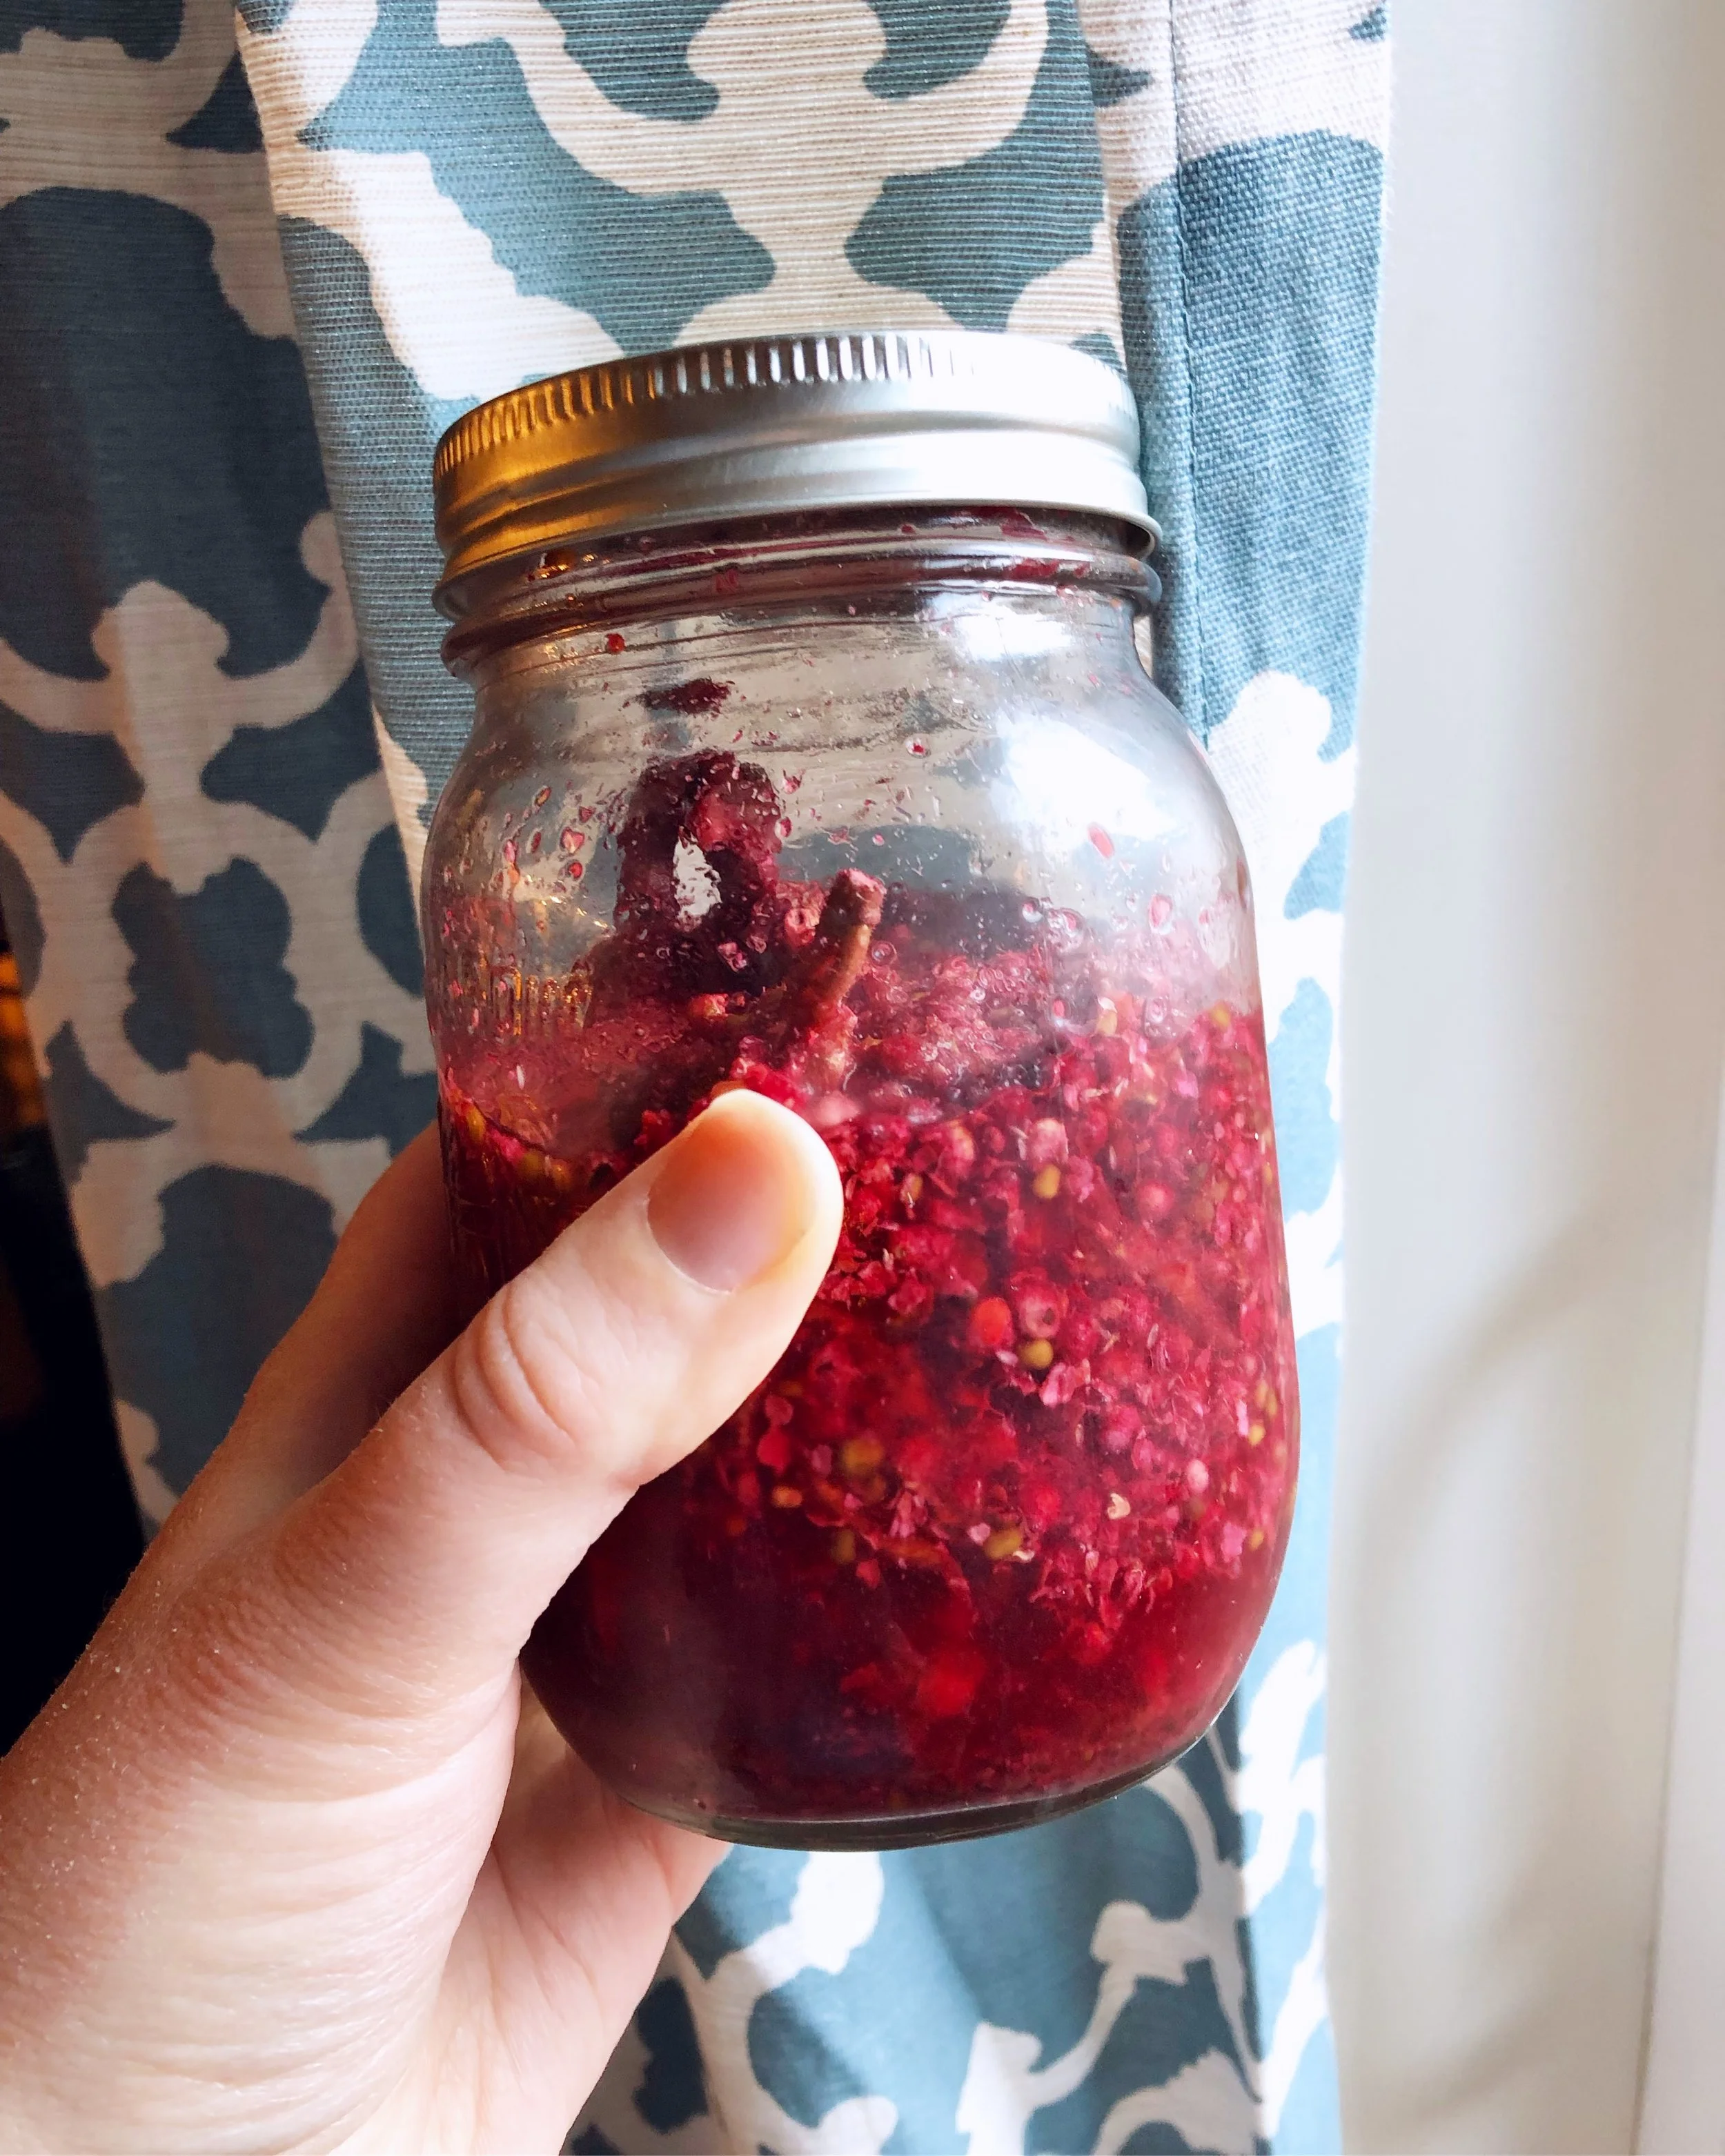
  1. The day before you want to make the cookies, prepare the soaker. Roast the nuts (spread out on a cookie sheet, roast at 350 degrees until you just start to smell them - don’t walk away! This will only be about 10 minutes). Chop the nuts, and combine with the chia seeds, and oats in a container such as a quart sized mason jar, and cover with coffee or juice. Soak overnight in the fridge.
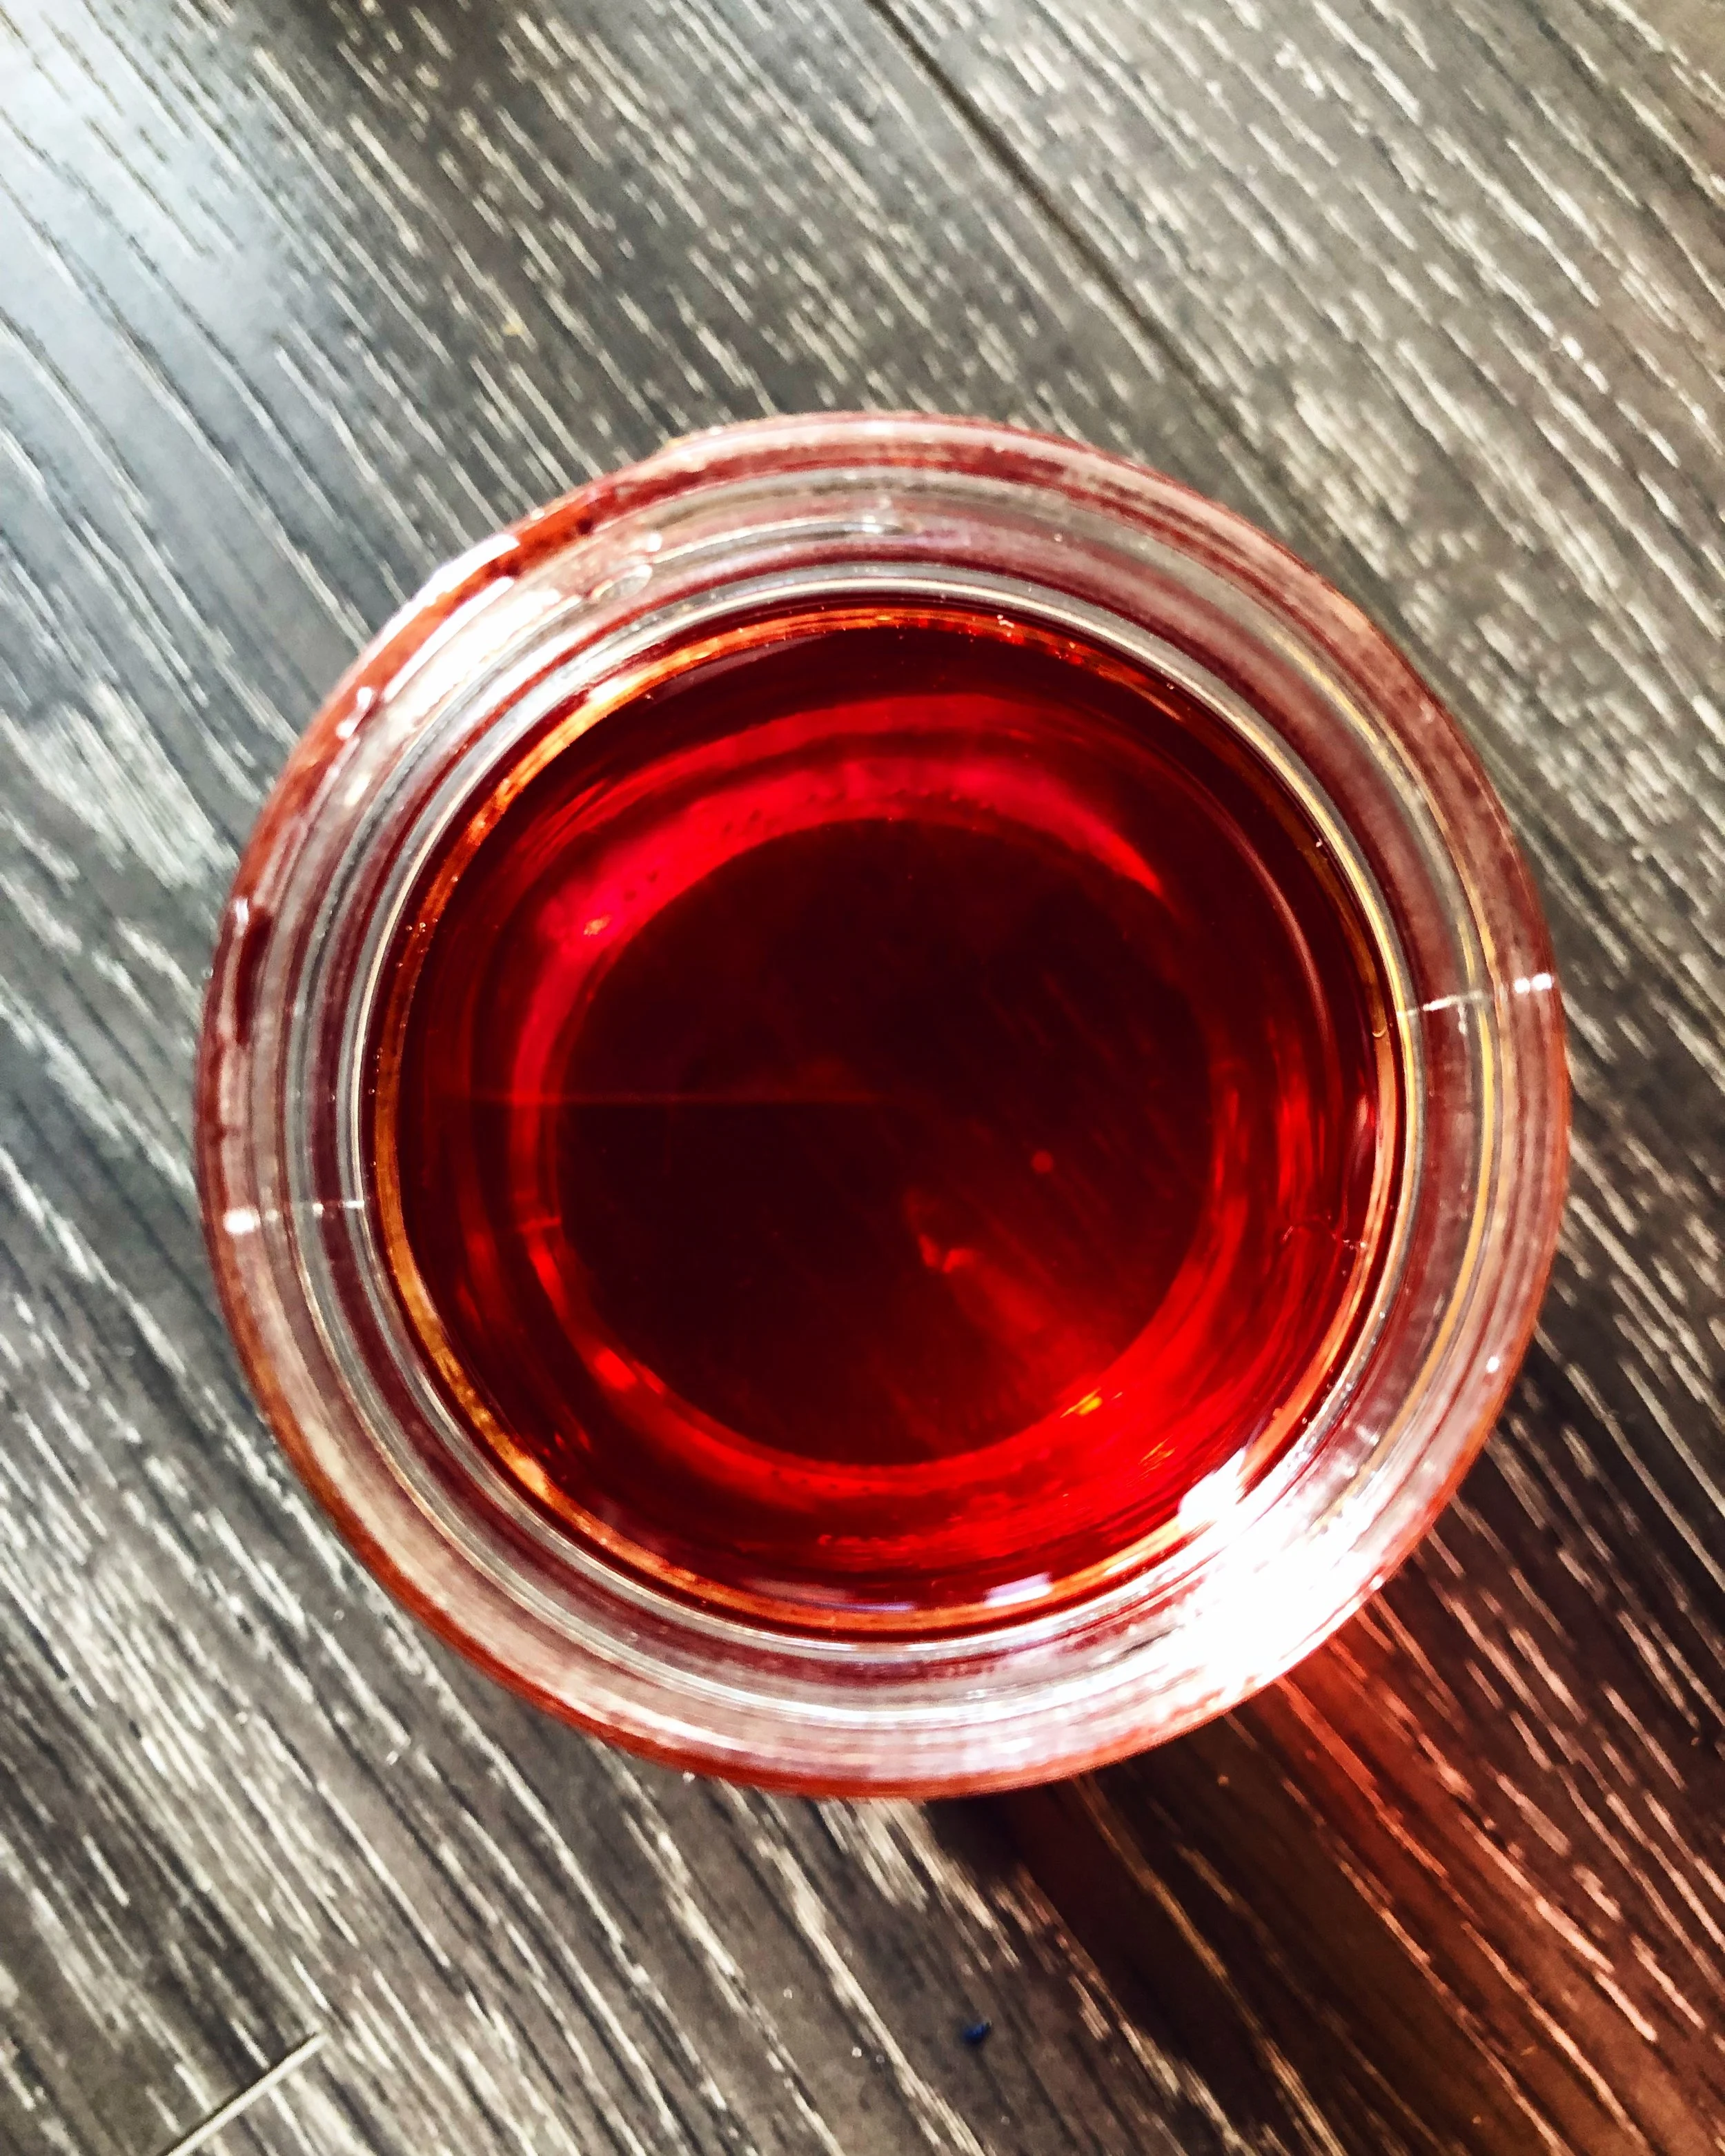
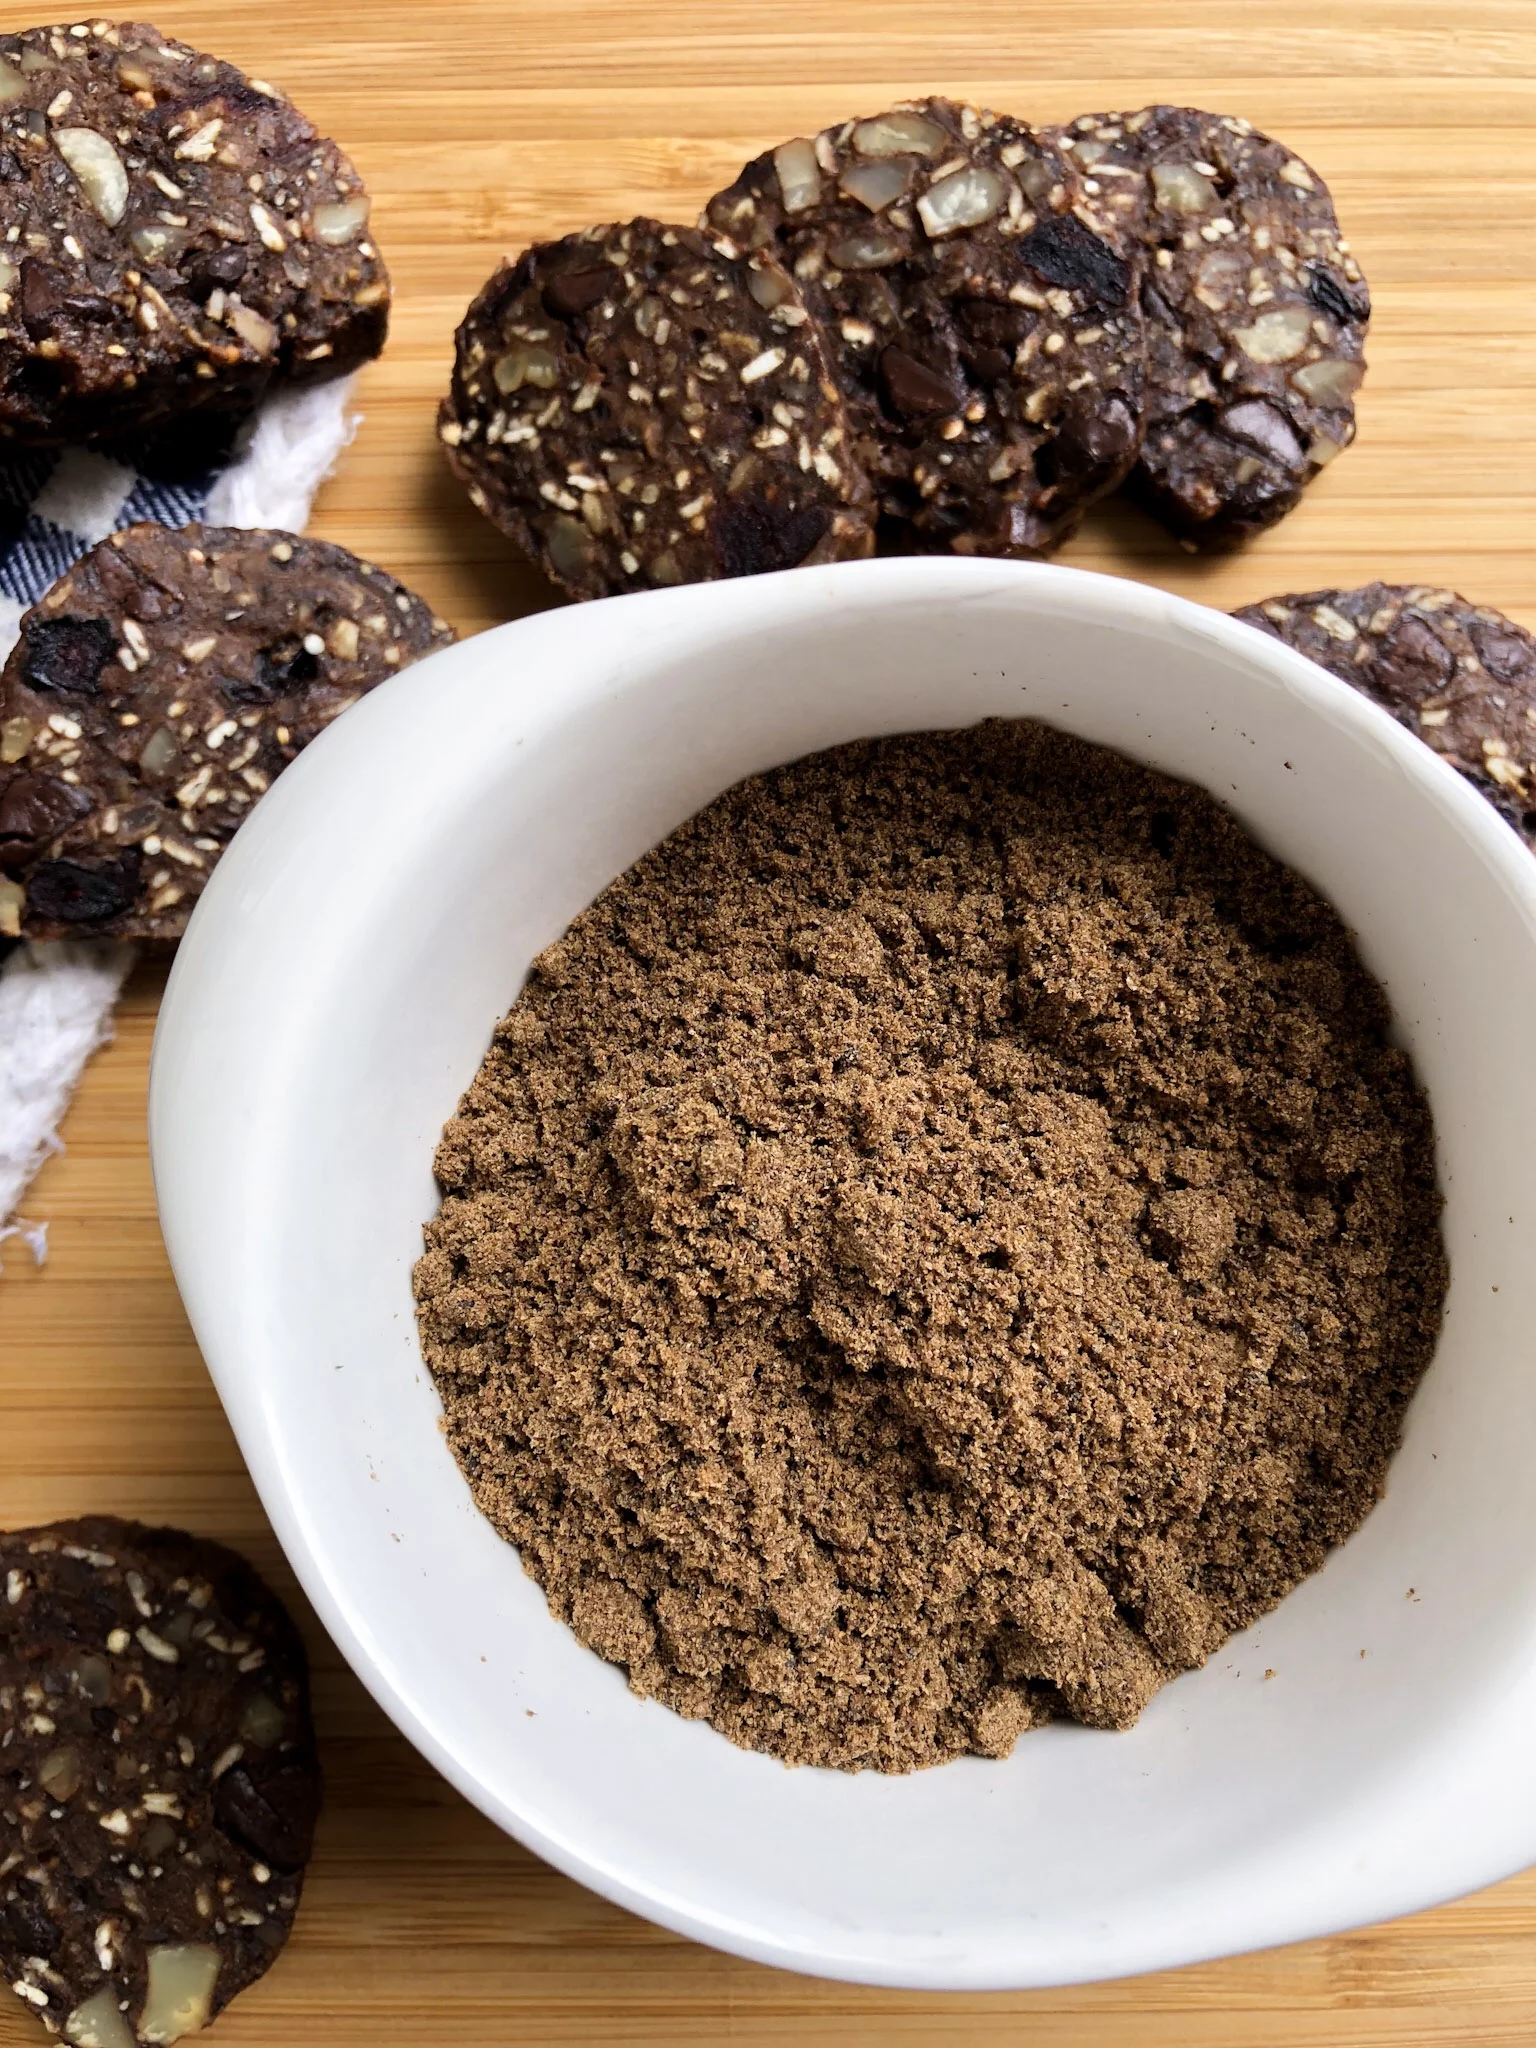
  2. The next day, make your date paste by blending about 40 dates with a little bit of water in a food processor or high powered blender.
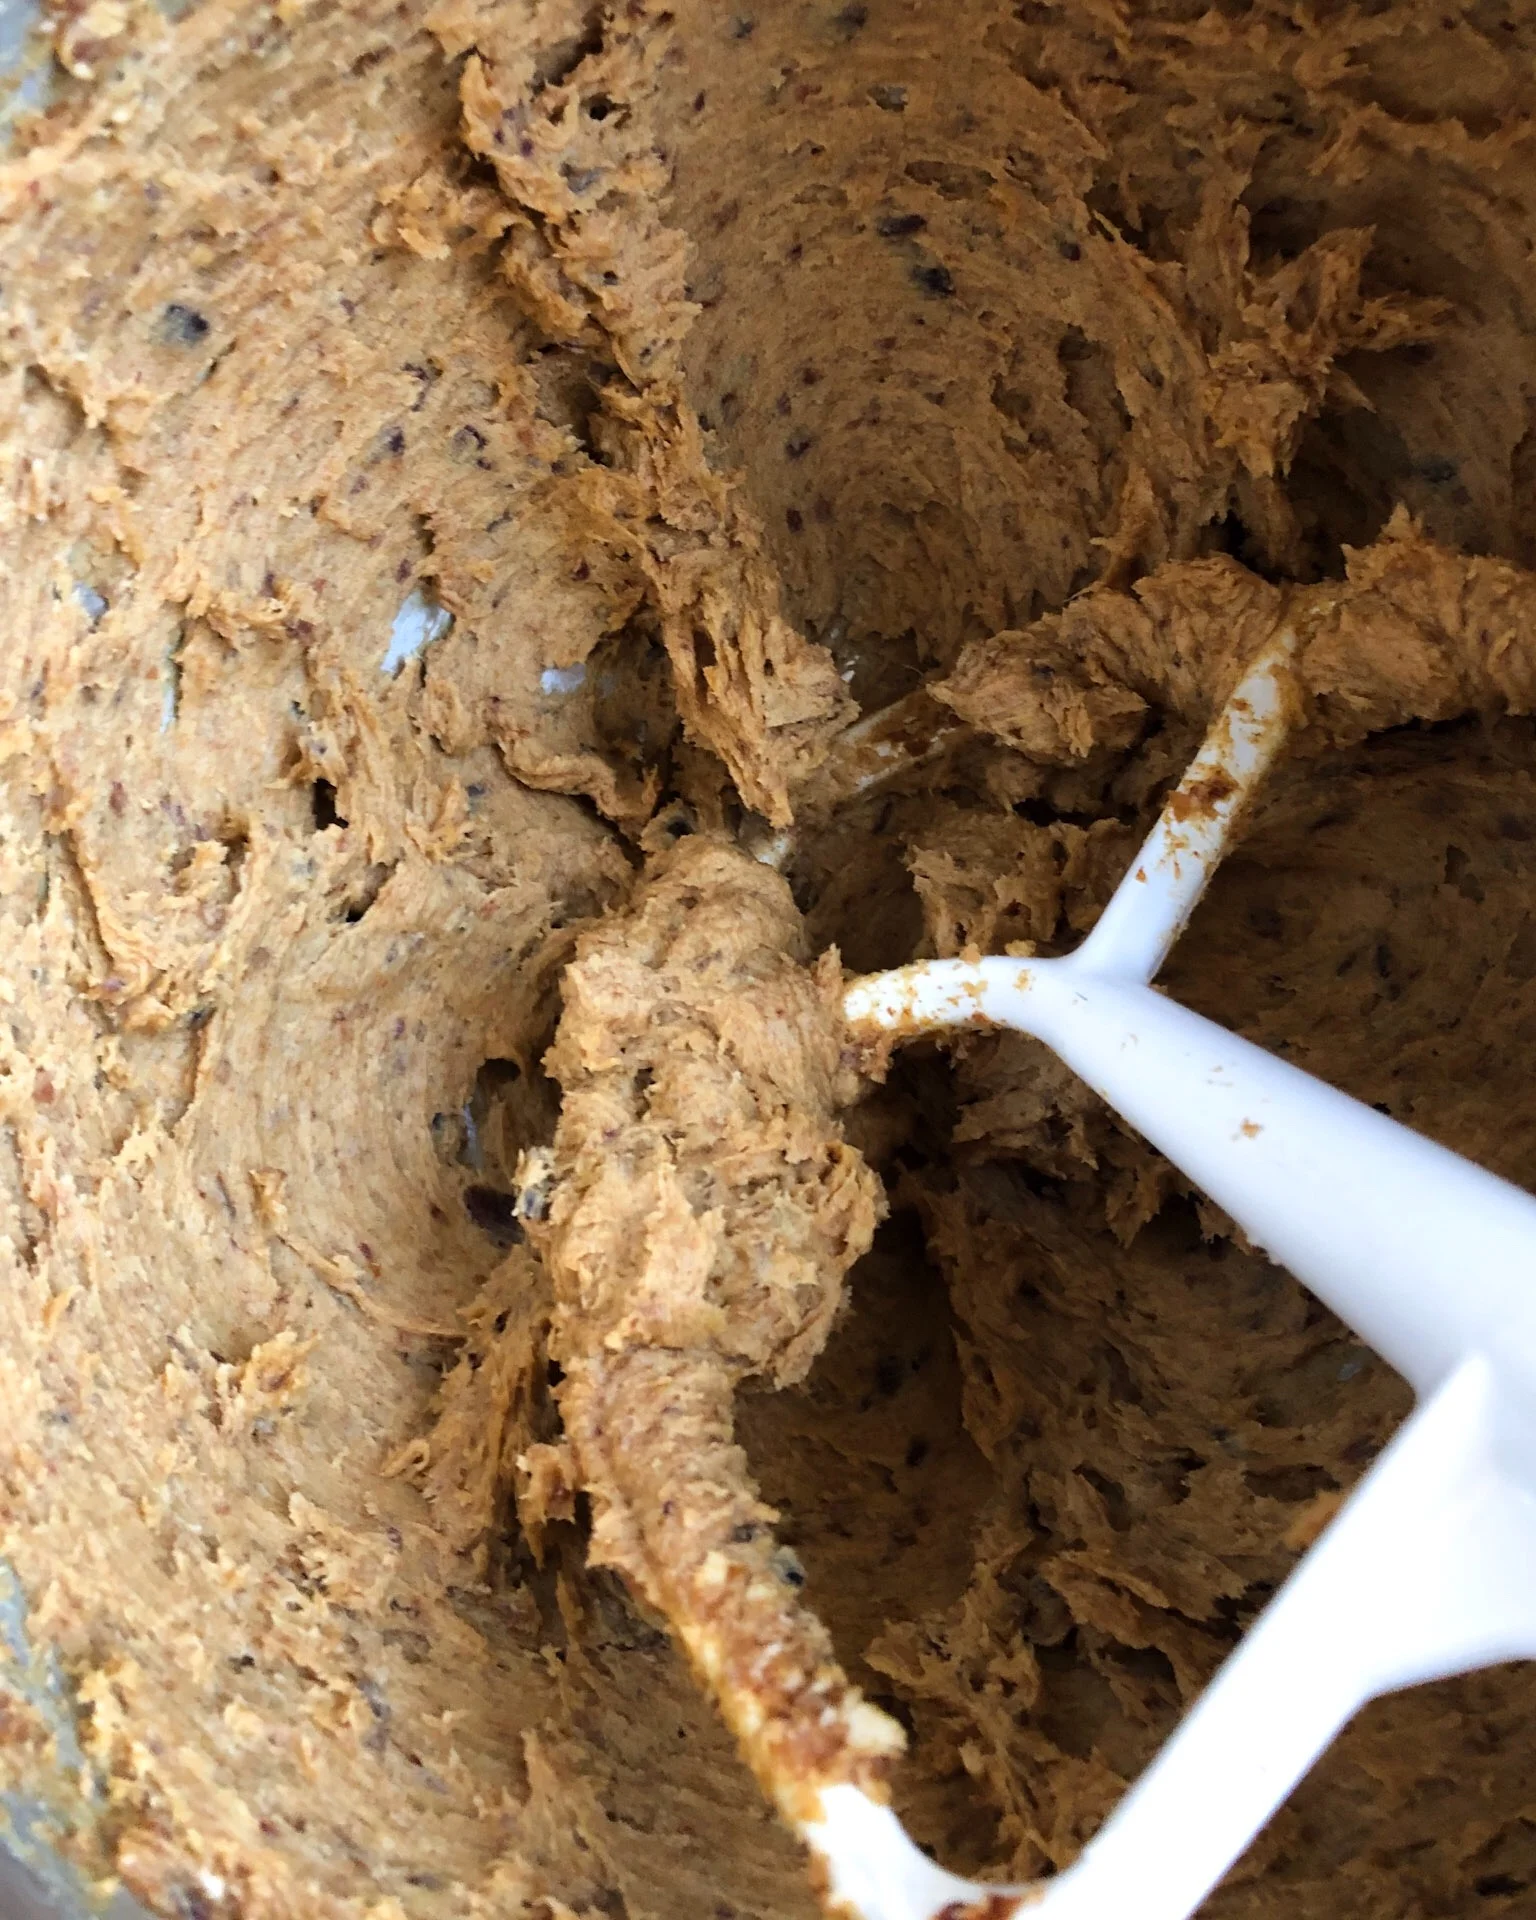
  3. Cream butter, sugar, molasses, and date paste until light and fluffy. You’ll want to make sure that everything is well blended, and one homogenous colour. Any sugar crystals should be dissolved. This might take a few minutes longer than you are used to with other cookies.
  4. Add the egg, vanilla, and spices, and continue to beat until well emulsified.
  5. Add soaker mixture from the fridge.
  6. Combine your baking soda, baking powder, and salt in a bowl with three cups of flour. Add this bit by bit, with your mixer running on the lowest setting. It is possible you will need more flour depending on how much liquid your soaker contributed to the overall mix. This will be a very wet dough. Add enough flour that it is workable, but still quite tacky. Go easy here as your oats and other dry mix-ins will absorb some of the liquid and you really don’t want to make these too dry.
  7. Add in craisins, chocolate chips, oats, and any other mix-ins.
  8. Scoop your dough onto wax paper, and form into logs. Freeze, or refrigerate until firm. When you are ready to bake preheat your oven to 350˚F. Slice the cookies to a thickness just over 1/4 inch.
  9. Lay cookies out on a baking sheet, and bake for 15-20 minutes.

Bite Snacks provided me with the Pure Cricket powder free of charge in exchange for this recipe and review, but all my thoughts and opinions are my own.

June 03, 2019 /Kelsey Fast
cookies, recipe
Eat
Comment
26ED835D-491A-4A22-BCE8-5B6C6E934901.jpeg

Garden Planning for a Balcony

May 07, 2019 by Kelsey Fast in Grow

By this time last year I had already written at length about my garden plan, broke down how I store my seeds, had given you a spring garden tour, and even had some harvest totals to share. I think it’s safe to say that I’m taking a more relaxed approach to gardening this season. A major part of this is the fact that I’m only working with a balcony for garden space, so I thought you might be interested in what I’m doing this year to plan that out.

Haskap bushes in our new (large) planter beginning to leaf out.

Haskap bushes in our new (large) planter beginning to leaf out.

I’m actually excited about the garden this year. A lot of people have asked me why I haven’t joined a community garden, or found somewhere to grow some things on a friend’s property or something. I might look into it in the future, but honestly with the arrival of Baby Forager I think the balcony is about all I can handle this time around! It’s also a really different climate than I’m used to. It’s almost the exact opposite of my old garden - south facing, sunny, and hot instead of north facing, shaded, and cool. Lots of things I had little succiess with before might do well here. Maybe I’ll finally have that amazing tomato crop I’ve been hoping for!

1CAB9EE6-3B29-4444-B263-B20471959A71.jpeg

I like to do my initial plans on graph paper. I don’t worry too much about drawing everything perfectly to scale, but this way you do get the ability to be a bit more precise. I find it helpful to at least have the exact measurements of the space you’re working in.

We built some really big planters for the garden out of cedar planks, and I’ll share how that worked at a later date when they are all finished. I am keeping a couple shrubs alive in the first one, and so hope to add some small fruit trees, and a grape vine. I’m hoping to use the grape vine to shade our large window a bit since it’s going to be a really hot summer and I don’t want to spend a ton on air conditioning!

507F5348-C90F-4AD3-90C0-A808DB23AA3E.jpeg

This will be a lot different for me, but I’m still going to focus the garden on mainly growing food, but obviously I won’t be able to grow a large amount of anything anymore. I’m very grateful for the awesome farmers markets and farmstands that are nearby to buy our produce.

Do you have any tips for growing in containers? I’d love to hear them all in the comments because I’m going to need all the help I can get!

May 07, 2019 /Kelsey Fast
garden planning, garden, small space garden
Grow
Comment
IMG_9035.jpeg

Eat the Dandelions

April 15, 2019 by Kelsey Fast in Find

Spring is the season of flowers, rebirth, planting, and so many other wonderful things. I’ve also come to notice that it’s the season for people to talk about bees. As a forager, a gardener, and an environmentally concerned citizen of the planet, I am very happy when the general public also remembers that bees are important. Since they play a key role in most of our food production, bees and other pollinators are vital to our survival so we are right to be concerned about protecting their food sources and habitat.

This concern for the bees gets demonstrated in all sorts of ways. Just today I was shopping and samples of Honey Nut Cheerios were being given out (very difficult to eat that sample as you’re pushing your shopping cart), along with packets of sunflower seeds to plant to ‘save the bees’. They even changed the design on their box to show a blank silhouette where the cartoon bee would be, to remind you that your beloved breakfast cereal is dependent on the bees not going missing. This is all well and good - even practical by giving out the sunflower seed mix to plant.

The most common thing I’ve noticed these days is that people demonstrate their care for the bees in the same way they do for almost everything else: hitting ‘share’ on a Facebook meme.

IMG_9388.jpeg

I’m sure you’ve seen these kinds of posts. They usually make the rounds on social media this time of year saying something like:

“Dandelions are the first food for bees in the spring. Don‘t spray them with pesticides! ”
— Random Meme on Facebook

This concern for the environment is great, but can we find better ways of expressing it than just sharing a Facebook post? I see this kind of thing all the time for all sorts of issues - and occasionally I’ll share some things that I find important too - but I hope that I can also say I’m working in other ways to make a positive change in my world than just clicking one button online. In the end, I do hope that people are discouraged from spraying weed killer, and if the Facebook posts are helping that’s great.

IMG_9060.jpeg

There has been an offshoot of this making it’s way into conversations about foraging.

I still have so much to learn about foraging, but over the past few years the humble dandelion and I have developed what you might call a relationship. We’re both descended from European transplants, and have naturalized here in North America. I let them grow in/near my garden, and they grow huge (I take care of my soil) and feed me. You can eat the entire plant from flower to root, and it’s all delicious. I’ve written here about using them in pesto, and also adding them to egg noodles. All this doesn’t even mention the role they play in bringing beneficial insects to my plants. Basically, I love the dandelion. It really might be my favourite plant.

Bracelet is the sterling silver spoon bracelet from my shop.

Bracelet is the sterling silver spoon bracelet from my shop.

There is a ‘rule of thirds’ in foraging - meaning that you take no more than a third of any given thing when you find it, and leave the rest to serve it’s purpose in nature. Exceptions would apply for invasive species (take it all), and the rare ones (take none). This sometimes gets combined with the advice about leaving the dandelions unsprayed for the bees, and people get very vocal (usually on the comments section on social media and blogs) about making sure you leave some dandelion blossoms for the bees when you pick some for yourself.

IMG_9103.jpeg

While there is nothing really harmful in this advice, I maintain that - for dandelions - it’s not really necessary. Dandelions are by no means the first or only food for bees in early spring. Here in Kamloops they are only just blooming, but the bees have been out and about foraging for a few weeks already. Don’t forget that dandelions are imports from Europe, so before they were here the pollinators had to have something available to survive until settlers brought them over! Dandelions are plentiful, and definitely valuable for many insect species (not just bees), but you’re not going to endanger the bees by picking too many of their blossoms. They also have a very long blooming season, and send up several flowering stalks at a time so even if you did pick every blossom you saw another would be waiting to shoot up and replace it.

I also don’t appreciate adding unnecessary barriers to people enjoying the nature around them. Dandelions are easy to identify and have no toxic lookalikes, so I like to encourage people who want to learn about foraging to start there. I wouldn’t want them to read one of those comments and feel unsure of whether or not they should pick them.

If those Facebook memes convince people to appreciate this amazing little plant that is awesome. Please don’t take this to mean that I approve of people using broadleaf herbicides on their yards. I just like to correct misinformation where I can. I also feel that encouraging people to eat the dandelions will discourage them from spraying them.

IMG_8974.jpeg

I’ll leave you with some encouragement to pick and eat dandelions without worrying about if you are destroying a fragile ecosystem. Enjoy them! They are as healthy and delicious as they are cheery and bright.

April 15, 2019 /Kelsey Fast
dandelions, foraging, medicinal flowers, musings
Find
Comment
IMG_2069.JPG

Sumac Ginger Honey Hearts

February 06, 2019 by Kelsey Fast in Eat, Find

Hello! There used to be a whole section here with me describing the amazing Flourist sifted red spring flour I use in my baking. I was trying to add something to this and some other old articles, and I’m not sure how but it all got deleted! Continue reading for the recipe, and some more details about how to find and use sumac.

{Jump to the Recipe}

Sumac berries infusing in cold water.

Sumac berries infusing in cold water.

Strained and completed sumac infusion.

Strained and completed sumac infusion.

I have to admit, that making these cookies is a bit of an involved process. This is especially true if you are foraging the sumac, and processing it yourself as I did. Here are some instructions that are very helpful if you want to go that route. If not, you can usually find dried and ground sumac at specialty spice stores, and I even saw it at my local Bulk Barn (bonus shopping here because at some locations you can bring your own container and your purchase will be zero-waste). I’m sure there are online options as well.

Sumac is a shrub that grows native in many areas of North America. You can identify it by it’s compound leaves, and large, compact berry clusters that stick straight up from the branches. The berries aren’t juicy, and they are covered by tiny hairs, and malic acid which gives it the distinct sour, almost citrus-like flavour. In most areas you’ll want to harvest the berries in July, and before any large rainfall hits as this will wash away much of the malic acid. That said, it’s not unheard of that sumac berries are still harvestable later on in the year - just rub them with your finger, and then lick it to see if your finger tastes sour (that will be the malic acid that transferred to your finger). If they still taste sour they are still good to use! The easiest way of processing them is just to bring the berry clusters home and let them dry thoroughly. Store them somewhere they won’t get dusty (I have mine from last summer crammed in a 1/2 gallon vintage mason jar) and they are ready to use whenever you need them.

IMG_2067.JPG

Some of you may have been told that Sumac is poisonous. In the plant world there are many different common names, and sometimes poisonous and non-poisonous plants even share the same one. This is the case with sumac. Poison sumac (Toxicodendron vernix) only grows in swampy areas, whereas the sumac we are looking for (Rhus glabra, Rhus typhina, or Rhus copallina, depending on the species that is local to you) prefers dry landscapes. It also has red berries, whereas poison sumac has white. There really is no chance that you will mistake the two. One thing you will want to be cautious about, is that sumac is related to mangoes, cashews, and poison ivy. If you are especially sensitive to some of these other plants please take caution if you are trying sumac. This post on identifying sumac varieties from Eat the Weeds is an excellent resource, but please make sure you consult more than one resource before eating anything you have foraged.

As always please take care when foraging, and make sure you are 100% certain of what you are gathering and eating. The best option is learning from someone who is an expert on the local plants for your area. Use more than one resource when identifying plants that are new to you like field guides, and reputable online resources - the more specific to your location the better. Spend a lot of time examining the different features of the plant you are looking for. Never be content to identify a plant by one feature alone.

IMG_2070.JPG

Now to explain more about making the cookies themselves! They do take some time to make, but I promise you the end result is worth it! I originally made these at Christmas time (being inspired by traditional Danish Christmas cookies like Honninghjerter, and Pebernødder) and they were the first to disappear from the cookie platters! The holidays were very busy, and even though I had originally planned to post the recipe back then, but I ran out of time. I think that turned out to be a good thing in the end though, because they are also so perfect for Valentine’s Day!

IMG_1682.JPG

You’re going to need to start the sumac infusion ideally two days before you want to have the cookies (although you could get away with the day before, but they are better if you have a bit longer for letting the dough chill). All of the colour in these cookies is completely natural - there is no food colouring at all! The lovely pink in the glaze comes from the colour of the sumac infusion itself, and that is also where the sour flavour from the sumac shines the brightest. Since lemon or other citrus is often paired with ginger in holiday baking, I thought sumac would be a delicious pairing with the ginger and I set out working on making a ginger-forward, spice cookie that blended well with the natural sour, fruity flavour of the sumac.

IMG_1914.jpeg

The day after your sumac has infused, start making your dough. This is essentially a sugar cookie with a lot of spices that gets rolled out a little thicker than normal. You’ll also want to make sure you have time to chill the dough for a day if possible. The flavours need time to mingle together in the dough before baking. if you have to speed things up at least chill the dough for a couple hours. This will also make rolling them out easier.

Make sure you leave a fair amount of room between the cookies on the sheet because they tend to puff up a bit, and spread ever so slightly. I also put in the instructions to roll them out a bit thicker than many of these are in the photos. This is because we found out after eating them all that the thicker ones were better!

IMG_2066.JPG

When your cookies are baked, decorating them is very fun! Prepare your sumac glaze to be a little runnier than your ginger one. You’ll be dipping the cookies into this glaze. Try to let as much excess run off back into the bowl as you can. I found that I had a lot of glaze pooling under the cookies as I let them dry on parchment paper. This wasn’t necessarily a bad thing because it tasted really good to have extra glaze, but it was a little less professional looking, and the glaze didn’t go as far. If this happens to you too and you run out of glaze just make a little more and keep going. No big deal!

When the cookies are all dipped let them dry before drizzling the ginger glaze over top. This will make sure that when you sprinkle the candied ginger over top it will only stick to the white icing. I did some with candied ginger, and some without, but everyone ended up liking the ones with ginger better. If you’re a little more sensitive to the heat of ginger feel free to leave that step out - they look and taste great without it too!

IMG_2068.JPG

Sumac Ginger Honey Hearts

Ingredients

    For the Cookies

  • 3 cups flour
  • 1 cup butter
  • 3/4 cup sugar
  • 3/4 cup light honey
  • 1 large egg
  • 2 tbsp sumac infusion (prepared ahead of time)
  • 2 tbsp dried sumac powder
  • 1/2 tsp salt
  • 1 tsp vanilla extract
  • 2 tsp ground ginger
  • 2 tsp fresh ginger (grated, or very finely minced)
  • 1/2 tsp nutmeg
  • 1/2 tsp white pepper
  • For the Glaze and Decoration

  • 3 cups icing sugar (approximate)
  • 2 tbsp sumac infusion
  • 1 tsp ground ginger
  • 1 tsp vanilla
  • 1 tbsp milk/water
  • 2 tbsp corn syrup (divided)
  • 1 cup candied ginger (to be finely minced)

Takes two days, serves several dozen cookies depending on the size of the cookie cutter used.

Instructions

  1. Two days before you want the finished cookies, prepare you sumac infusion. If you are using fresh/dried sumac berries, add a couple drupes worth of berries to a pint jar, and combine with 1 cup cold water. Leave in the fridge overnight. If using sumac powder you either purchased or prepared yourself, add 3 tbsp powder to one cup of cold water and leave in the fridge overnight.
  2. The day before you want to bake the cookies prepare the dough. This dough really needs to be chilled overnight to let the flavours come into their own more fully before baking. If you don’t have time for this, at least chill the dough for a couple hours, but overnight will be better.
  3. Cream butter, sugar, and honey together until well emulsified. You shouldn’t be able to see any sugar crystals, and the resulting mixture should be light and fluffy.
  4. Add the egg, vanilla, sumac powder, 2 tbsp sumac infusion, and continue to cream the mixture until well emulsified. It should all look like one cohesive mixture with no visible clumps.
  5. Add the salt, baking soda, and spices. Mix well.
  6. Last of all, add the flour slowly, mixing on low. Depending on the humidity levels of the flour and your kitchen you might need to add a little more or less, so keep an eye on the dough as you add the flour and stop early, or add a little extra depending on how it looks and feels. Don’t let the dough get too dry, though. It will firm up and be easier to work with after it spends some time in the fridge, and you don’t want your finished cookies to be too floury. Aim for your dough to be fairly sticky at this point, but not overly runny.
  7. Transfer to an airtight container and leave in the fridge overnight, or at a bare minimum a couple hours.
  8. At this point preheat your oven to 350 degrees Fahrenheit. Roll out the cookies to a 1 cm (or just under 1/2 inch) thickness, using a little more flour on your work surface and rolling pin to keep the dough from sticking. Cut into hearts, and continue this process until all your dough is used up. I don’t find too big of a difference after re-rolling the excess dough a few times. I also feel that ingredients - especially foraged ones - are precious, so I like to make sure I use as much of my dough as possible. The yield here will depend on the size of cookie cutter you use, but you should end up with a couple dozen cookies either way.
  9. Leave some space between the cookies on the baking trays, because they do tend to puff up and spread just a little bit, but they will definitely still maintain their heart shape after all of this.
  10. Bake the cookies until they are just barely beginning to brown on the edges. This will be about 15 minutes per tray, depending on how your oven runs. Mine seems to run a bit cooler than most, so I often end up needing to leave things in a little longer. You can also usually tell when the cookies are almost done because you’ll start to smell them as they bake.
  11. Remove the cookies from the oven and allow them to completely cool before you start decorating them.
  12. While waiting for the cookies to cool this is a good time to start preparing your glazes. You’ll do one in a larger amount with the sumac infusion, and one with ginger powder and vanilla.
  13. Combine 2 cups icing sugar, 1 tbsp corn syrup, and sumac infusion to make your first glaze. Add the infusion slowly so that you get the right consistency. You want it to be thick enough to coat whatever is dipped in it, but runny enough that the excess will still drip off when you dip the cookies. If you overdo it, you can always add more icing sugar to thicken.
  14. For your second glaze, add the remaining cup of icing sugar and corn syrup, as well as the ginger powder, vanilla extract, and milk/water (go slowly as you add this - you may not need it all). You want this glaze to be slightly thicker than the other since it will be used as a drizzle over the finished cookies.
  15. Dip all the cookies in the sumac glaze first, allowing the excess to drip back into the bowl as much as possible rather than just leaving them to drip on the parchment paper or whatever you’re going to let them dry on (this just makes a tidier looking end result - if you don’t get it all don’t worry you’ll just have some of the glaze pooling underneath the cookie). I started having problems with pooling, so I started leaving the freshly dipped cookies on a cooling rack for a few minutes before transferring to parchment to continue drying.
  16. Drizzle cookies with the ginger glaze, and while this is still wet sprinkle with the very finely chopped candied ginger. Allow this to dry completely before you handle the cookies.

While the prize for the giveaway on my Instagram feed was sponsored by GRAIN, this post is not. I have been their customer for the past few months and wholeheartedly endorse their product based on my own experience. All thoughts and opinions expressed are completely my own.

February 06, 2019 /Kelsey Fast
baking, cookies, eat, foraging, food, in my kitchen, recipe, sumac, GRAIN
Eat, Find
Comment
My favourite photo from January. We traded a friend some some sad leftover squash (for her chickens) and a garden hose we didn’t need anymore, and we got these gorgeous eggs. The best kind of trades are when both parties feel they got the better end…

My favourite photo from January. We traded a friend some some sad leftover squash (for her chickens) and a garden hose we didn’t need anymore, and we got these gorgeous eggs. The best kind of trades are when both parties feel they got the better end of the deal!

Friday Favourites: January 2019

February 01, 2019 by Kelsey Fast

One Friday each month I like to link up to various other blogs and resources I find on the internet and share some of the things I’ve found to be helpful or interesting. Take a look and maybe find out something new!


Grow

  • Some excellent info about allowing your Christmas tree to decompose in your back yard as a DIY ecology project.

  • How to know if a seed variety is good for container gardening from Fruition Seeds.

  • An interview with William Padilla-Brown on cultivating mushrooms.

  • How to better make use the “days to maturity” information on seed packets from Garden Betty.

Find

  • An article from Bird Studies Canada about the first ever Christmas Bird Counter in British Columbia.

  • An article about how the first Cape May Warbler ever found in the lower mainland was recently spotted in Abbotsford, BC.

  • Why woodpeckers are keystone species in many ecosystems from Woodland Woman.

  • How to make Wild Bark Tea from How to Cook a Weed.

Eat

  • Granola recipe using sumac (you can forage this or pick it up at spice stores) as one of the flavours from Food52.

  • An article about chef Rich Francis who is working to raise awareness about Indigenous food culture in Canada.

  • Marisa from Food in Jars is doing another preserving “mastery challenge” this year.

  • Really great article on a baker’s relationship with their sourdough starter.

  • I had an amazing time a few months ago at the laminated pastry workshop at Bluebunch Farm! Monika will be announcing the spring schedule for workshops soon!

Monika demonstrating chocolate croissants.

Monika demonstrating chocolate croissants.

I was pretty happy with my batch of croissants!

I was pretty happy with my batch of croissants!

Not bad for a first attempt at any sort of laminated pastry!

Not bad for a first attempt at any sort of laminated pastry!

Make

  • Some tips on making your own coiled pine needle basket from Joybilee Farm.

  • Make your own eco-friendly confetti with this tutorial from Mother Natured.

  • Tutorial for making old/thrifted sweaters into mittens from the Renegade Seamstress.

  • A great tutorial on Instructables for making a basket out of plastic shopping bags.

Miscellaneous

  • Some ideas from National Geographic for reducing the plastic waste your family creates this year.

  • Guide to recycling your Christmas lights in British Columbia, Canada.

  • If you’re interested in cloth diapers, here’s a discount code for Nuggles Diapers by following this link, or entering code: AFORAGERSHOME at checkout! This is an amazing company run by a local mom and we love using them on our kids!

  • A really thorough guide to buying in Bulk, especially for those located in Kamloops by Ahem! Waste-Free Life


In order to support my blogging endeavours, some of these links are affiliate links for which I will receive a very small commission should you purchase that item. I never link to any product in this way that I haven’t experienced myself and would absolutely recommend to others commission or no!

February 01, 2019 /Kelsey Fast
friday favourites
Comment
  • Newer
  • Older

Terms and Conditions | Privacy Policy | Shipping and Returns

Powered by Squarespace