A Forager's Home

Grow. Find. Eat. Make.

  • Blog
  • About
  • DIY
  • Recipes
  • Foraging
IMG_1504.JPG

Rockwell Razor Review - Zero Waste Shaving?

December 10, 2018 by Kelsey Fast

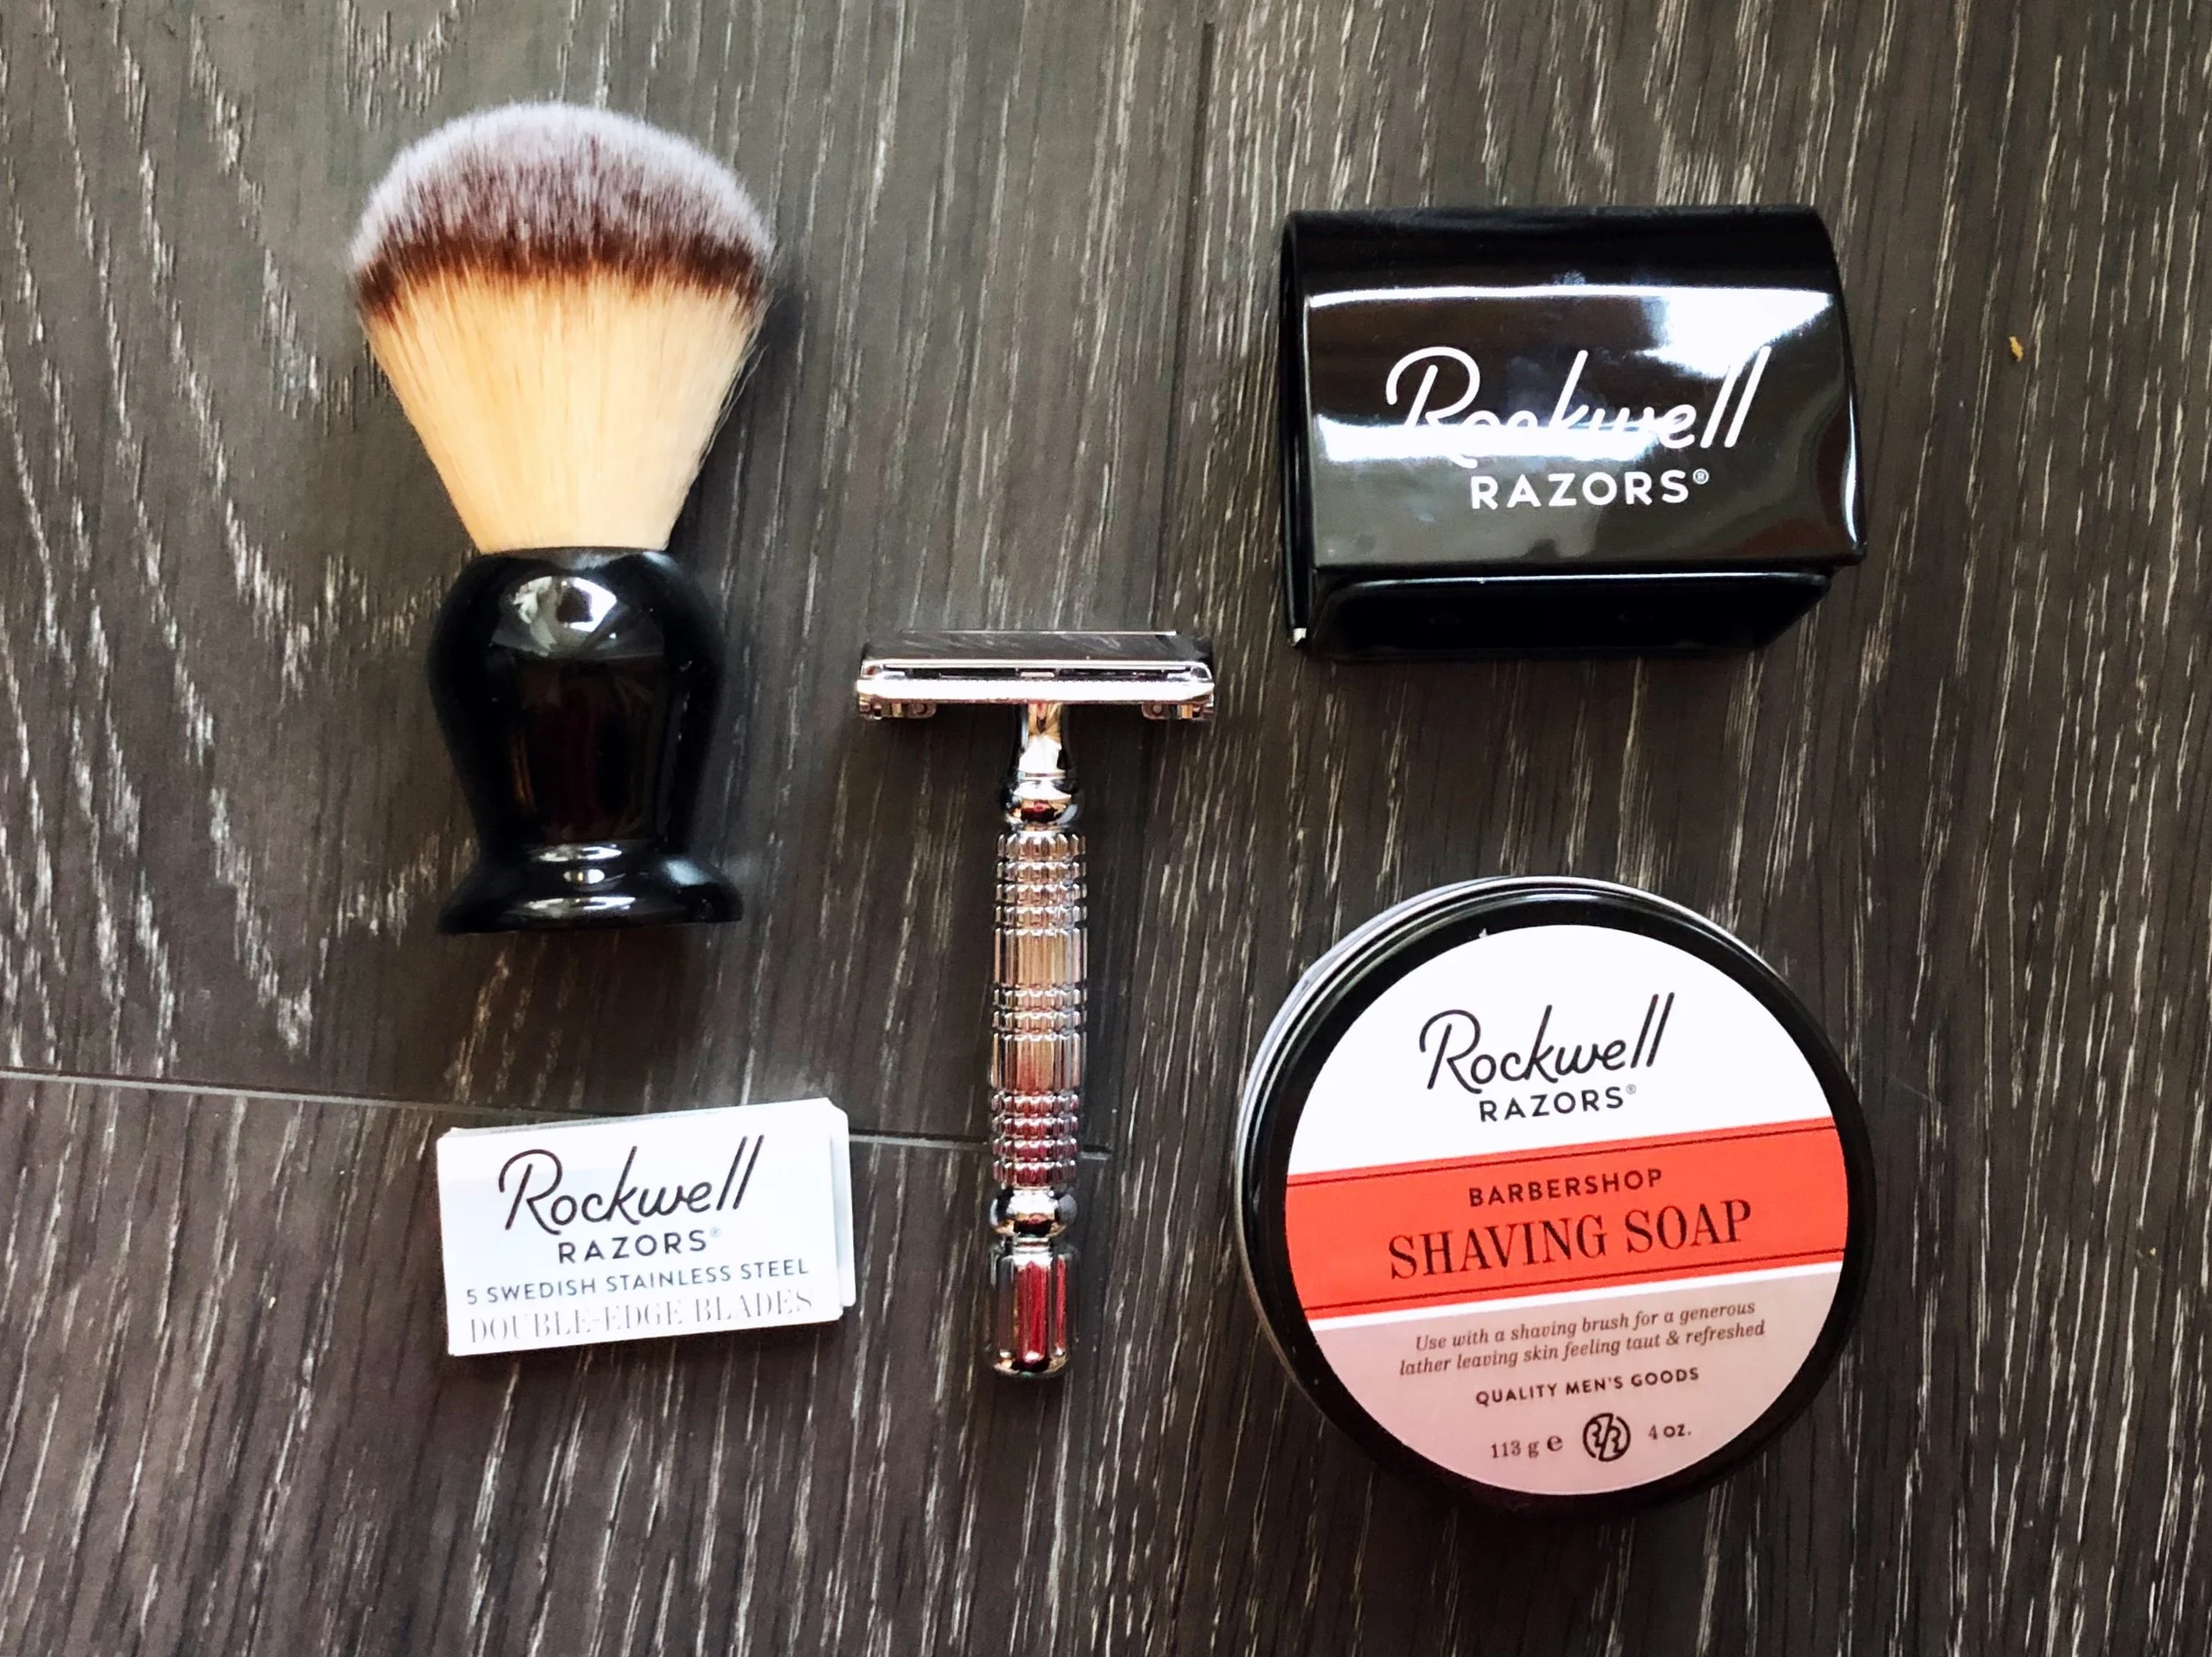
I was contacted a while back by Rockwell Razors to see if I was interested in reviewing their safety razor shaving kit from a zero waste/eco-friendly perspective. I happily accepted their offer of a free shaving kit, and waited eagerly for it to arrive in the mail.

I’ve been seeing a few new, innovative ideas out there for shaving but they are mostly marketed heavily toward men. Rockwell is not an exception. I don’t really mind using a men’s razor since they do the exact same thing, but it does get annoying after a while when everything you order is labelled “quality men’s goods” or something to that effect. It’s completely Rockwell’s decision if they want to market their product to men only, but I feel they are closing themselves off to a huge market of people that do a lot of regular shaving. Nevertheless I was still more than happy to try their product since there was no reason a “man’s” razor wouldn’t do the same job as the lurid pink ones that are marked up significantly more in price in the store.

IMG_1505.JPG

I was also really excited about the idea of zero-waste shaving. One handle that can last a lifetime if you take care of it, and a replaceable, recyclable blade seemed like an ideal solution. Short of using a straight razor, this does seem like one of the most ecologically responsible options out there. There are companies creating disposable razors with their own in-house recycling options, but if you are trying to avoid plastic consumption, that is still a problem. I also feel that people are probably just throwing away most of those too because they aren’t picked up by any city recycling program. I’ve found if it’s not convenient people usually don’t take the eco-friendly step.

Upon opening my package from Rockwell I was a little bit disappointed to see that the packing wasn’t entirely zero-waste. Most of it was made of paper, but there were a few things still wrapped in plastic. My city’s recycling depot does take most forms of plastic overwrap, but that’s still not technically zero-waste, so marketing it as such is a bit of a misnomer.

The other thing I’m still working out is whether I can actually recycle the blades. Rockwell markets them as recyclable (and certainly the stainless steel they are made of is), but figuring out how and where to recycle them is proving a bit trickier. Most cities will not accept these in their curb side pickup, or at their depots due to the extreme hazard the workers would be placed under dealing with sharps. I plan to contact a local scrap metal recycler to see if they will take them, but other than that I’m coming up short on ideas. I’ll keep using the blades and collecting them in the provided blade bank until it’s full and that will take a while, so I have a bit of time to work out how to deal with my used blades. This runs a bit counter to what Rockwell claims on their website about the blade bank:

“The Rockwell Blade Safe fits all double-edge razor blades and is completely recyclable - once it’s full, simply throw it in the recycling!”
— Rockwell Razors

UPDATE: I have since learned that the local scrap metal recycling facility will in fact accept used razor blades, so while it’s not as simple as just tossing the blade bank in the curb side recycling bin there is a fairly easy way to get it done.

The blades come wrapped in paper, and they go as-is into the blade bank which is also metal. From there I can either empty the used razors into another container to dispose of them and keep using it, or attempt to bring the bank, blades, and all to whatever recycling facility I can find. Even if I ultimately find they can’t be recycled, this does still seem like a better option than all those plastic cartridges going in the garbage.

IMG_1506.JPG
IMG_1507.JPG

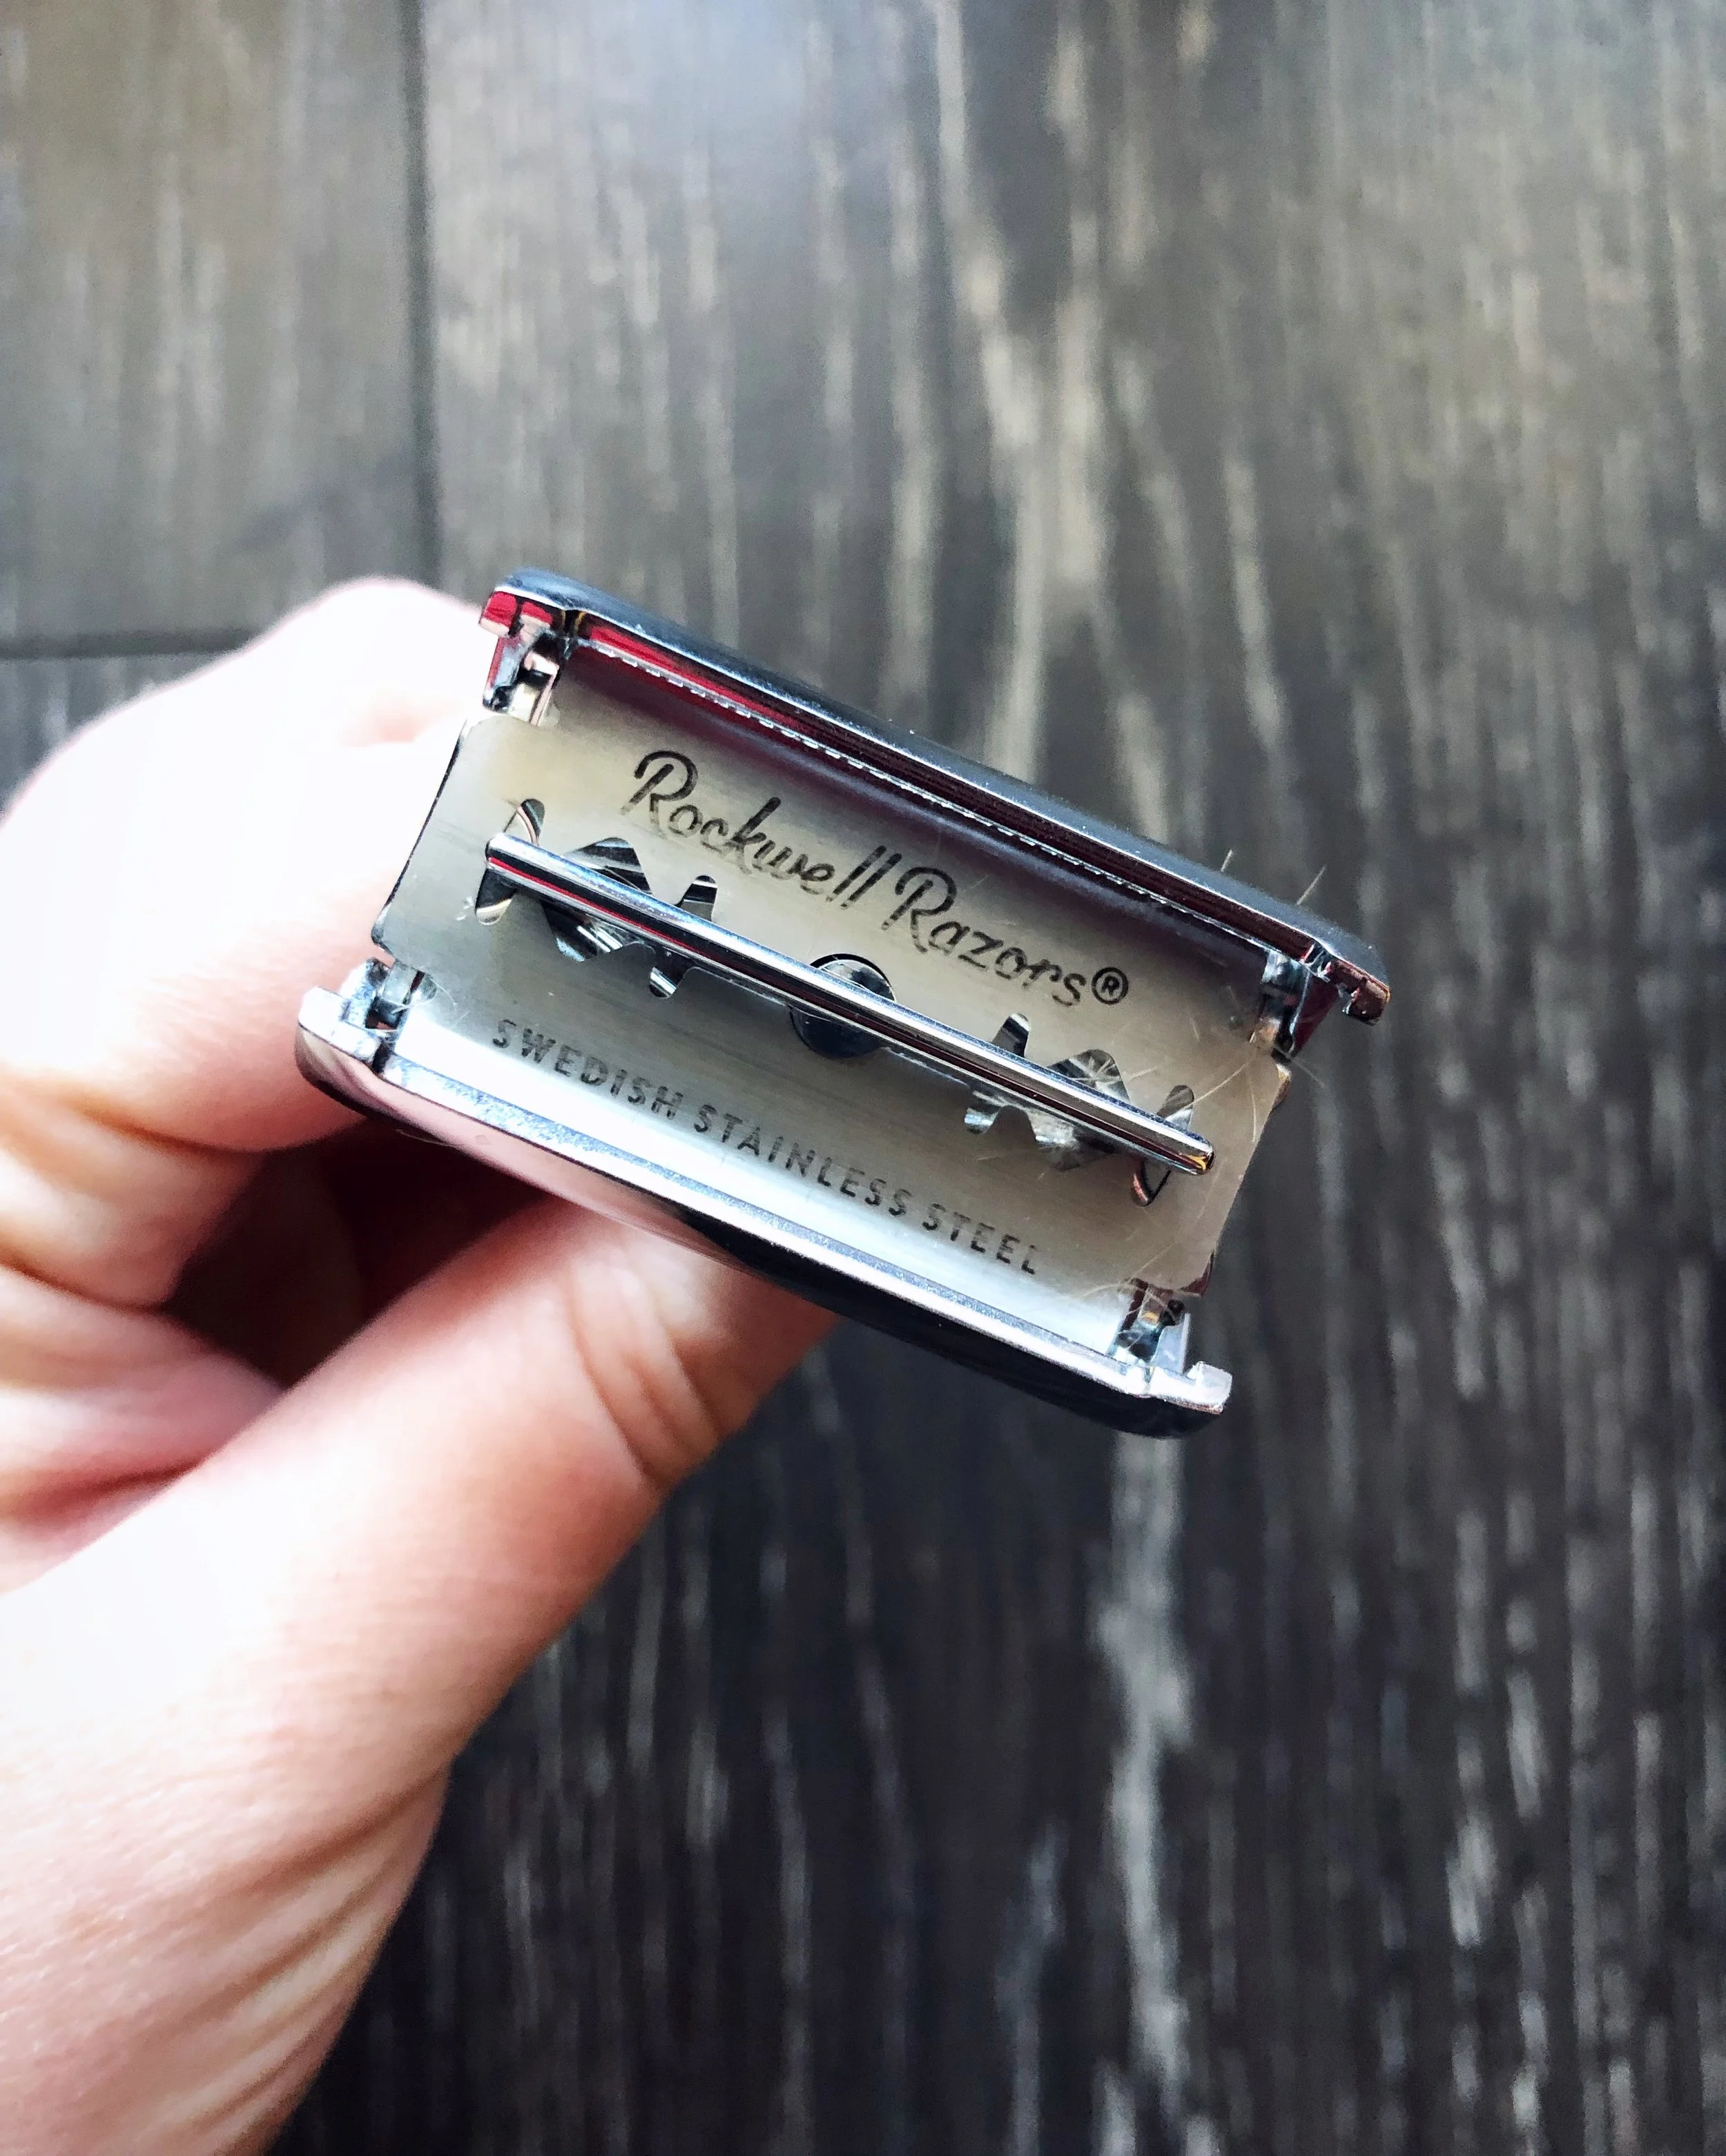
I was a little nervous to actually use the razor, since I’ve always just gone with the conventional type from the drug store. This seemed a little bit intimidating at first, but really it was hardly different at all from using any other razor. The only thing I noticed is that I had to watch how I held the handle as I shaved because at first I didn’t notice I was actually turning the part that opens the razor holder, so that got looser as I shaved.

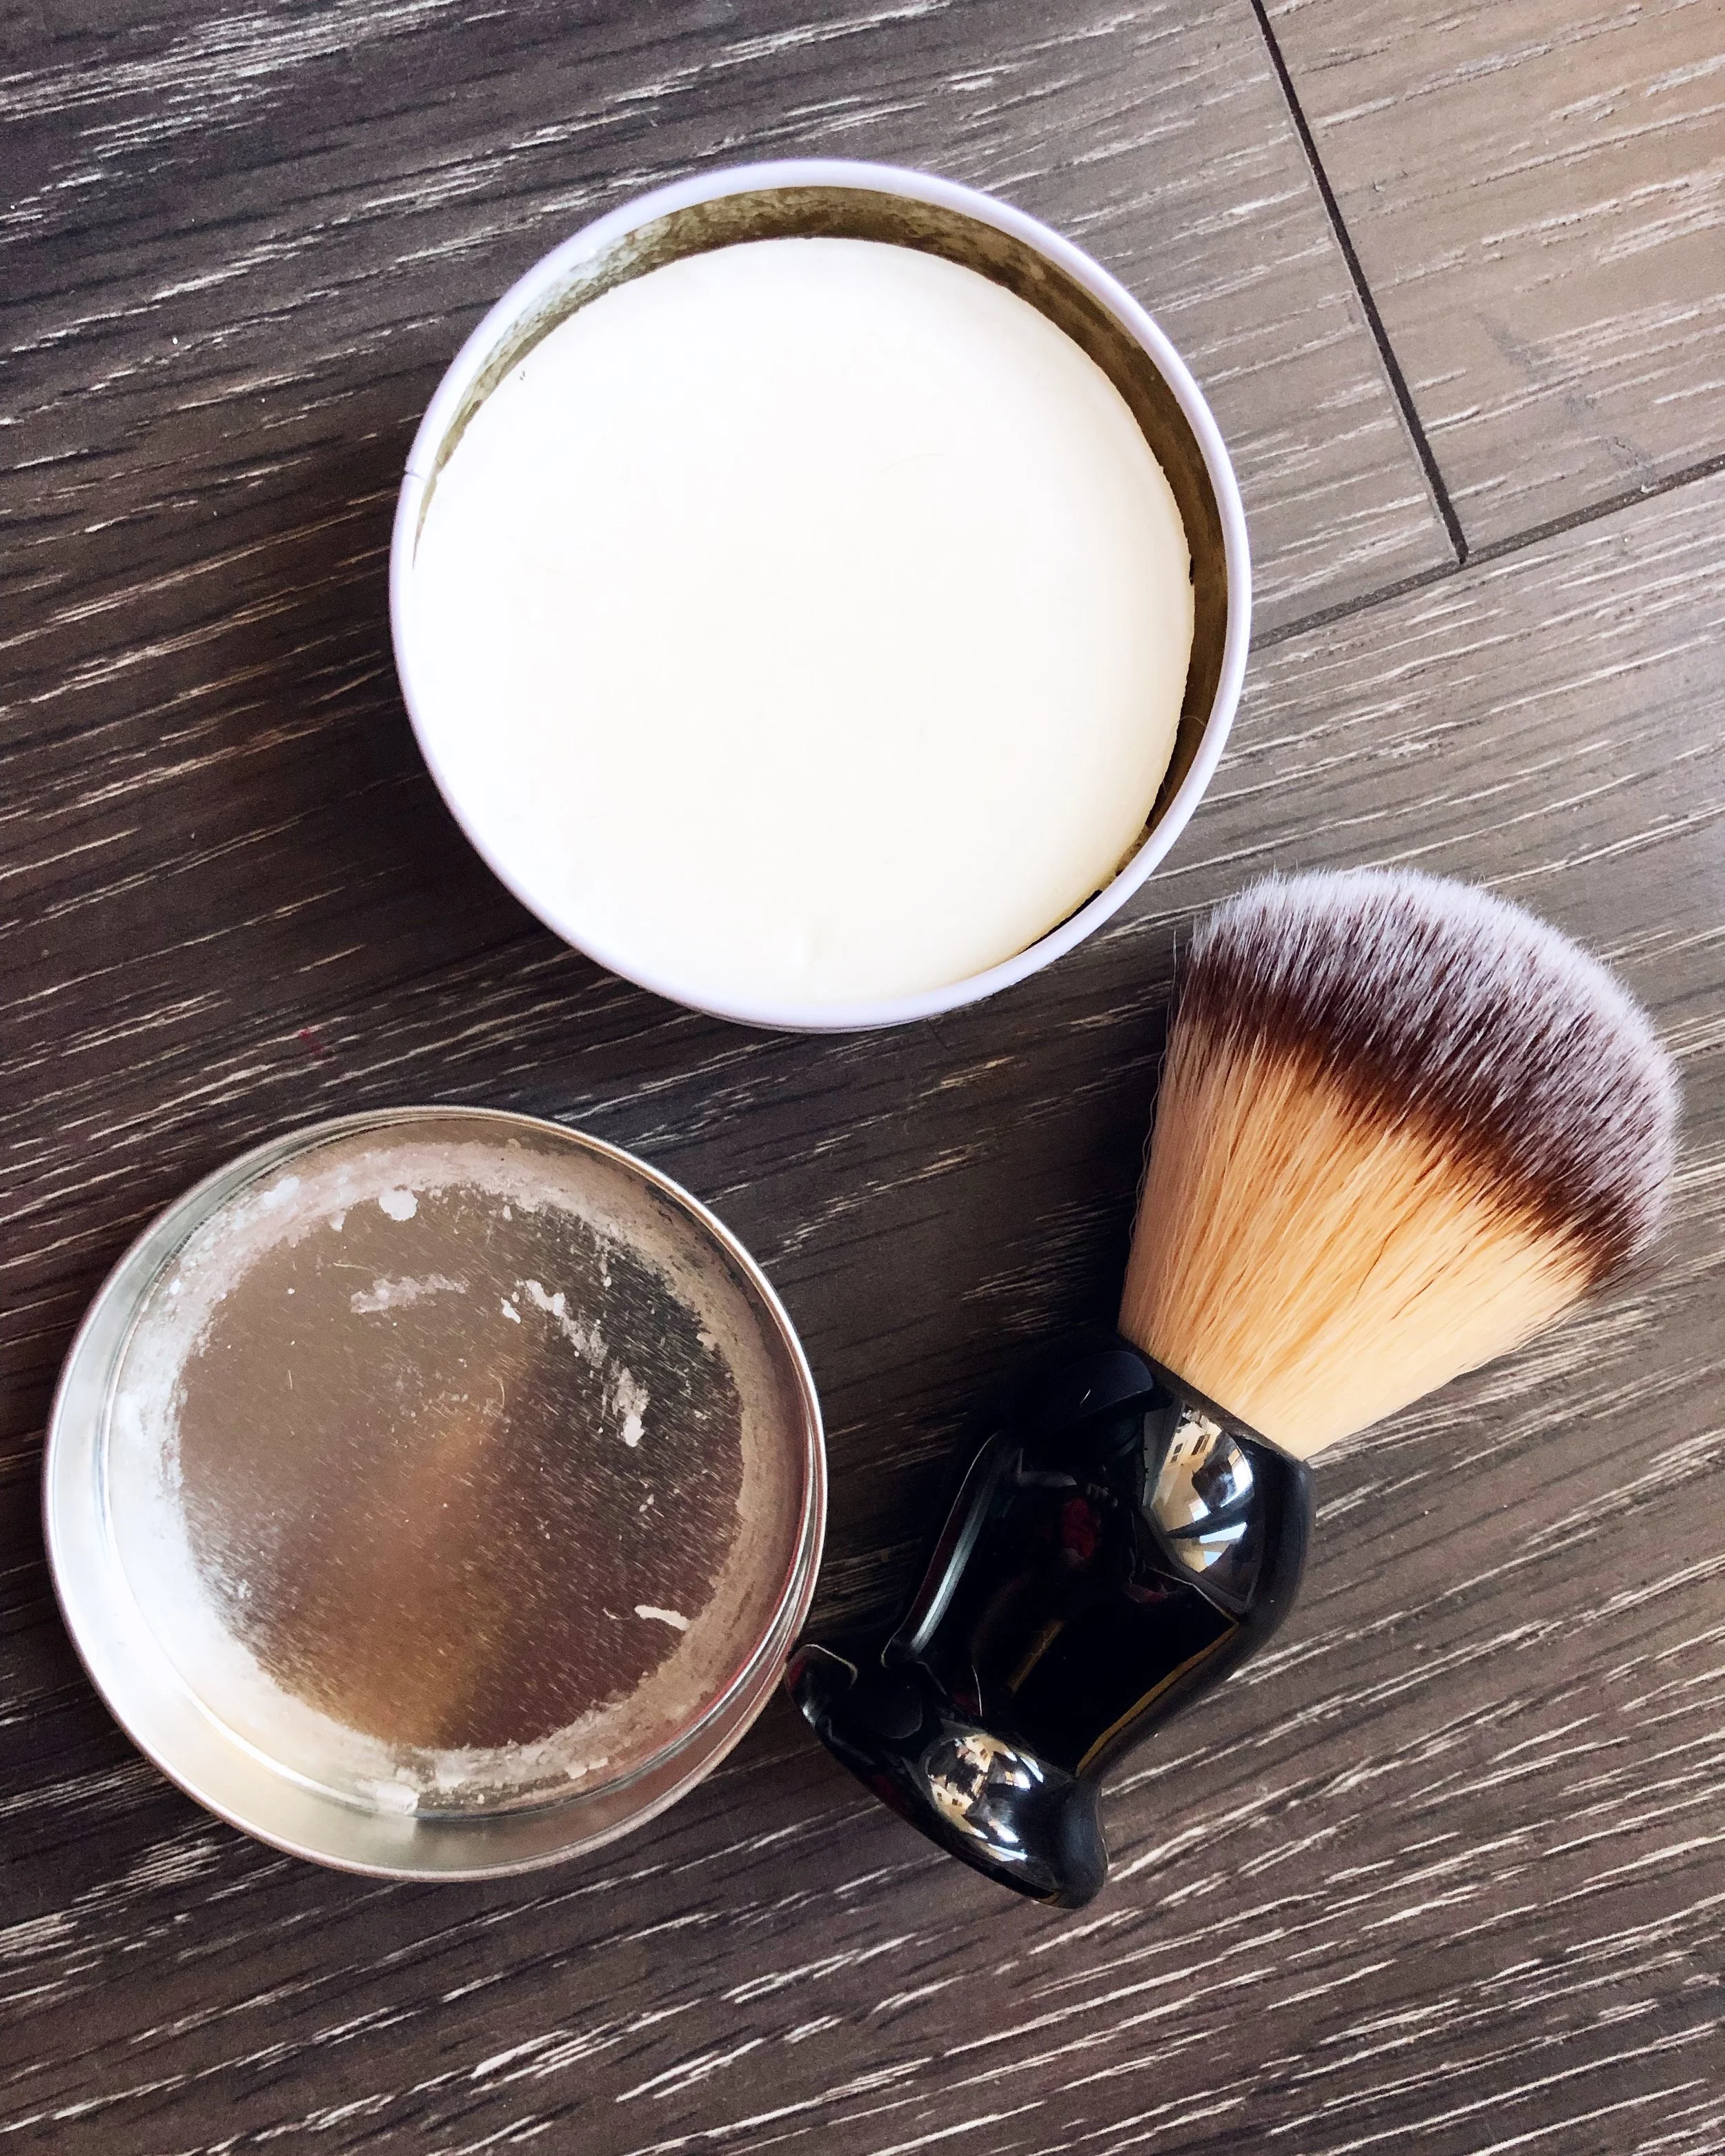
Once I got used to it I actually found I liked the process. It seemed easier and more portable to use the shaving soap and brush than shaving as normal in the shower. I found it was really easy to just shave using the sink, and some damp cloths to wipe off any excess soap. I think this probably used a lot less water, so that’s also a point in their favour for eco-friendliness.

All in all, there were some shortfalls I found with how the company marketed their product, but I do actually like the process of using the safety razor and will continue to use it instead of the conventional option.

IMG_1508.JPG

Rockwell provided me with their shaving kit free of charge in exchange for this review. All thoughts and opinions expressed here are my own.

December 10, 2018 /Kelsey Fast
zero waste, product review
Comment

Douglas-Fir Sugar Cookies

December 07, 2018 by Kelsey Fast in Eat, Find

It’s beginning to look at least a little bit like Christmas over here! There isn’t all that much snow compared to the last couple years, and November was unseasonably warm. No matter what the weather is doing Christmas is on its way and I’ve got a great sugar cookie recipe to share with you!  

Douglas-fir might be a common choice for Christmas trees, but the one behind this plate of cookies is an artificial tree so don’t use this as an example if you’re trying to make a positive ID!

Douglas-fir might be a common choice for Christmas trees, but the one behind this plate of cookies is an artificial tree so don’t use this as an example if you’re trying to make a positive ID!

Where I live Douglas-fir trees are one of the dominant features in our landscape. You can see a whole bunch of them in the panorama shot below of my old backyard view. Pseudotsuga menzesii aren’t a true fir tree at all, and come in a couple varieties - one coastal, and the other inland. The latter ‘Rocky mountain Douglas-fir’ (or pseudotsuga menziesii var. glauca) is what we typically find in our area. They have a few different features, but their uses are the same. I haven’t had a chance to taste the coastal Douglas-fir, so I can’t comment on the difference, but this recipe could be made with either. The main thing I’ve observed is that the cones are slightly different shapes, and there are a few other differences in the overall growth habit of the trees.

There are very few naturally occurring coniferous trees in the BC Interior that are poisonous - and in fact all trees in the family Pinaceae which includes the Douglas-fir are completely edible. The main danger you might come across the Western yew. This is not actually a coniferous tree, but it is an evergreen and is very toxic, so make sure you know what you’re gathering. You can tell it’s yew because of the way the needles connect to the branches, and the little red “berries” called arils that grow on it. These arils themselves are technically edible, but the seed inside them, and the branches they grow on are one of the most toxic substances growing in nature. I don’t say this to scare you off foraging from trees, but rather to encourage caution and that you’ve studied enough to feel confident on your ID. Eat the Weeds has an excellent article about yew that covers much more than I have time for here, and the Provincial Government of BC has a really great online guide to common native trees in this area.

The flavoured sugar I made this spring/summer was using the green cones of the Douglas-fir. I really loved the way the sugar turned out, and was already dreaming of making Christmas cookies in the shape of Christmas trees, using actual Christmas trees as one of the ingredients! These are really easy to identify if you’re a little nervous about your tree identification skills. If the cones you’ve gathered look like my photo below you can be fairly confident that you’ve not gathered anything poisonous, but please don’t rely on my photos alone for identification purposes. Pick up a reputable field guide (like the BC Government one I linked to above), and use more than one feature as your basis for identification. Douglas-fir cones have these little bracts that stick out which makes them easy to spot. There is a legend that a little mouse tried to hide in the cones from a forest fire and got stuck there. When the cones are fully dried (like in the wreath I have in my shop) you can see how the bracts look like the hind feet and tails of little mice! This makes them really easy to identify.

This sugar cookie recipe is great using the flavoured sugar (and I’m already thinking about making some lilac or rose flavoured ones with the floral sugars I made earlier this summer too), but it would be equally as good as one done with just plain granulated sugar. I also want to go out and try to make some sugar with the mature needles of the tree and see how that tastes. I was kind of hoping that the sugar and the resulting cookies would be greener, but as you can see the outside of the cones were a very light green, and when you cut them open they are white inside, so what I ended up with was a very light coloured sugar that actually turned more yellow in time, and didn’t colour the resulting cookies at all. I also want to do a taste comparison with the mature needles because I think the taste would be stronger, and I want to know if that would be a good thing, or an overpowering thing! Most of the advice you find online about using pine/fir/spruce needles for food is that you usually gather the immature tips in the spring when they are the most tender. If I end up doing a follow up experiment I’ll definitely be posting the results either in a follow-up post, or editing this one to reflect it!

As it is, the taste of the fir cones is fairly subtle, but it comes through such a simple recipe like this in a really pleasing way. You aren’t going to raise any eyebrows if you include these on your holiday cookie platter, but they still have a little extra something in their flavour profile that sets them apart from your average sugar cookie. The flavoured sugar when it is fresh tastes almost like a Sour Patch Kids candy - acidic and almost citrusy. This is because Douglas-fir naturally contains a lot of vitamin C. I found that over the months of storage the brightness in the flavour mellows somewhat and you notice more of the resinous tree flavours that were more of a backdrop when the sugar was fresh.

Here you can really see the little flecks of Douglas-fir cones in the dough.

Here you can really see the little flecks of Douglas-fir cones in the dough.

You don’t need anything special for this recipe, although I highly recommend GRAIN flours. They’re not paying me to say this, but I so appreciate what they are doing, and the quality of the flour they produce. I know exactly which place in Canada (Etzikom, AB) the wheat for my flour was grown in and that makes me very happy.

I also like to use a marble rolling pin (because of the weight of it, and because you can throw them in the freezer to make them really cold for rolling out pastry), and I love the shape of this vintage cookie cutter I found in an antique store even if the handle and backing part make it a little tricky to see if you are overlapping your cookies when you cut them.

I also found that chilling the dough for this recipe was really important. It helped the flavour from the sugar seep into the dough more, and also helped make it easier for rolling. It ended up being a bit on the sticky side for sugar cookies, so you’ll need to flour your rolling/cutting surface, but try not to add too much or else that’s all your cookies will taste like. Just use the bare minimum to keep things from sticking. Also please note that the temperature in the recipe below is not a typo! I used to think that you were supposed to cook sugar cookies at a hot temperature for a very short time, but my pastry chef friend showed me another way that in my opinion results in a much nicer cookie. You’ll need between 20-25ish minutes per batch in the oven, but it is so worth it in the end for the overall texture so just trust me and give it a try. You’ll also need to rotate the tray in the oven, and what I mean by that is halfway through the baking time (after 10-13 minutes) you’ll pull the tray out and turn it so that the cookies that were in the front of the oven are now in the back. This was another step that no one really taught me before, but it helps ensure the cookies are all baked evenly.

Douglas Fir Sugar Cookies

Ingredients

  • 1 cup butter
  • 1 cup Douglas fir Sugar
  • 1 large egg
  • 1 tsp vanilla
  • 1 tsp baking powder
  • 1/2 tsp salt
  • 2 cups flour (plus more for dusting when rolling dough)

Takes 1 hour, serves 5 dozen.

Instructions

  1. Preheat your oven to 250˚F.
  2. Cream butter and sugar in mixer until butter is light and fluffy, and no granules of sugar remain. This step is particularly important for these cookies because the homemade flavoured sugars tend to be on the coarser side and you don’t want big sugar crystals in your finished cookies.
  3. Add the egg and vanilla and cream until emulsified and the mixture is homogenous.
  4. Sift dry ingredients together in a separate bowl, and add slowly to the egg/sugar/butter mixture.
  5. Chill dough in the fridge for a minimum of two hours or up to two days. Dust counter with flour roll to 1/4 inch thickness. Cut into desired shapes. You can choose to re-roll the scrap dough as many times as you like but the more you do it the more flour will be incorporated and the quality of the cookies will suffer some, but not to the point of making them less delicious. I chose to use all my dough since my flavoured sugars are a bit precious and I wanted to make as many cookies as possible without wasting.
  6. Place on parchment lined baking sheets in preheated 250˚F oven. Bake for 10-13 minutes, rotate cookie sheet so the cookies in the back are now in the front, and bake for another 10-13 minutes until cookies are baked through but have not begun to colour on the edges.
December 07, 2018 /Kelsey Fast
cookies, baking, foraging, food, holiday, Winter, Douglas-Fir, Christmas
Eat, Find
2 Comments
IMG_1232.JPG

DIY Magnetic Spice Rack

November 27, 2018 by Kelsey Fast in Make

If you’ve been following along with this blog for a while, you’ll know we moved recently. Our new place has a lot more built in storage, but it is overall quite a bit smaller than our last place, so we’re having to be a bit creative with how we store things. The kitchen is especially challenging in that there is quite a bit of storage, but a lot of it is hard to access (think massive corner cupboards with no lazy Susans, and really small openings). This really made it difficult to figure out where to store all my small spice jars.

I had a few of the magnetic spice jars Ikea used to sell a while back, and my initial idea was to buy a whole bunch more, but it looks like they are out of stock. I know you can buy these elsewhere, but they aren’t that cheap, and usually come with a little magnetic stand to put on your counter which I don’t need since I’m planning on using a side of my fridge that is otherwise empty. They are also fairly expensive if you need as many of them as I will.

It occurred to me that I might be able to use some of my fairly extensive mason jar supply and make my own to go with the three large ones I already had. I had even purchased magnets for another project that was never realized that would work perfectly for this, so I’ve barely spent anything. Even if I do need to buy a few more jars my plan is to keep an eye out at thrift stores. If I need to buy some more mason jars, they will be the 125 ml size (1/4 pint for my American friends). That seems to work well in terms of weight for the magnets, and size to contain my spices.

Supplies you’ll need:

The picture above shows the supplies you’ll need. I do know there are better, stronger magnets available, but this is what I had around. With this type of ceramic magnet you’ll need two magnets per 125 ml jar.

  1. 125 ml Mason Jars

  2. Ceramic Magnets

  3. Gorilla Glue

  4. Chalk marker (to write the names of the spices on the jars)

To prepare the lids:

To keep things sturdy, follow the manufacturer’s instructions on the back of your gorilla glue to attach the mason jar lid to the ring. After that glue the magnets to the top of the lid and leave to cure overnight. You don’t need a lot of glue, so go easy on it. You don’t want any overflowing onto your counters and that kind of thing so use a bit less than you think you’ll need.

Allow the glue to cure:

Leave the jars to cure for 24 hours, or for as long as the instructions on your glue say. I’ve been stacking them like the photo above with the empty jar on top to sort of keep a bit of pressure on things as they dry. It will probably suggest you clamp whatever you are glueing, but I don't have a clamp, and haven’t found it to be necessary with these so far.

Putting your jars into use:

To keep track of what is what use a chalk marker and write on the bottom of the jar what is inside. This is easily wiped off if you end up changing what you’re storing in each jar.

I think a major bonus of using this system, is that my local Bulk Barn allows us to bring our own refillable containers to their store instead of using those little plastic baggies to take ingredients home in. In this case I can just wash the container, and put the empty ones in a tote bag to take with me next time I need spices! When it comes to washing the jars, the dishwasher will be completely fine, but for the lids with their magnets I suggest lightly hand washing them. I’m not sure they’d hold up in the dishwasher.

Let me know if you give this a try! I’d love to see what you come up with in the comments!

November 27, 2018 /Kelsey Fast
food, handmade, in my kitchen, DIY, kitchen, organization, pantry, tutorial, zero waste
Make
Comment

Apple Muffins with Sourdough Starter

November 26, 2018 by Kelsey Fast in Eat

If you’ve been following my Instagram page, you’ll have noticed some posts and stories about trying to revive my very dormant sourdough starter. Basically this entails feeding it like crazy, until the microbes start to revive and everything gets all bubbly and happy again. During that process if you don’t use or discard a portion of your starter you’ll just be overrun with the stuff, and since I’m a big fan of zero-waste, I’ve been trying to use it in various ways.

One thing that I’ve found really interesting is that you can use sourdough in a quick bread recipe, and it reacts with the baking soda in the same way as adding another acid. This recipe uses some starter, but if you don’t have it try omitting it, and substituting the juice partially or in full for yogurt, or buttermilk. Alternatively if you still want them to be dairy free try substituting the starter for applesauce, and a bit more flour. There should be enough acid in the juice and the applesauce to activate the baking soda, but it won’t be quite the same in the end. And if you don’t have a sourdough starter making one is really easy! There are a lot of awesome tutorials available if you give it a quick google.

You’ll also notice this recipe calls for ‘pumpkin pie spice’. I don’t normally use ready made spice blends, but the one from Silk Road Spice Merchants in Calgary is amazing and I highly recommend it. I also used the Western Family brand Wassail as the juice in my muffins since it is what I had in my fridge at the time, and so these muffins were very heavily spiced. I felt like this was perfect for fall/winter food, but you can use whatever mix of spices you like. Pumpkin pie spice usually contains cinnamon, clove, nutmeg, allspice, and ginger. Use these spices in whatever ratio you like them best and your muffins will be delicious.

There isn’t too much in this recipe that needs a lot of explaining, but do make sure you combine the wet ingredients (sourdough starter, oil, juice, eggs, vanilla) and sugar in one bowl, and the rest of the dry ingredients in another bowl until you are ready to mix your final muffin dough. The starter reacts with the baking soda really quickly, and this reaction is your primary leavening agent so you want to make sure that is almost the very last thing that happens. I like the apple grated into the muffins, but it does tend to disappear into the overall texture that way, so if you want them to be more obvious try chopping them into small pieces and mixing that in. I save myself a step and don’t bother peeling my apples since you don’t really notice the skins when they are all baked into the overall texture.

Let me know if you have any further questions in the comments! I’d love to hear how these turn out for you if you give them a try!

Apple Muffins with Sourdough Starter

Ingredients

  • 1 cup sourdough starter (any type)
  • 1 cup apple juice
  • 2 large eggs
  • 1/2 cup sugar
  • 1 tsp vanilla
  • 1/4 cup oil
  • 1 tsp baking soda
  • 1 tsp baking powder
  • 1/2 tsp salt
  • 2 tsp pumpkin pie spice
  • 2 cups all purpose flour
  • 1 apple (grated)

Takes 35 min, serves one dozen muffins.

Instructions

  1. Preheat your oven to 350˚F.
  2. Combine sourdough starter, juice, sugar, eggs, oil, and vanilla until smoothly blended and homogenous. If your starter is a bit stiff this might take a little bit of time, but make sure there are no lumps remaining when you are done.
  3. Whisk the dry ingredients together, and then combine with the wet ingredient mixture. You will notice the baking soda reacting to the acid in the sourdough starter almost immediately, so it is important that you work quickly and don’t allow the mixture to sit for long. Stir gently until the mixture is just combined. You don’t want to over mix this.
  4. Gently stir in grated apple.
  5. Evenly distribute your batter into one standard size muffin tin.
  6. Bake for approximately 25 minutes or an inserted toothpick or cake tester comes out clean.
November 26, 2018 /Kelsey Fast
autumn, baking, eat, food, in my kitchen, kitchen, muffins, Winter
Eat
2 Comments
IMG_1057.JPG

Friday Favourites

November 16, 2018 by Kelsey Fast

Grow

  • Indoor food gardening tips from Empress of Dirt

  • Preserving your herb harvest from Quarter Moon Living

Find

  • Cut down your own Christmas tree from the forest, but make sure you get this permit from the BC Government, or the applicable one for where you live.

Eat

  • Caramel apples from the Farmer’s Daughter.

  • Cranberry Orange Compote recipe from Food in Jars

  • Sweet potato cinnamon buns from Oh Sweet Day!

Make

  • Adorable red truck Christmas pillow DIY from Raggedy Bits

  • Give cheap looking artificial Christmas trees new life with this tutorial by Vintage Porch (but please be kind to the earth and consider sourcing your trees from second hand shops since they are full of them!)

  • DIY beeswax taper candles from Remodelista

Misc and Zero Waste

  • How to choose the best reusable bags from Ahem! Waste Free Life

  • Seriously awesome cloth diapers designed right here by a mom in Kamloops!


Some of these links are affiliate links for which I will receive a small commission from any sale made. Any product linked here is something I have tried and would absolutely recommend from my own experience with the company.

November 16, 2018 /Kelsey Fast
friday favourites
Comment
  • Newer
  • Older

Terms and Conditions | Privacy Policy | Shipping and Returns

Powered by Squarespace