A Forager's Home

Grow. Find. Eat. Make.

  • Blog
  • About
  • DIY
  • Recipes
  • Foraging

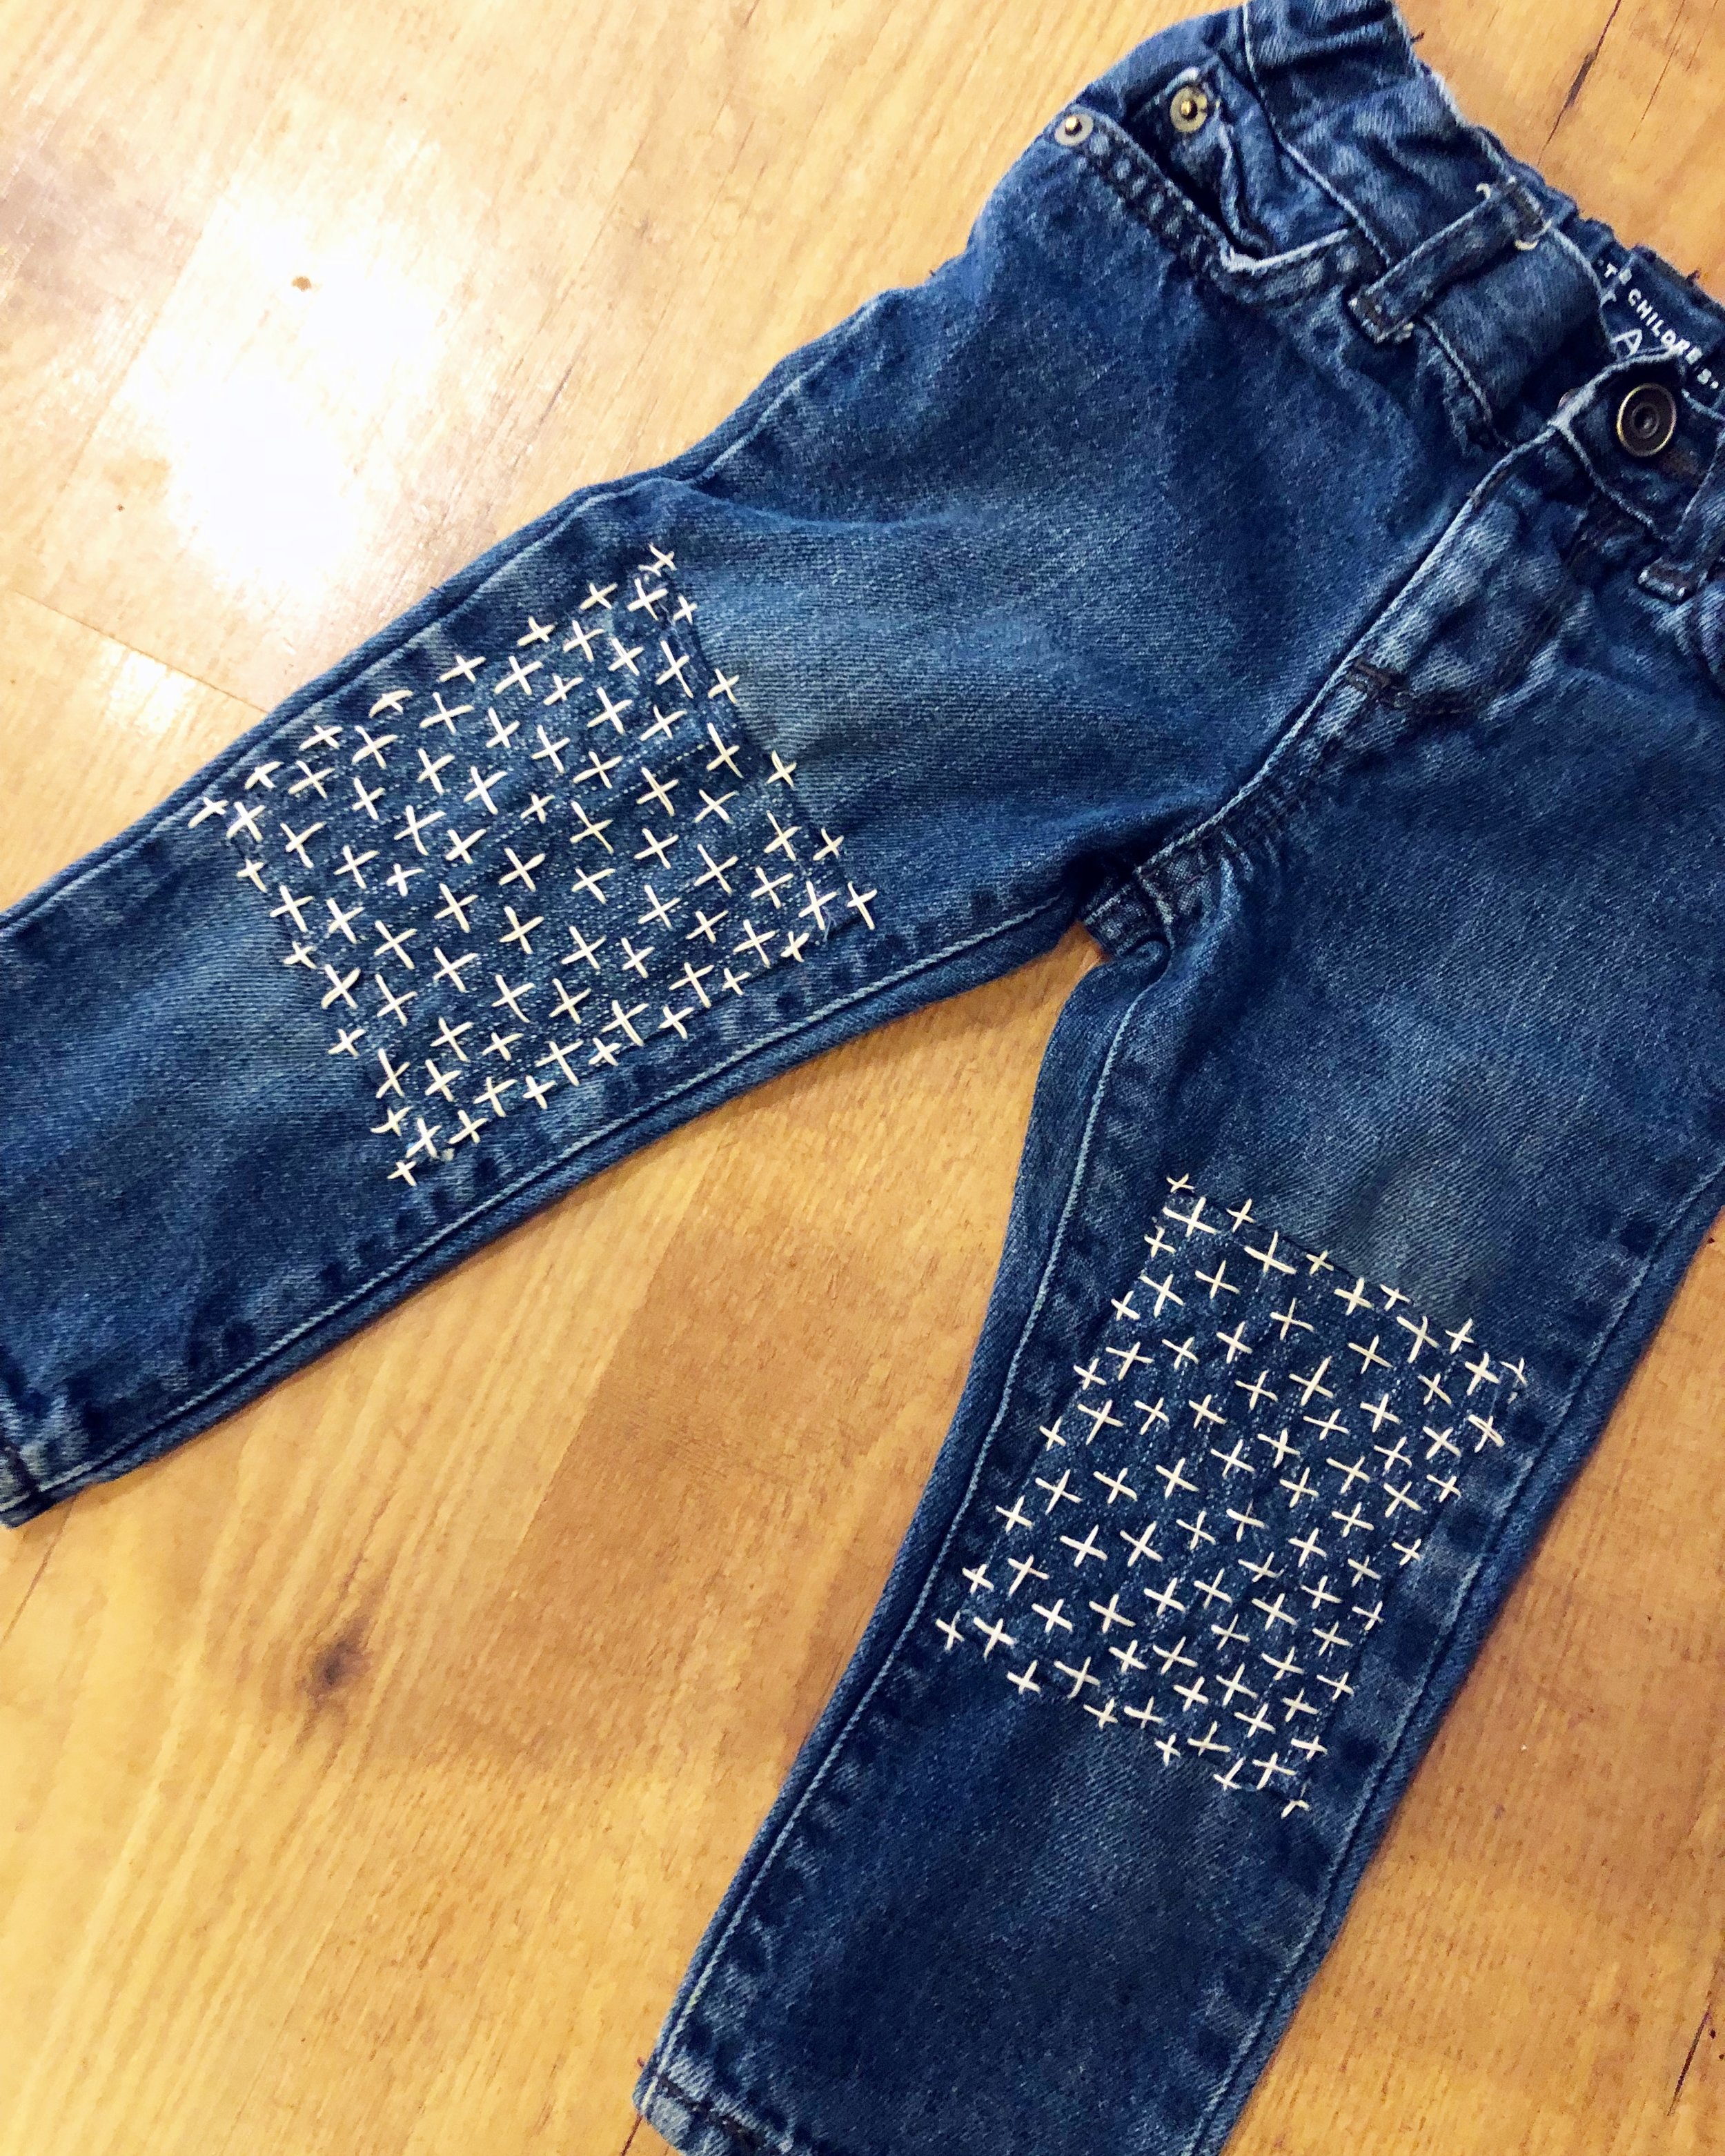
Mending Toddler Jeans - Knee Patches

November 11, 2018 by Kelsey Fast in Make

I have a kid who is really hard on his jeans. He’s super excited to see you? He slides to his knees. He’s super disappointed about something? Cue falling to his knees. The end result of all this “power sliding” is that the knees of his jeans wear out while everything else is looking almost brand new.

Now I know there is no way I’m the only one in this situation, so I wanted to talk about this fairly simple (and adorable) way of adding knee patches to super skinny toddler jeans.

“Repair is a radical act”
— Patagonia

I love the above quote from Patagonia. I know they are using it as a marketing slogan and using it to convince you to buy their clothes, but the sentiment behind it is so true. We live in an era of disposable fashion, and if we care about this planet - not to mention the people who make our clothing - we need to change our approach. Mend what tears. Fix what is broken. Remember that there is a living breathing human who made each item you are wearing and it becomes that much more precious.

I try my best to make good choices about the clothes we buy, and to fix things where I can. Since I know a lot of you reading this blog care about this earth and like to DIY I plan to start sharing more about this and offering tips and tricks that I’ve picked up along the way. I’m not the only one doing this and there are many people doing an even better job, but I’m just here sharing what I’ve learned.

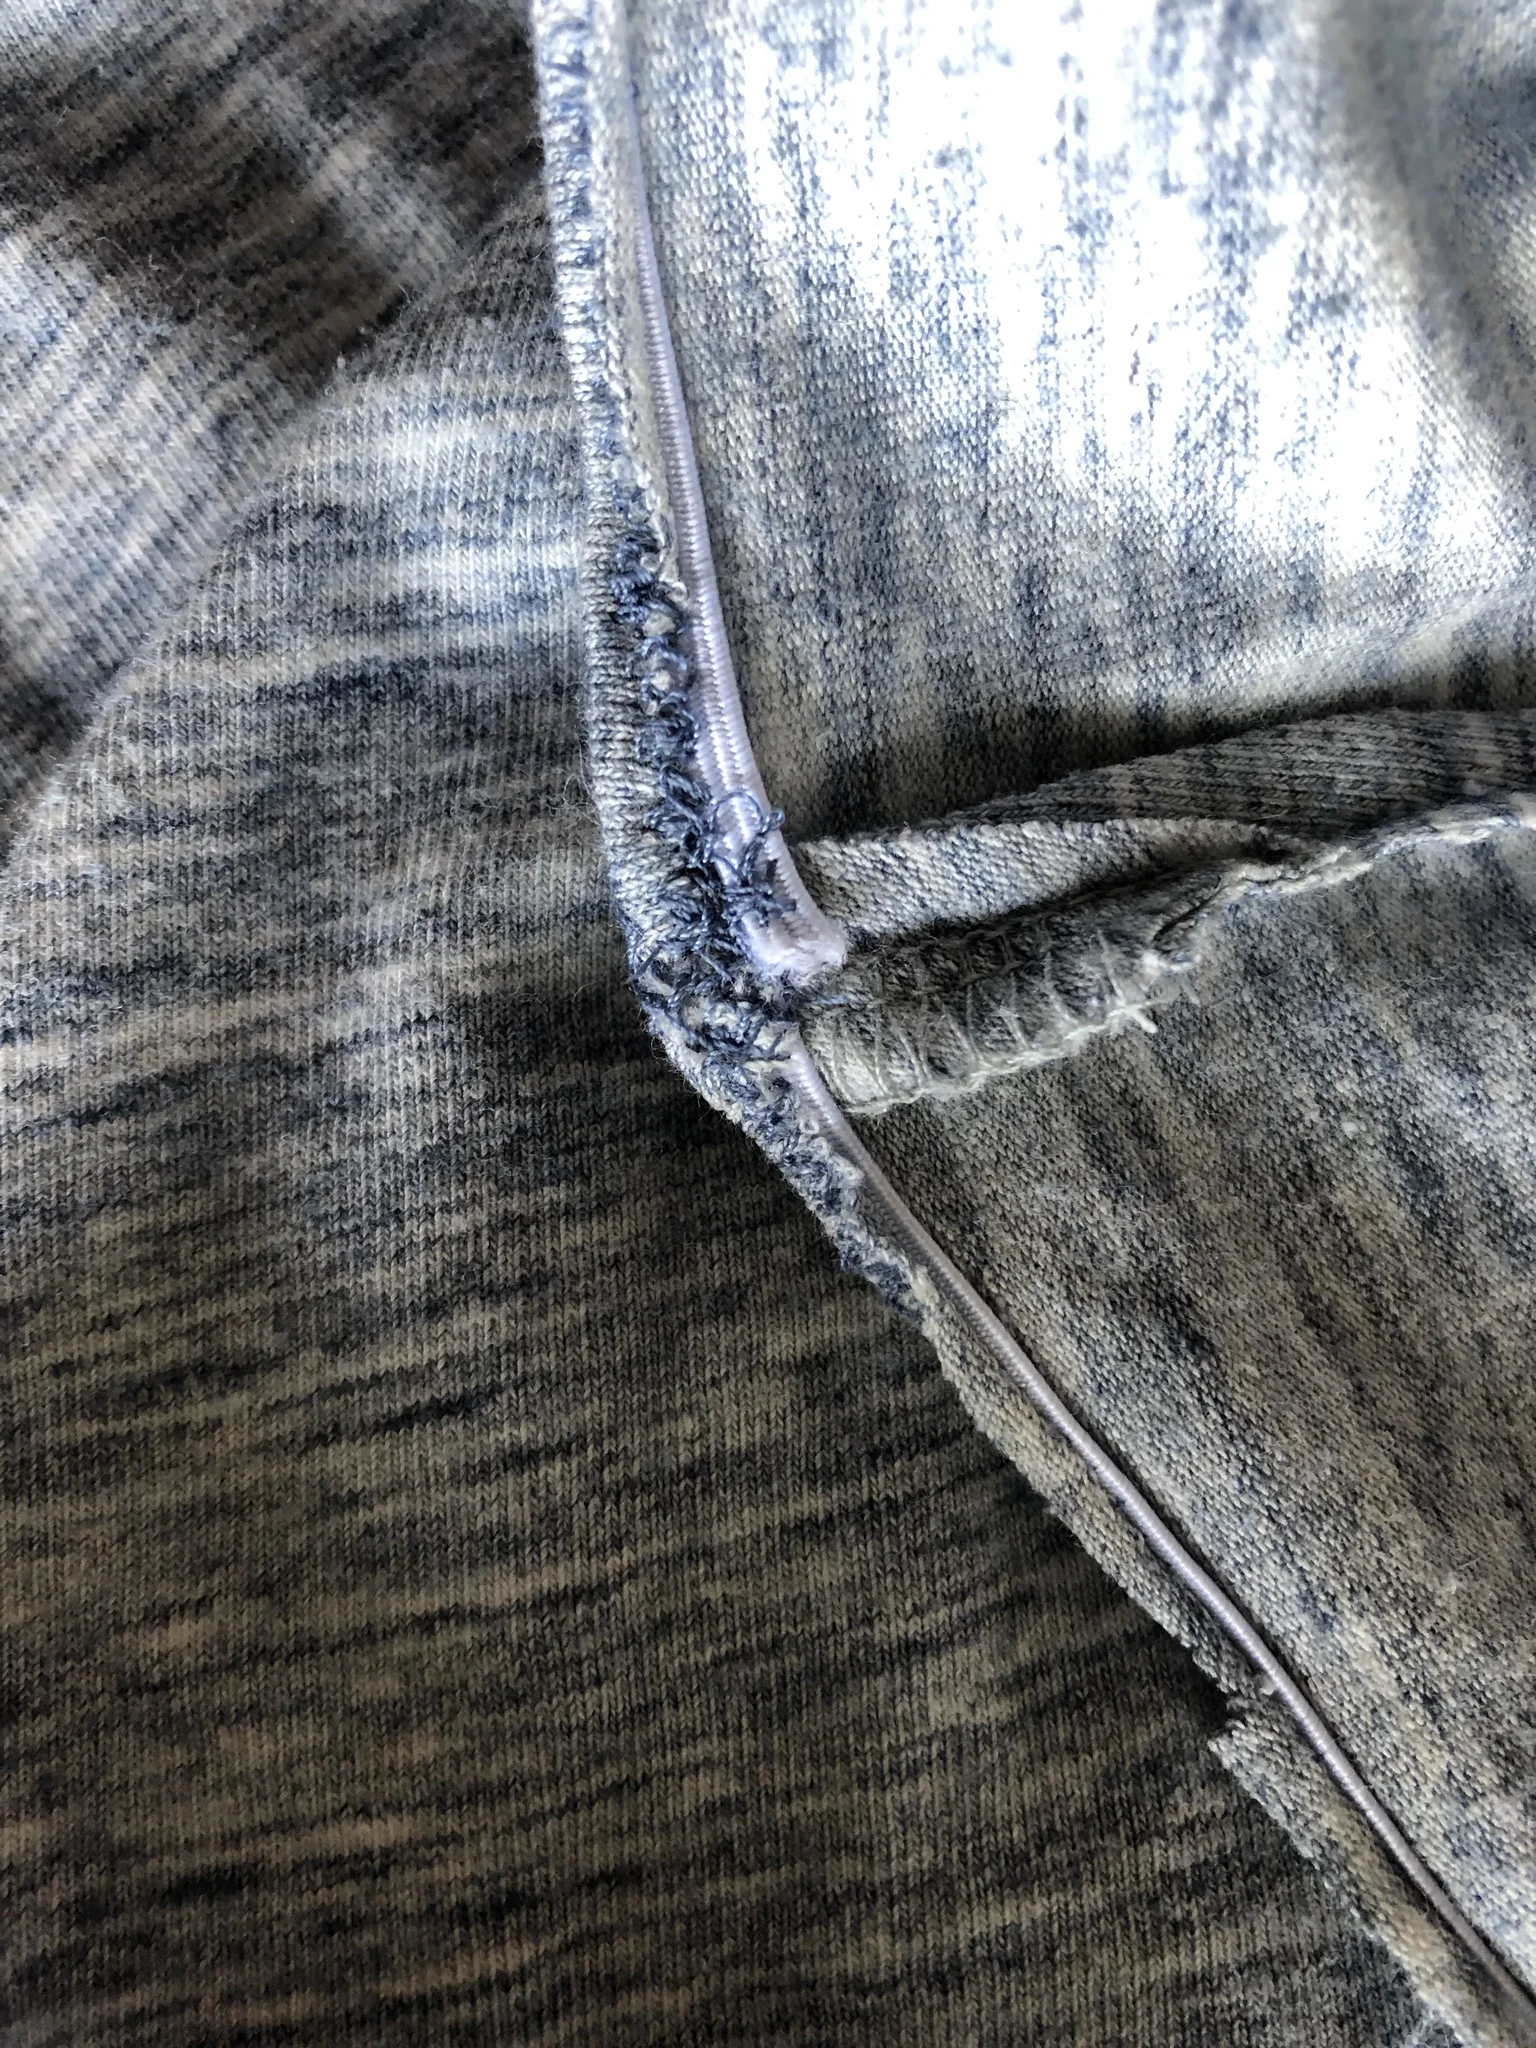
My go-to way of patching up jeans is to use a sewing machine and a lot of back and forth stitches. It’s super fast, and fairly invisible. With these skinny little jeans that wasn’t an option as the leg wouldn’t fit, so instead I made some patches and embroidered them to the jeans.

IMG_1052.JPG
IMG_1053.JPG

To make the patches

  1. Cut pieces of denim or other fabric to the size that you need it plus about a 1/4 inch extra on all sides. You’ll want the fabric to be a similar weight to whatever you are repairing. I usually mend our jeans until they are too far gone, and then keep them around to use as spare fabric for this kind of purpose.

  2. Using a sewing machine turn over and stitch a 1/4” rolled hem on all sides of the patches to finish the edges.

To attach the patches

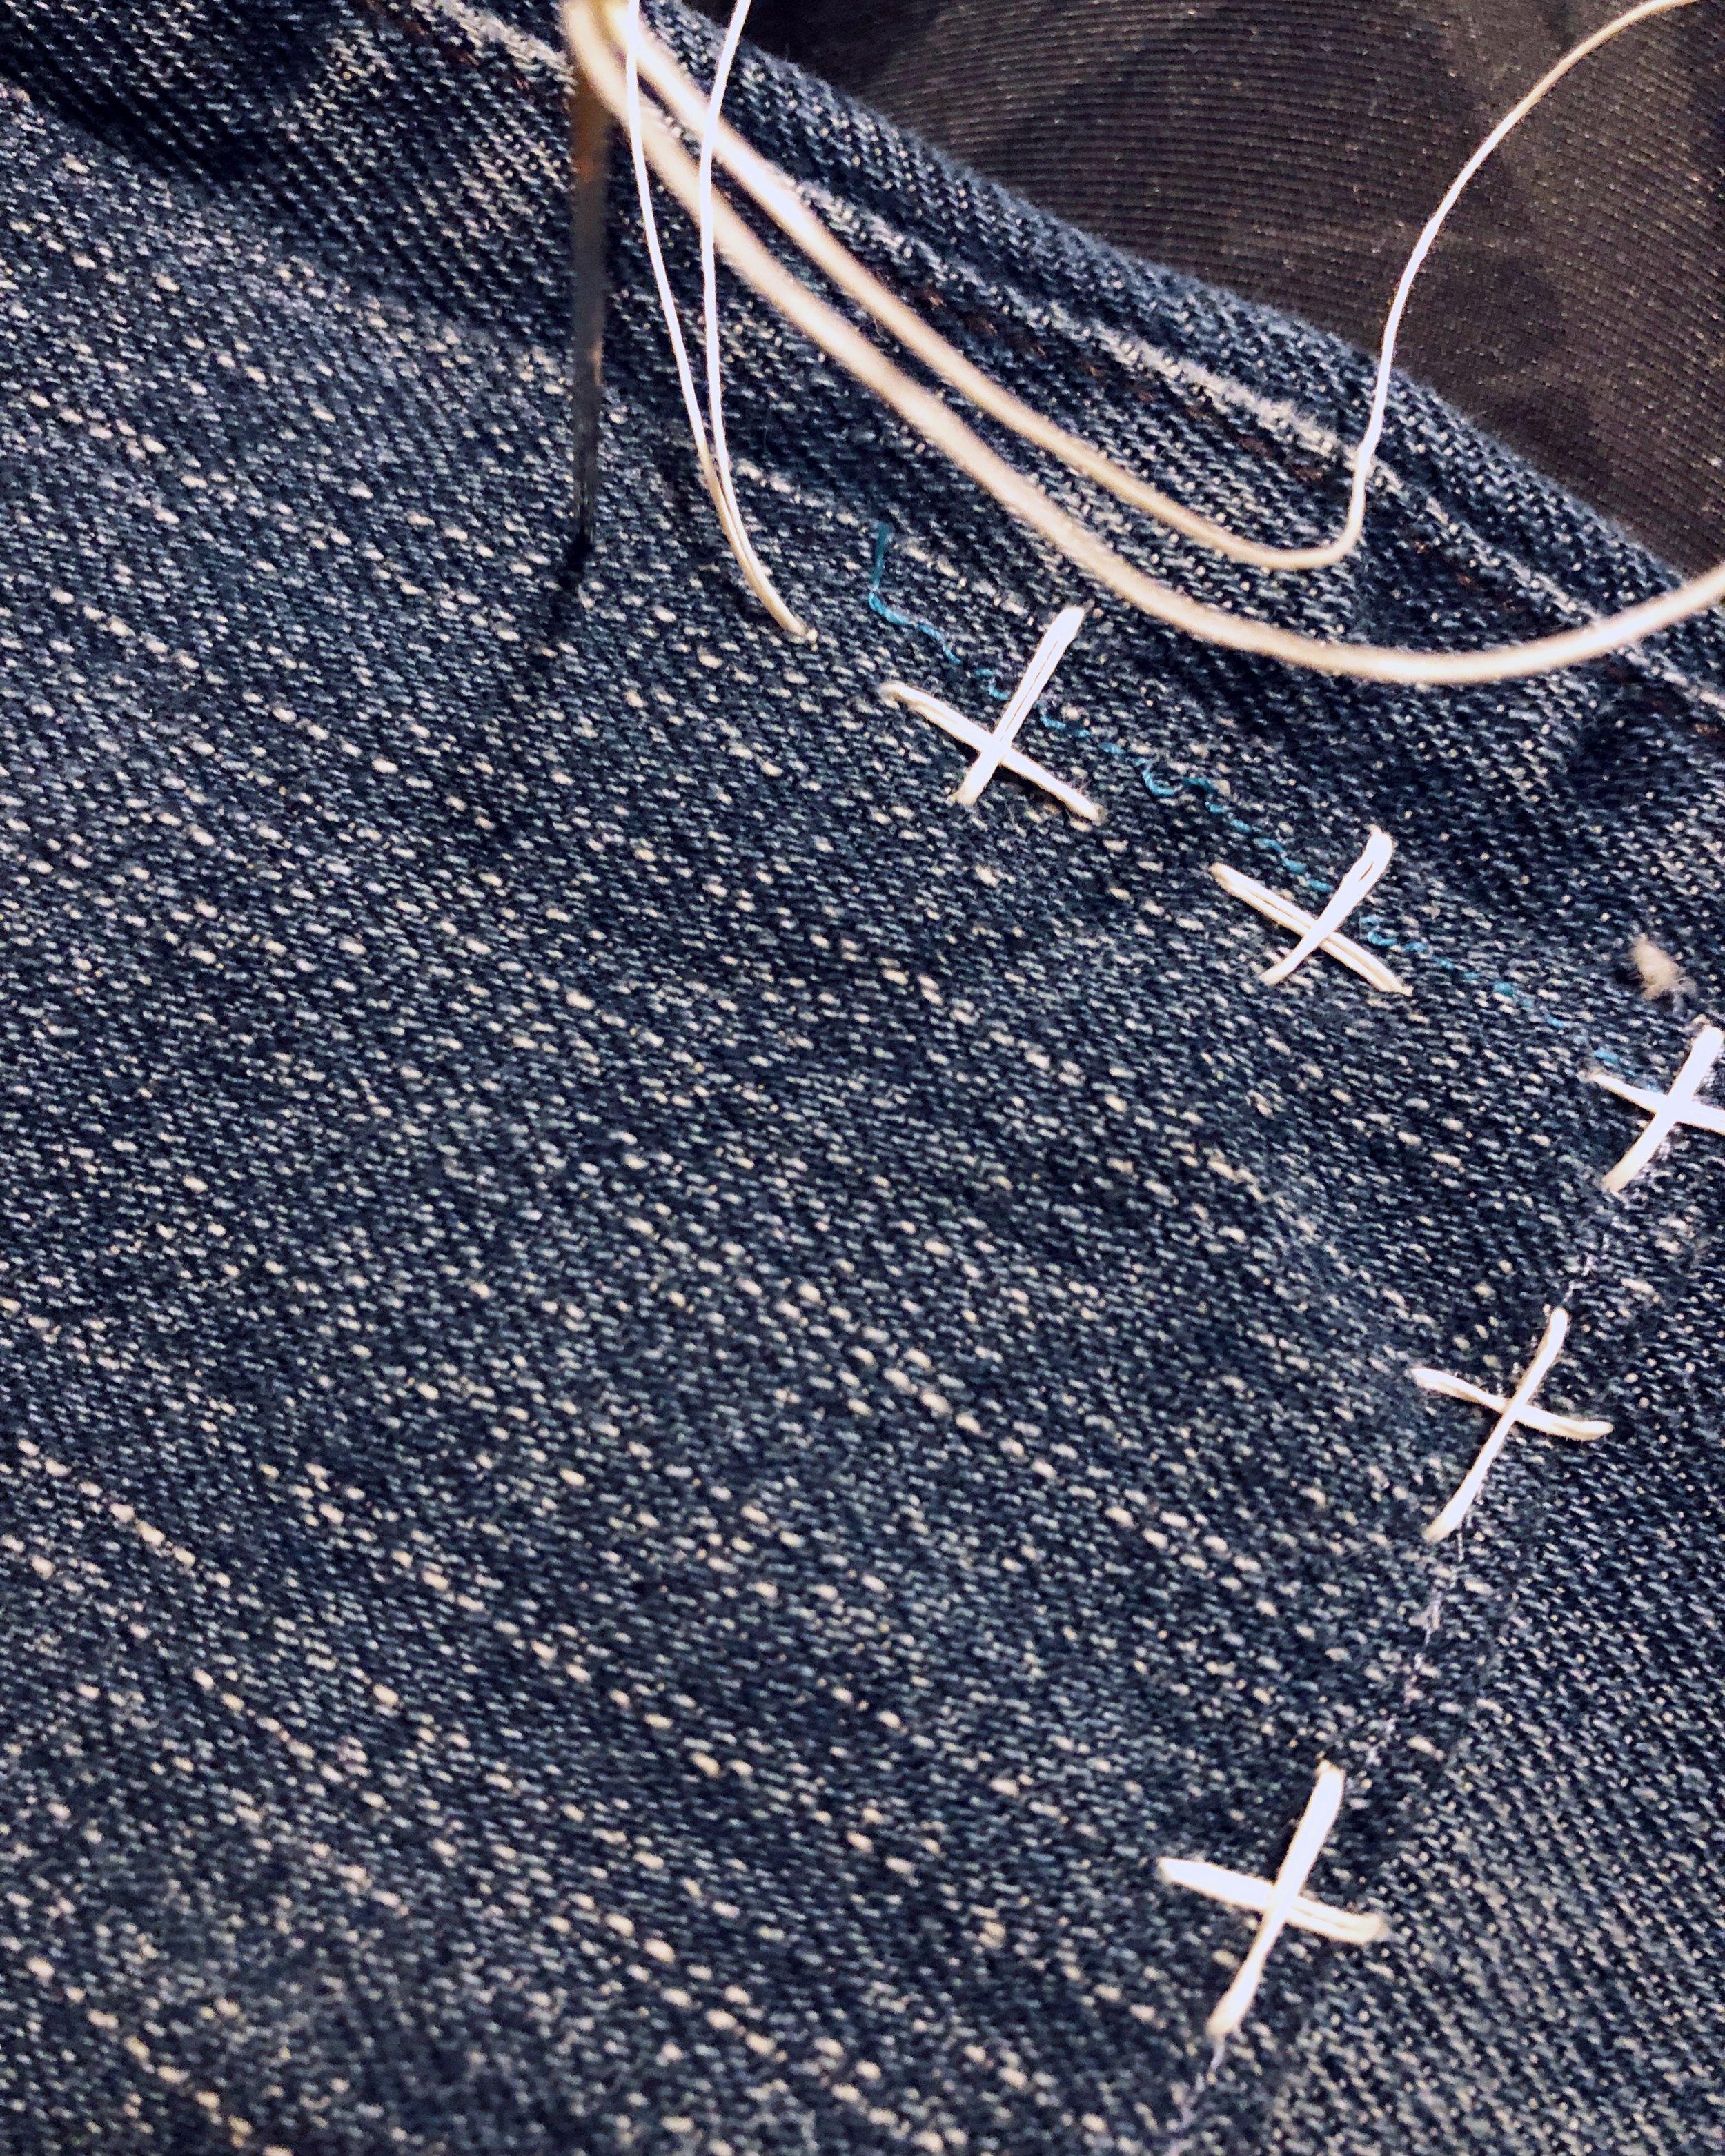
  1. For a visible mend: Using embroidery thread, or other strong topstitching thread use your favourite motif to attach the patches. I did little +’s in alternating rows in a very contrasting white thread. I think straight lines, or x’s - or even a combination of both - would be really adorable.

  2. For an invisible mend: (note that this will not be truly invisible, but at least way less obvious) match your thread to the colour of the garment you are mending. Stitch down the patch around the edge, and in straight lines or some other unobtrusive pattern to hold down the middle of the patch.

IMG_1055.JPG
November 11, 2018 /Kelsey Fast
eco friendly, DIY, reuse, tutorial, upcycle, zero waste, mending
Make
1 Comment
Little Forager watering the garden in his awesome swim diaper from Nuggles.

Little Forager watering the garden in his awesome swim diaper from Nuggles.

Goodbye Garden

November 05, 2018 by Kelsey Fast in Grow

Some of you who follow my Instagram or other social feeds might already know we have moved. Part of this move means saying goodbye to my garden of 4 years, and starting a new life as a balcony gardener. This post is going to be on the photo heavy side, because I don’t really have a lot to say about our change. I’ll continue to garden in this new way, and keep writing about it here although the topics will be even more focused on small space and container gardening. Nothing else about the blog will change other than the “Grow” topic, since I am more than able to continue with the “Find, Eat, and Make” categories that I normally write about.

IMG_8602.JPG

We’ll miss our time here - especially the incredible views - but we’re looking forward to settling in to our new place, and tackling the challenges that come with growing plants on a balcony.

I’ll be updating more about our new place soon, and there is also new stuff coming down the pipe for the A Forager’s Home Shop (specifically winter/Christmas related things) so stay tuned here for updates! It’s been a little while since I last updated this blog, but moving has really commanded all my attention! I’m looking forward to getting back in the swing of things again now that we are almost settled in.

IMG_0143.JPG
IMG_0289.JPG
IMG_9913.JPG
IMG_0855.JPG

Some of these links are affiliate links for which I will receive a small commission from any sale made.  Any product linked here is something I have tried and would absolutely recommend from my own experience with the company.

November 05, 2018 /Kelsey Fast
garden planning, garden, family, musings
Grow
Comment

July Harvest Totals

August 24, 2018 by Kelsey Fast in Grow

Asterisk denotes foraged items.

  • Beets (mixed): 970g
  • Calendula: 7g
  • Carrots (rainbow): 339g
  • Chamomile: 28g
  • Garlic Scapes: 12g
  • Hyssop: 39g
  • Kale (Red Russian): 54g
  • Pansies: 10g
  • Peas (Amish Snap): 131g
  • Peas (Green Arrow): 118g
  • Raspberries: 587g
  • Rhubarb: 128g
  • Strawberries: 19g
  • Tomato (Italian Golden Love Apple): 11g
  • Tomato (Uptown Funk): 57g
  • Zucchini: 84g

Total: 2.6kg

At first I was disappointed to see my harvest totals were so low for this month, but then when I looked back I found I actually did about the same - if not slightly better - than this month last year. We tend to do a lot of travelling in July, so there isn't a lot of time around the house to garden or forage. It's also been rather smoky out with the wildfire conditions, so we haven't been making a whole lot of trips out to gather anything wild. 

Normally my peas do better than this, but I messed up on trellising the Green Arrow ones that normally do quite well for me, and the Amish Snap I was growing out mainly to replenish my seed for upcoming seasons, so I was leaving the best looking pods on the vines to fully mature. It was a good year for berries (although Little Forager gets to the few strawberry plants I have before I can get most of them to the scale) and I am sure this was the most raspberries I've ever picked. We even missed out on the last few due to the timing of our vacations. It was also a sad year for the rhubarb. I'm not sure why but if it does this poorly next year I'm going to try it in a new location and see what happens.

August 24, 2018 /Kelsey Fast
summer, harvest totals, garden
Grow
Comment

How to Recycle Old T-Shirts Into New Underwear

August 20, 2018 by Kelsey Fast in Make

(Update: after living with these underwear for a while there are some changes that I would make next time. The first is that I might consider doing something else with the leg openings - like adding elastic there. I would also add another layer of fabric in the crotch since that will also make them last longer. If you just need a super quick pair and you don’t care about the additional steps go ahead and make them this way! They still lasted quite a while this way!)

This post is a little different from my usual offerings, but in the spirit of zero-waste and DIY and all of that, I wanted to post this tutorial to make your own underwear from fabric you were probably going to give away or throw away. You might not have thought to make your own underwear before - and truly I didn't really consider it either - but it turned out that it was really easy to do! Let's be honest too - women's underwear is not always the cheapest, and you can't always find your favourite, most comfortable ones in stores again after they've worn out. This solved both problems for me, so I figured I'd post it up here and share what I learned. If you're not interested - feel free to keep scrolling and you'll find recipes and harvest totals and foraging guides down further below. I won't be offended if you skip reading this one!

Here's what you'll need:

  • One t-shirt (I got two pairs of underwear out of one adult men's medium shirt)

  • Paper to trace a pattern on

  • Pair of underwear to copy a pattern from

  • Sewing machine capable of a zigzag stitch 

  • Thread

  • 1/8" elastic

  • Sharp scissors, measuring tape, pins, etc

This first step is probably the most difficult of all of them. You need to choose a pair of underwear you are going to copy, and make a pattern from them. The most foolproof way of doing this is to sacrifice that pair and cut them apart at the seams, and then trace them onto paper. If you don't want to do that, you can lay them flat on paper and try to trace them that way (this is what I did). If you look at the paper in the left photo you can see that the piece on the bottom is folded in half - this is because I folded the underwear I was copying in half and found it easier to trace the shape that way. 

Make sure you add a little bit extra - about 1/4" - when you trace the pattern so that when you sew it together it remains the right size.

A little bit of messy stitching, but it's not going to be visible in the end product. If your sewing skills are rusty, or you're new at this don't let this keep you from trying this project - it's really easy and forgiving if you make a few mistakes!

A little bit of messy stitching, but it's not going to be visible in the end product. If your sewing skills are rusty, or you're new at this don't let this keep you from trying this project - it's really easy and forgiving if you make a few mistakes!

Steps to making your underwear:

  1. Pin the paper pattern you've created to the t-shirt. If your shirt is too small to fit both pieces you'll need to cut the front from the back so you can get both the front and back pattern pieces to fit. If they both fit without altering the t-shirt you are going to end up with enough pieces to make two pairs of underwear.

  2. Pin the crotch seams together. If your fabric has a "right" and "wrong" side (eg: if there is a pattern that is more visible on one side than the other, the pattern side is the "right" side that you want facing out for the end project) make sure the right sides are together when you sew them. 

  3. Sew the crotch seam in a zigzag stitch very close to the edge - about 1/4" away to match the seam allowances you left when you were creating your pattern.

  4. Pin the side seams together (still keeping the right sides together) and sew them in the same way you did the crotch seam. At the end of this you should have what looks like a pair of inside-out underwear! You're almost done!

  5. Measure the waistband of the underwear and cut a piece of elastic that is slightly smaller than it. Keep it just slightly smaller because you don't want the elastic cutting into you while you wear them, but you do want them snug enough that they stay up!

  6. Sew the elastic ends together so the whole thing is in a loop.

  7. Pin the elastic around the very top of the waistband. Try to do this in even sections so that the extra slack in the fabric is evenly distributed around the elastic. Ideally you don't want it bunching more in one spot than others.

  8. Sew the elastic to the very top of the underwear fabric using a zigzag stitch. Stretch your elastic as you go so it matches the slack in your underwear. If it's not perfect, don't worry. This is a very forgiving process and it probably won't be very visible.

  9. Fold the elastic over one more time so the fabric of the underwear is covering the elastic (notice in my photo above I didn't do this perfectly, but it doesn't really matter in the end since it's going to be hidden on the inside). It's a little bit fiddly, so just do your best and try again next time if it wasn't as perfect as you'd like. Sew this folded down elastic down again with a zigzag stitch remembering to stretch the elastic out just like last time.

  10. Using an iron, press your seams. You don't need to do anything to your raw edges because t-shirt fabric naturally doesn't fray!

That's it! If you give this a try and have any pointers for me please leave them in the comments! I'd love to hear about it if any of you do try this out at home!

August 20, 2018 /Kelsey Fast
diy, sewing, zero waste, tutorial
Make
6 Comments

Floral Ice Cream

August 09, 2018 by Kelsey Fast in Eat

I don't tend to like a lot of single use kitchen gadgets, but one that I will never regret buying is my Cuisinart Ice Cream Maker. I love ice cream! Being able to make my own and experiment with different flavours is something I really enjoy.

I wanted to share this recipe, because it is so versatile, and it is unlikely you'd ever find these kinds of flavours on the shelf in your local grocery store. You don't even really need to make it with flowers - really any herb or spice blend you wanted to infuse into the cream would be great. I don't think this would be an ideal method for making fruit flavoured ice cream, though. 

My photos in this post are doing a bit of time travelling back to when lilacs were blooming. I had planned to post this recipe in the spring, but somehow it got left behind. I decided that just because lilacs in particular were done there was no reason this recipe couldn't still be shared. You can make this recipe with any edible flower you like the taste of (here's a handy list of edible flowers), and they can be used fresh or dried. 

IMG_0164.JPG

The first step for making your ice cream, is to infuse the cream with the petals. I used two cups of heavy/whipping cream and two cups of whole milk. Cram in as many flowers as will fit, and heat the mixture gently for about half an hour. After that you'll move the cream to the fridge and leave it to cold infuse for 24 hours. The next day you strain that and use it as the base for your custard.

IMG_0163.JPG

Floral Ice Cream

Ingredients

  • 2 Cups Heavy Cream
  • 2 Cups Whole Milk
  • 3 Cups (approx) Edible Flowers of Choice
  • 1 Cup Sugar
  • 2 Large Eggs
  • 1 tsp Vanilla
  • 1-2 drops food colouring (optional)

Takes Two Days, serves 4.

Instructions

  1. Combine the cream, milk, and flowers in a pot on the stove and allow to infuse over medium heat for about 30 minutes. After this allow to cool, and then transfer to the fridge to continue to cold infuse overnight.
  2. Strain the flower infusion, and return to the stove on medium heat. Add the sugar.
  3. Crack the eggs into a separate bowl and beat with a fork until homogenous. Very slowly - stirring constantly - pour some of the hot cream mixture into the beaten eggs to temper them. Return the pot to the stove, and then add the tempered eggs and vanilla (and food colouring if desired - lilacs do not impart a lot of colour when cooked, so I added some colour to make it look more appetizing). Continue to cook on medium heat, but do not allow the mixture to boil. You’ll know the custard is done when it has thickened to the point where it coats the back of a spoon, and you can easily draw a line through it with your finger.
  4. Transfer the finished custard to the fridge to cool and age for at least over night or up to two days.
  5. Freeze in your ice cream maker according to the manufacturers instructions. For my machine it makes soft serve immediately, but for a more “scoopable” texture put in an airtight container in the freezer for a few hours until you like the consistency. Enjoy!

Some of these links are affiliate links for which I will receive a small commission from any sale made.  Any product linked here is something I have tried and would absolutely recommend from my own experience with the company.

August 09, 2018 /Kelsey Fast
recipe, ice cream, food, foraing, eating foraged food
Eat
2 Comments
  • Newer
  • Older

Terms and Conditions | Privacy Policy | Shipping and Returns

Powered by Squarespace